Understanding electrical wiring can seem daunting, but with the right guidance, it becomes manageable. Many homeowners find themselves needing to install or replace switches, making knowledge of wiring diagrams essential for safety and efficiency.
A 2 switch wiring diagram is a valuable tool that simplifies the process. It visually represents how to connect two switches in a circuit, ensuring everything functions correctly. This guide will help you navigate the basics.

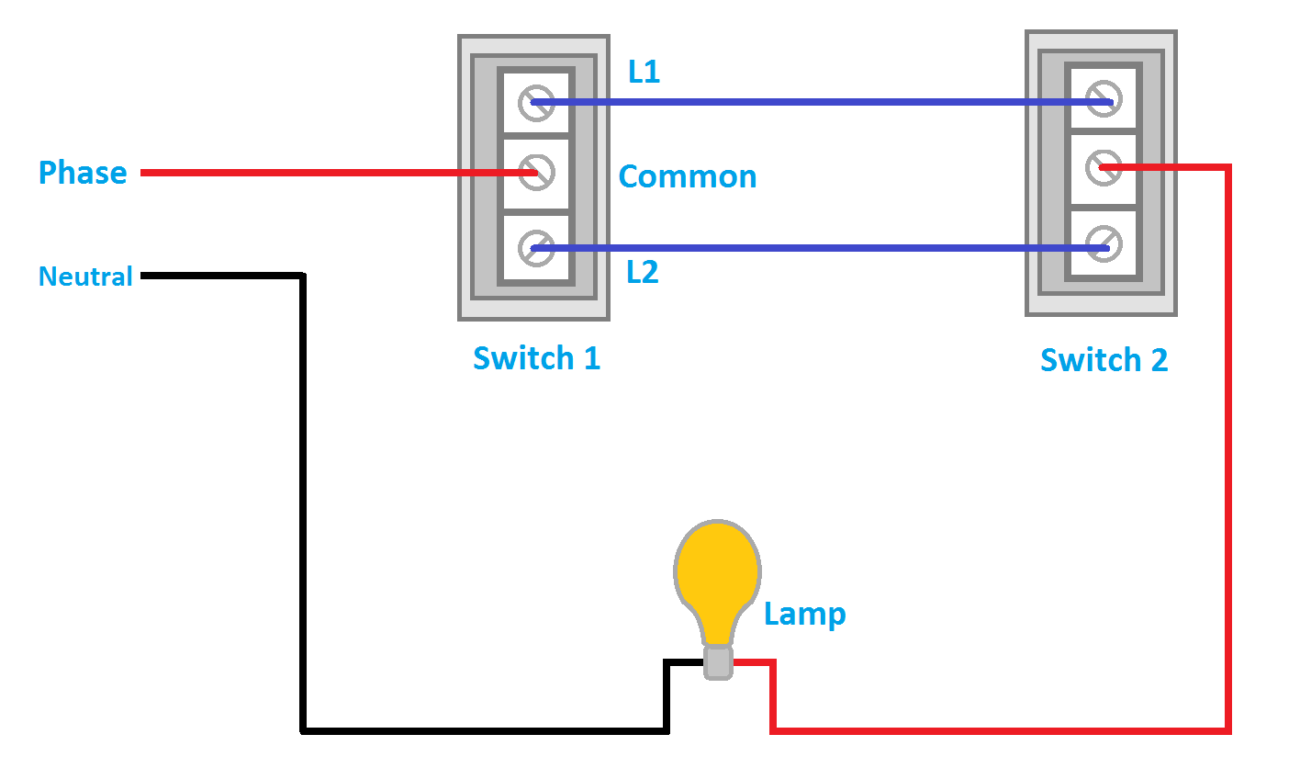
2 Switch Wiring Diagram
2 Switch Wiring Diagram
When working with a 2 switch wiring diagram, it’s important to identify the components involved. Typically, you’ll need two switches, a power source, and the light fixture. Understanding these elements is crucial for a successful installation.
Next, familiarize yourself with the wiring connections. The common wire connects to both switches, while the traveler wires link them together. This setup allows you to control a single light from two different locations, enhancing convenience in your home.
Safety should always be your priority when dealing with electrical work. Ensure the power is turned off before starting any installation. Using a voltage tester can help confirm that no electricity is flowing through the wires.
Once you’ve completed the wiring according to the diagram, double-check all connections. Properly securing wires and ensuring they are insulated will prevent potential hazards and ensure your switches operate smoothly.
With a clear understanding of the 2 switch wiring diagram and careful execution, you can confidently tackle your electrical projects. This knowledge not only enhances your home but also empowers you as a DIY enthusiast.