Understanding home wiring can seem daunting, but it’s easier than you might think. With a little guidance, you can tackle projects like installing a 2 way switch with confidence and clarity.
Learning about electrical systems not only empowers you but also enhances your home’s functionality. A 2 way switch allows you to control a single light from two different locations, making it perfect for hallways or large rooms.

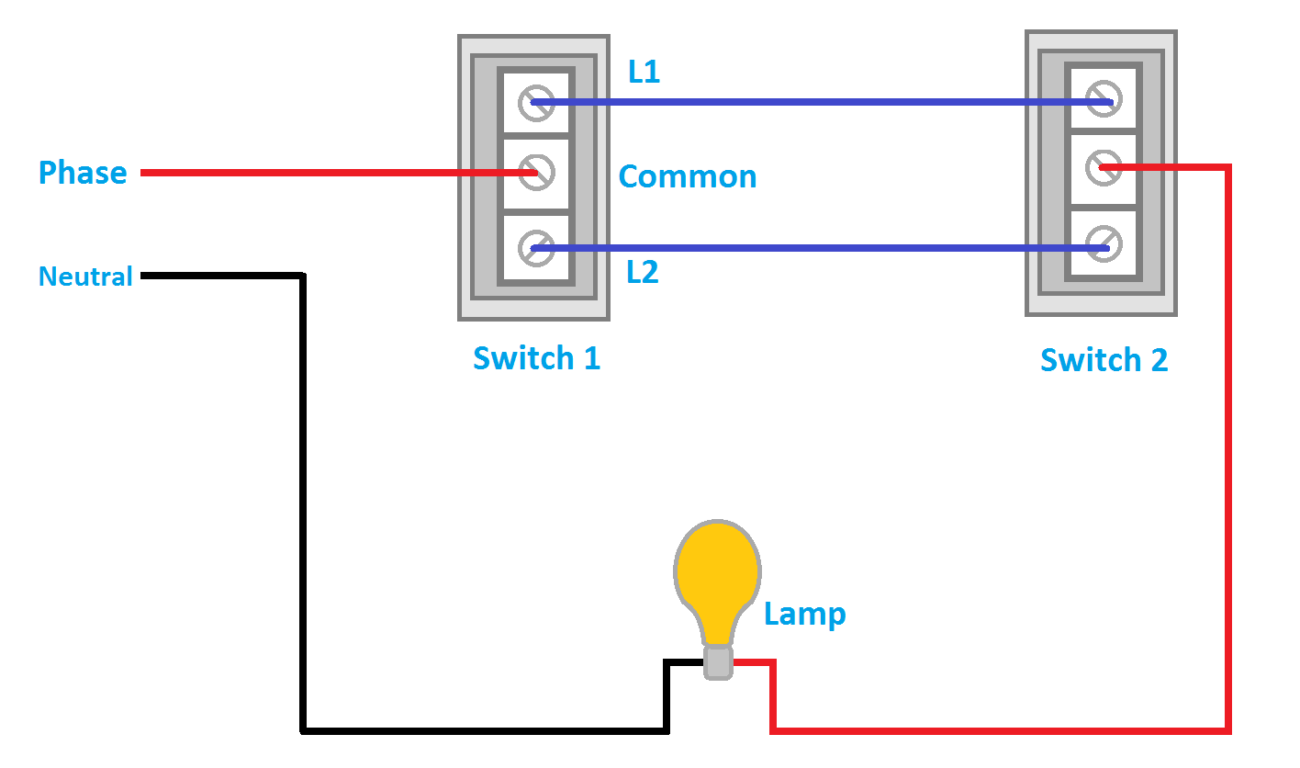
2 Way Switch Wiring Diagram Home
2 Way Switch Wiring Diagram Home
To begin, gather your materials: two 2 way switches, a light fixture, and appropriate wiring. Familiarize yourself with the wiring diagram to ensure you connect everything correctly. This will help prevent any mishaps during installation.
Start by turning off the power at the circuit breaker. Safety is paramount when working with electricity. Once the power is off, you can proceed to connect the wires according to the diagram. Each switch will have specific terminals for connection.
After connecting the switches and light fixture, double-check all connections before restoring power. It’s crucial to ensure that everything is secure and correctly wired to avoid any electrical issues later on.
Once everything is in place, turn the power back on and test your switches. You should be able to control the light from both locations seamlessly. Enjoy the convenience of your new setup!
With a little patience and attention to detail, installing a 2 way switch can be a rewarding DIY project. Embrace the challenge and enhance your home’s lighting today!