Understanding electrical systems can be daunting, but having the right information makes it easier. A clear wiring diagram is essential for anyone looking to work with 220 outlets safely and effectively.
Whether you’re a DIY enthusiast or a professional electrician, knowing how to read and interpret a wiring diagram can save time and prevent mistakes. This guide will help you navigate the basics of 220 outlet wiring.

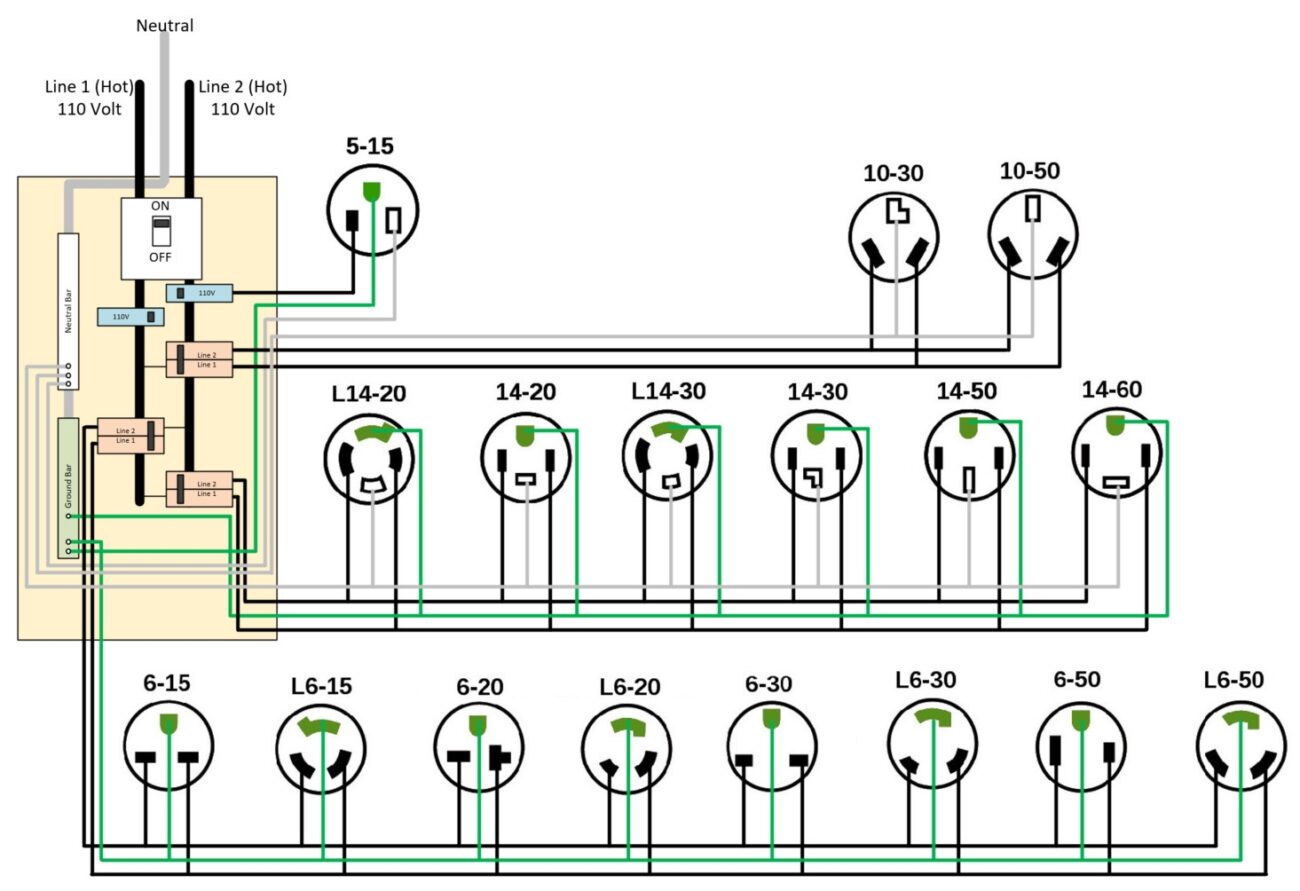
220 Outlet Wiring Diagram
220 Outlet Wiring Diagram
A 220 outlet wiring diagram typically includes two hot wires, a neutral wire, and a ground wire. Each wire has a specific role in ensuring the safe operation of your electrical devices.
When installing a 220 outlet, it’s crucial to connect the wires correctly. The hot wires provide power, while the neutral wire completes the circuit. The ground wire is vital for safety, preventing electrical shocks.
Always ensure that your circuit breaker is rated appropriately for the devices you plan to use. A 220 outlet is commonly used for heavy appliances like dryers and ovens, which require more power than standard outlets.
Before starting any electrical work, turn off the power at the breaker box. This step is essential for your safety and helps avoid any potential accidents during installation.
With the right knowledge and tools, working with a 220 outlet can be straightforward. Always prioritize safety and consult a professional if you’re unsure about any steps in the process.