Understanding how to wire a 3-way light switch can seem daunting, but it’s easier than you might think. With the right diagrams and a bit of patience, you can tackle this project confidently.
Many homeowners want to control their lighting from multiple locations. This is where 3-way switches come into play, allowing you to turn lights on or off from different points in your home.

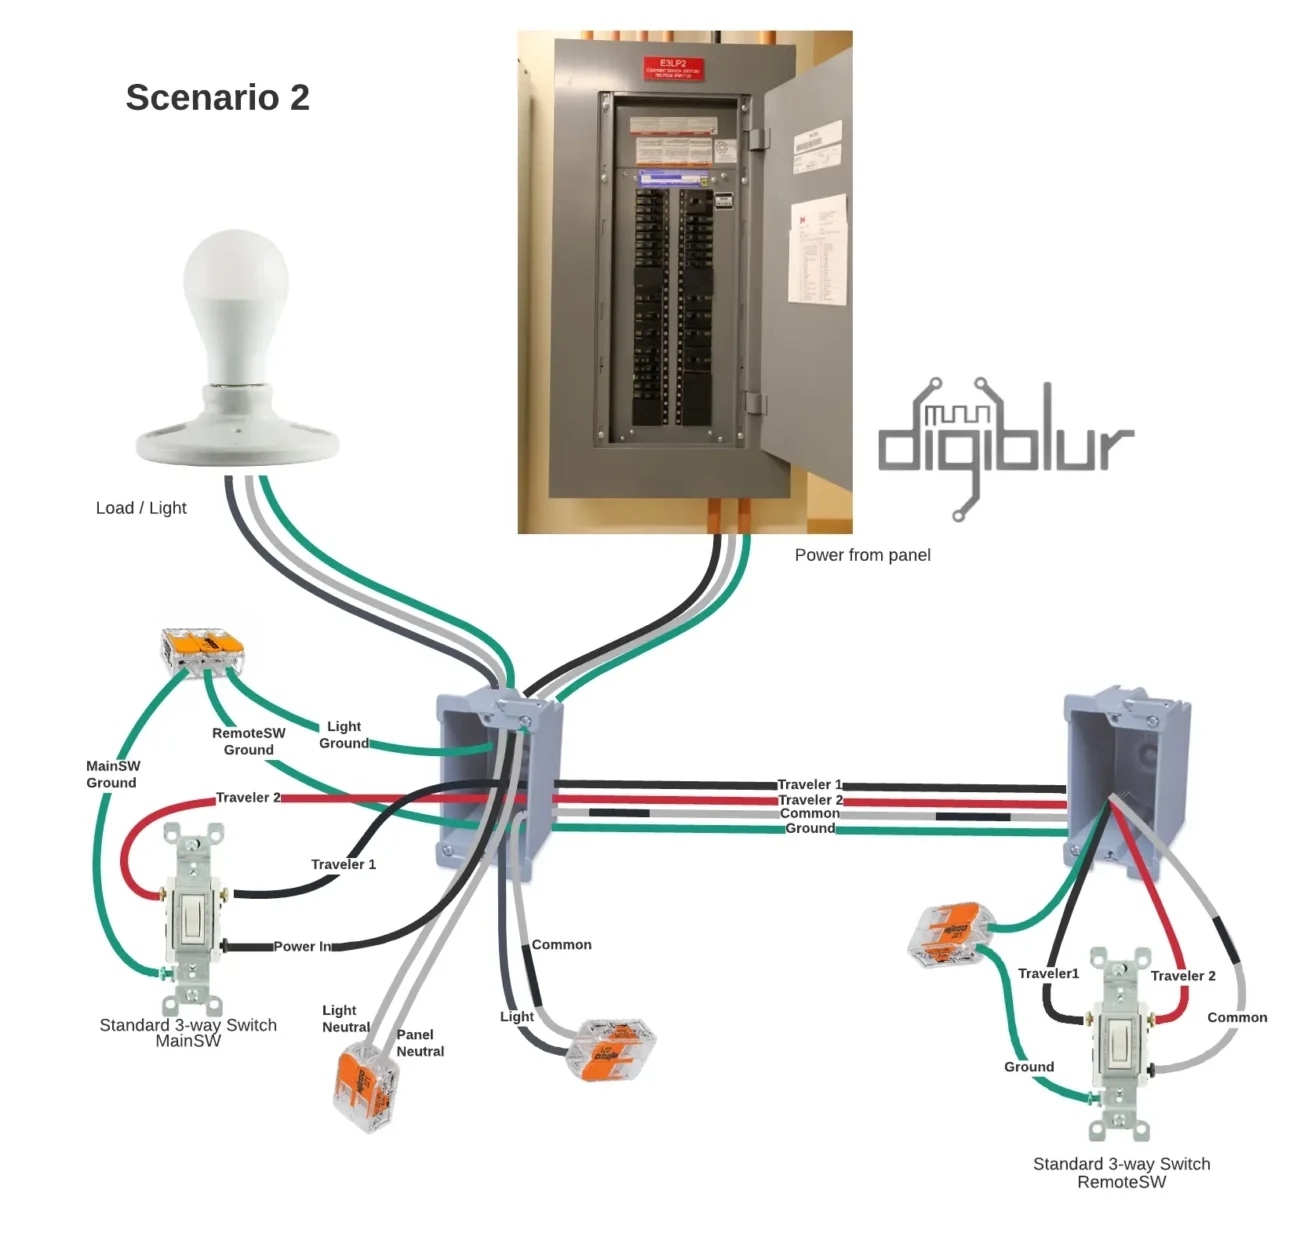
3 Way Light Switch Wiring Diagrams
3 Way Light Switch Wiring Diagrams
When wiring a 3-way switch, it’s essential to have clear diagrams. These diagrams illustrate how to connect the switches and the light fixture correctly, ensuring everything functions as intended.
Typically, a 3-way switch setup involves two switches and one light fixture. Each switch has three terminals: common, traveler, and ground. Understanding these terminals is crucial for proper installation.
Using color-coded wires can simplify the process. Generally, black wires are used for hot connections, while red wires serve as travelers. White wires are typically neutral, making it easier to follow the diagram.
After wiring, always test your switches before closing up the wall. This ensures that everything works correctly and helps avoid any frustrating surprises later on.
With the right approach and diagrams, wiring a 3-way light switch can be a rewarding DIY project. Enjoy the convenience of controlling your lights from multiple locations with ease!