Understanding electrical wiring can seem daunting, but it doesn’t have to be. With the right guidance, anyone can grasp the basics of wiring systems, especially when it comes to switches. This knowledge can empower you to tackle home projects confidently.
One common area of confusion is the 3-way switch setup. This configuration allows you to control a single light from two different locations, making it perfect for hallways or large rooms. Let’s explore how 3 Way Wiring Diagrams For Switches work.

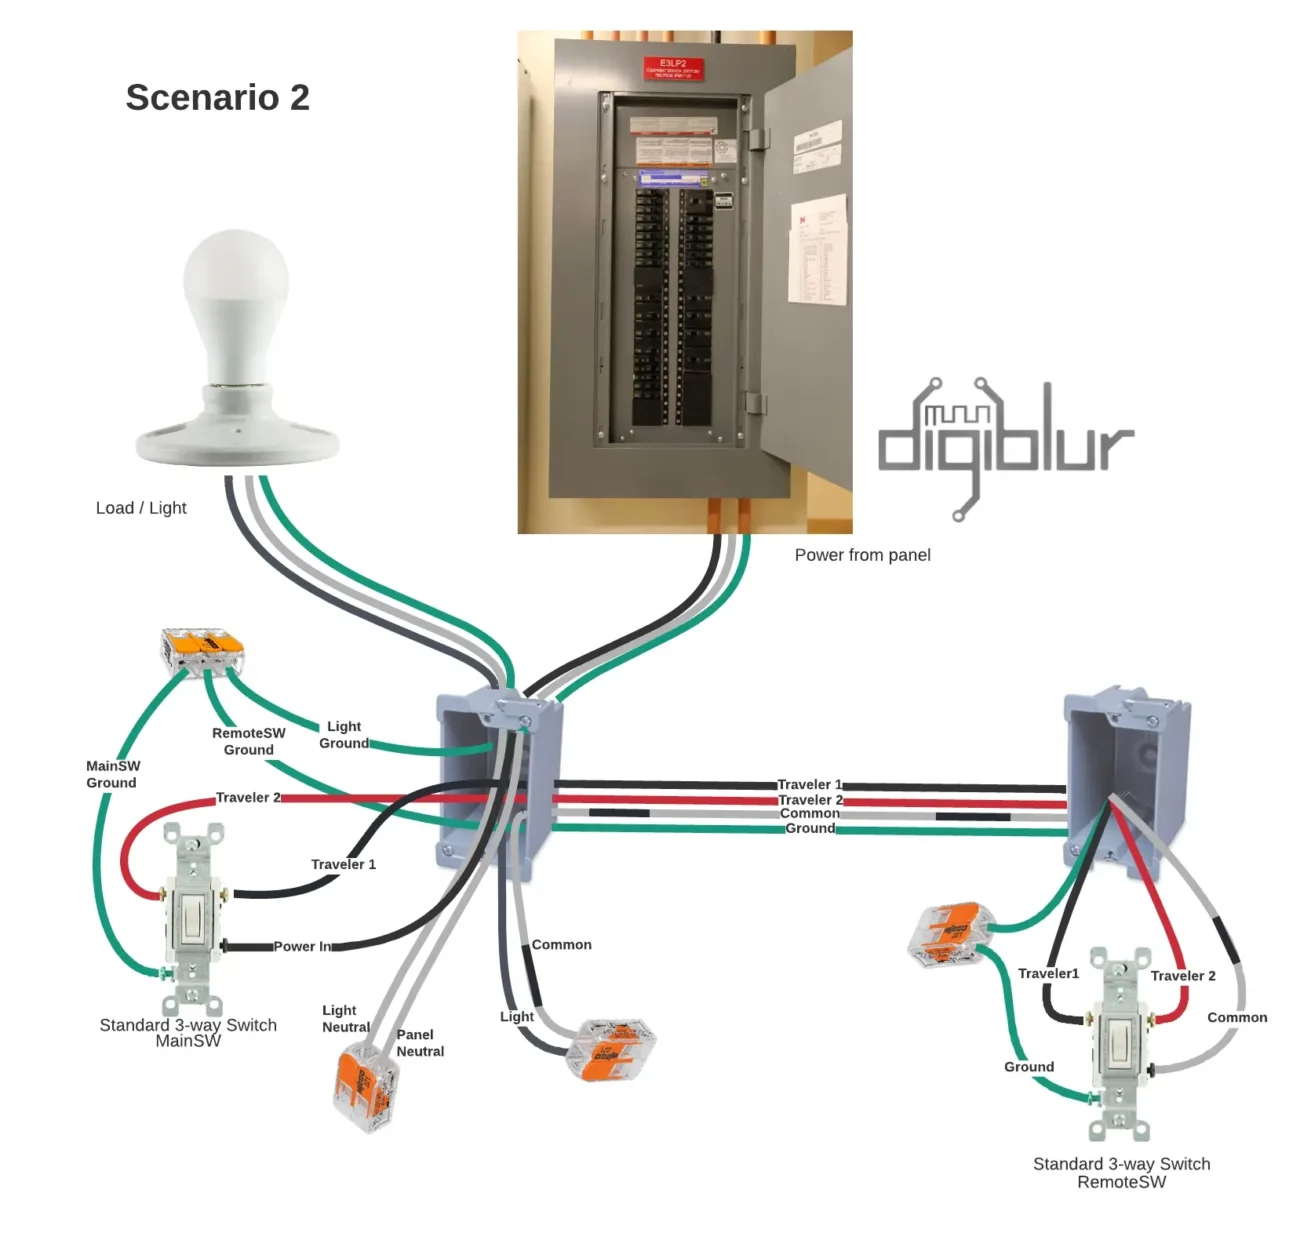
3 Way Wiring Diagrams For Switches
3 Way Wiring Diagrams For Switches
3-way wiring diagrams illustrate how to connect two switches to one light fixture. Each switch has three terminals: common, traveler, and ground. Understanding these components is essential for successful installation.
In a typical setup, the power source connects to the first switch’s common terminal. From there, two traveler wires run to the second switch. This arrangement allows either switch to control the light independently, enhancing convenience in your space.
When wiring, always ensure the power is turned off at the circuit breaker. Use wire nuts to secure connections and electrical tape for added safety. Following these steps will help prevent accidents and ensure a reliable installation.
Once everything is connected correctly, test your switches to confirm they operate as intended. If the light turns on and off from both locations, congratulations! You’ve successfully mastered the 3-way switch wiring.
Learning about 3-way wiring diagrams can simplify your home projects significantly. With practice and attention to detail, you’ll gain confidence in handling electrical tasks safely and effectively.