Understanding how to wire a 3 wire voltage regulator can seem daunting, but it’s quite straightforward once you break it down. This guide will help you grasp the essential steps and components involved in the process.
Voltage regulators are crucial for maintaining a stable voltage level in various electrical systems. Knowing how to properly wire them ensures your devices operate efficiently and safely, preventing potential damage from voltage fluctuations.

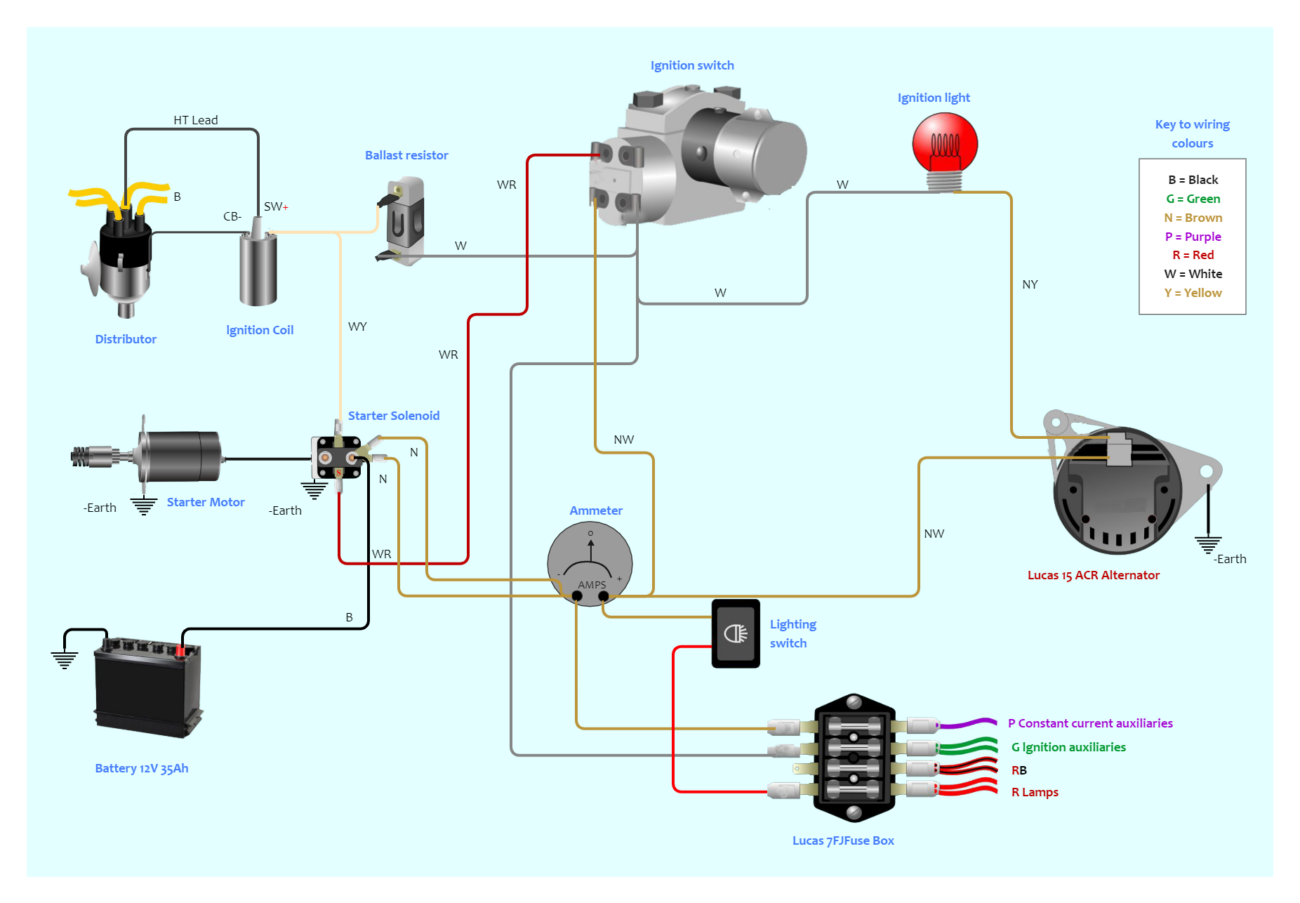
3 Wire Voltage Regulator Wiring Diagram
3 Wire Voltage Regulator Wiring Diagram
The 3 wire voltage regulator typically consists of three terminals: input, output, and ground. Each terminal plays a vital role in regulating voltage and ensuring your system runs smoothly. Understanding these connections is key to successful wiring.
To begin wiring, connect the input terminal to your power source. This connection provides the regulator with the necessary voltage to function. Make sure to use appropriate gauge wires to handle the current without overheating.
Next, connect the output terminal to the device or circuit that requires regulated voltage. This step is crucial as it delivers the stable voltage needed for optimal performance. Double-check your connections to avoid any mishaps.
Finally, attach the ground terminal to a suitable grounding point. This connection helps prevent electrical shocks and ensures safety during operation. A solid ground connection is essential for any electrical system.
With these steps, wiring a 3 wire voltage regulator becomes manageable. Following this guide will help you achieve a reliable setup that enhances your electrical projects and keeps them running smoothly.