Understanding the wiring of a 4 pin starter relay can be crucial for anyone looking to troubleshoot or upgrade their vehicle’s electrical system. This simple component plays a vital role in starting your engine efficiently.
Many car enthusiasts and DIY mechanics often seek clarity on how to connect these relays properly. A clear wiring diagram can make all the difference in ensuring your starter relay functions as intended.

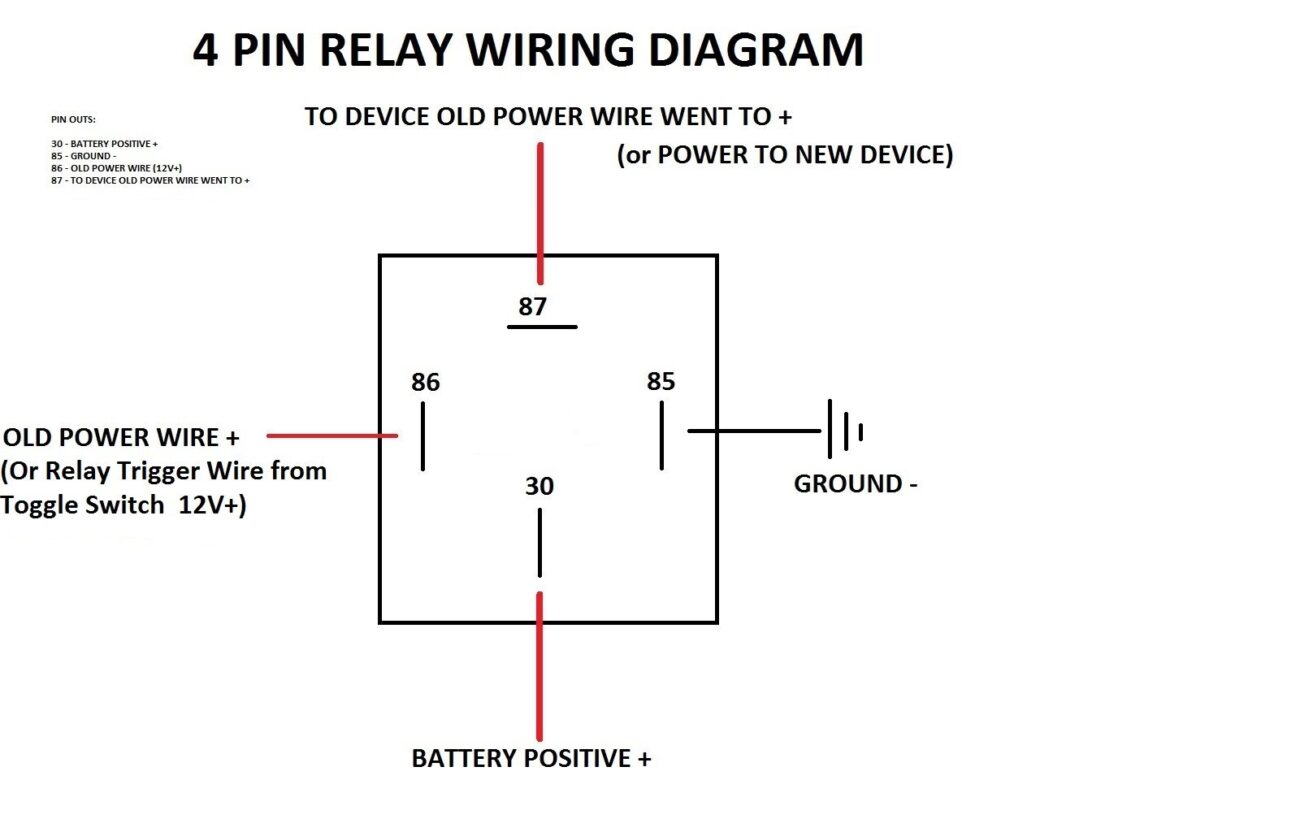
4 Pin Starter Relay Wiring Diagram
4 Pin Starter Relay Wiring Diagram
A 4 pin starter relay typically has four terminals: two for the coil and two for the switch. The coil terminals activate the relay, while the switch terminals connect to the battery and starter motor.
When wiring, connect one coil terminal to the ignition switch and the other to ground. This setup allows the relay to engage when you turn the key, sending power to the starter motor.
The switch terminals are straightforward. One connects directly to the battery’s positive terminal, while the other connects to the starter motor. This configuration ensures that when activated, power flows seamlessly to start your engine.
Always double-check your connections before testing. A simple mistake can lead to electrical issues or prevent your vehicle from starting altogether. Following a reliable wiring diagram can save you time and frustration.
In conclusion, understanding a 4 pin starter relay wiring diagram is essential for effective vehicle maintenance. With clear instructions and careful connections, you can ensure your vehicle starts smoothly every time.