Understanding electrical wiring can seem daunting, but with the right guidance, it becomes manageable. One common setup is the 4-way light switch, which allows you to control a single light from multiple locations.
Learning how to wire a 4-way switch can enhance your home’s functionality. This setup is particularly useful in larger spaces or hallways where multiple entry points exist. Let’s explore the 4 Way Light Switch Wiring Diagram to simplify this process.

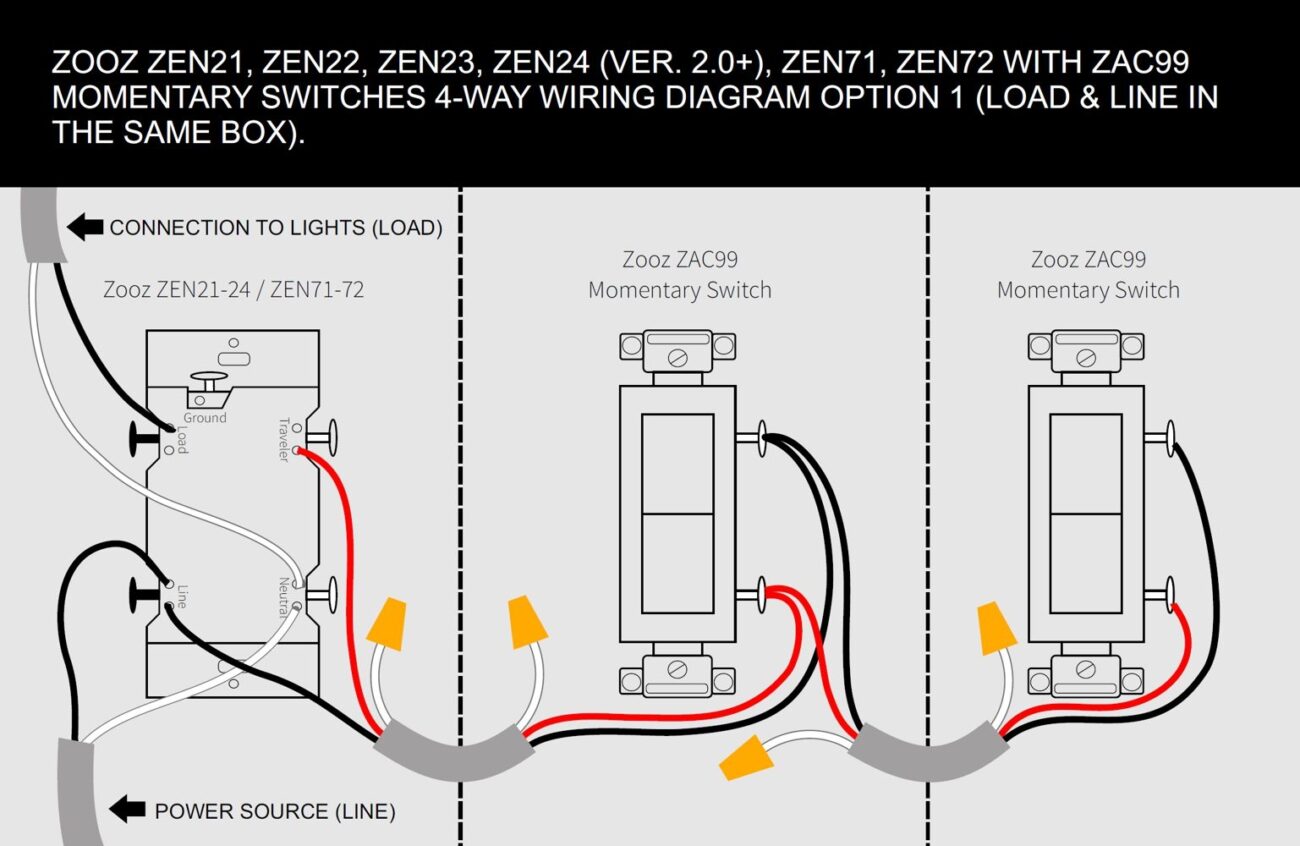
4 Way Light Switch Wiring Diagram
4 Way Light Switch Wiring Diagram
The 4-way switch is typically used in conjunction with two 3-way switches. The diagram illustrates how these switches connect to control lighting effectively. Understanding this layout is crucial for successful installation.
To begin wiring, ensure you turn off the power at the circuit breaker. This step is essential for safety. Next, connect the wires from the first 3-way switch to the 4-way switch according to the diagram.
After connecting the first switch, link the 4-way switch to the second 3-way switch. Pay attention to the color coding of wires; it helps prevent mistakes during installation. Double-check your connections before restoring power.
Once everything is connected, turn on the power and test your switches. You should be able to control the light from all locations seamlessly. If something doesn’t work, revisit your connections and ensure they match the wiring diagram.
Mastering the 4 Way Light Switch Wiring Diagram can significantly improve your home’s lighting control. With careful attention and a little patience, you’ll enjoy enhanced convenience in your living space.