Understanding the wiring of a 4 wire blower motor can seem daunting, but it’s quite manageable with the right guidance. This knowledge is essential for anyone looking to troubleshoot or replace their blower motor effectively.
Having a clear wiring diagram can save you time and prevent potential mistakes. With a 4 wire blower motor, knowing which wire connects where is crucial for proper functionality and safety.

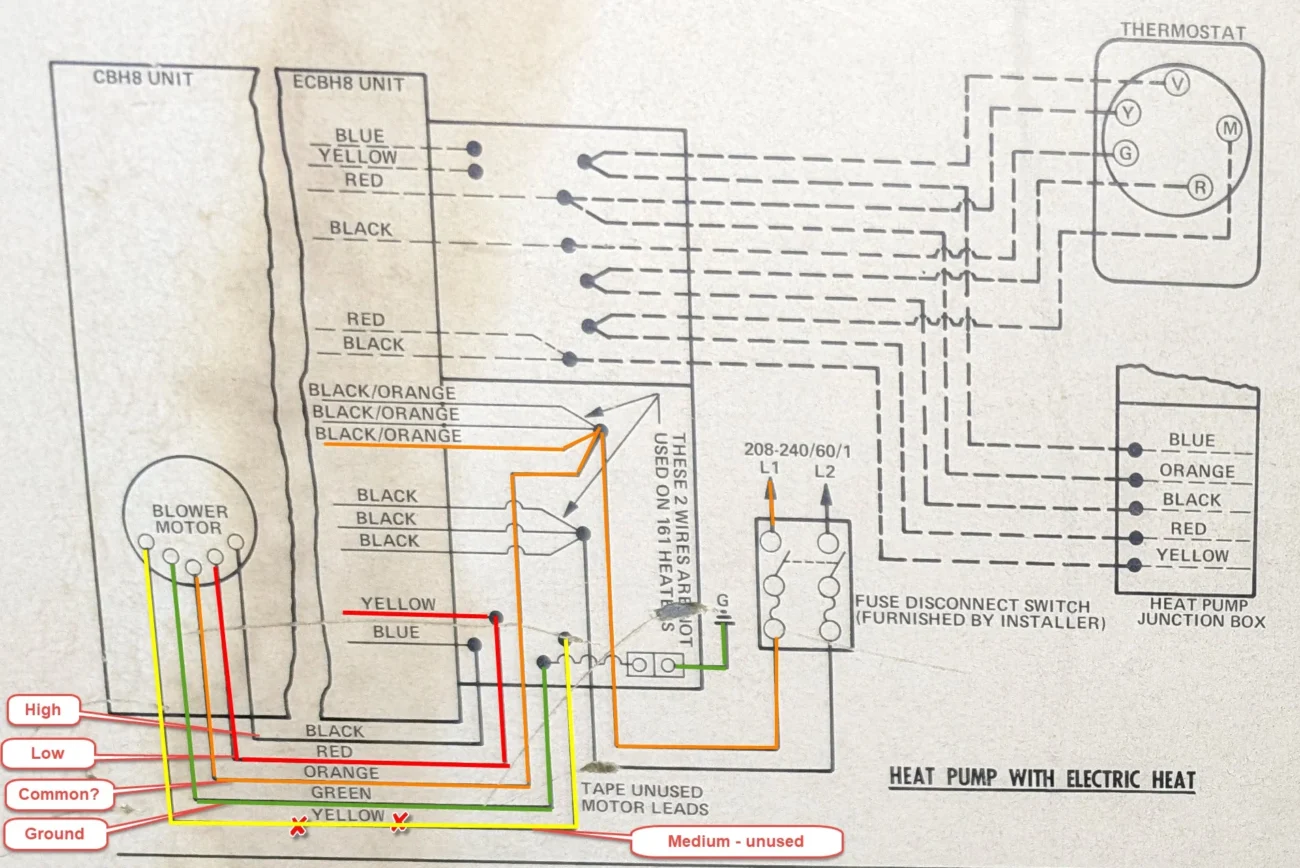
4 Wire Blower Motor Wiring Diagram
4 Wire Blower Motor Wiring Diagram
The 4 wire blower motor typically includes two power wires, a ground wire, and a speed control wire. Each wire plays a specific role in ensuring the motor operates smoothly and efficiently.
When wiring your blower motor, start by identifying the color codes of the wires. Generally, black and red are for power, while green is for ground. The fourth wire, often blue or yellow, controls the speed settings.
It’s important to connect the wires securely to avoid any electrical issues. Double-check your connections against the wiring diagram to ensure everything is in its correct place before powering on the system.
In case of any confusion, consulting your vehicle or appliance manual can provide additional clarity. Remember, safety first! Always disconnect power before starting any wiring work.
With a little patience and attention to detail, you can successfully navigate the 4 wire blower motor wiring diagram. This knowledge empowers you to maintain your system effectively and confidently tackle future repairs.