Understanding how to wire a ceiling fan can seem daunting, but it doesn’t have to be. With the right guidance, you can easily navigate the process and enjoy the benefits of a well-installed fan in your home.
Many homeowners find themselves confused by the various wiring configurations. A clear understanding of the 4 wire ceiling fan wiring diagram can simplify this task and ensure a safe installation.

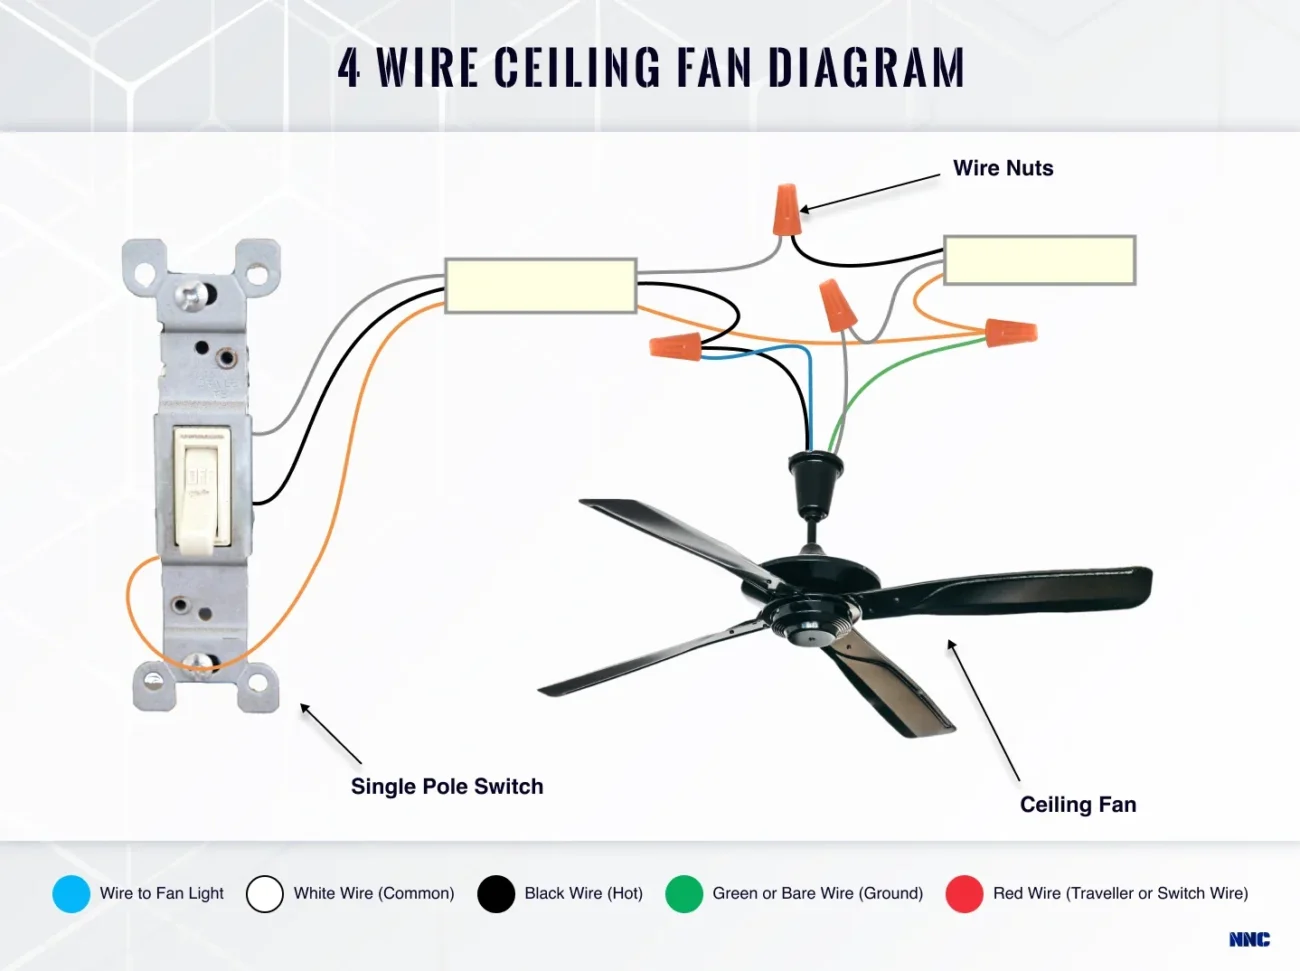
4 Wire Ceiling Fan Wiring Diagram
4 Wire Ceiling Fan Wiring Diagram
The 4 wire ceiling fan wiring diagram typically includes four wires: two for the fan, one for the light, and a ground wire. Knowing which wire serves which function is crucial for proper installation.
Generally, the black wire is used for the fan motor, while the blue or red wire is designated for the light kit. The white wire serves as the neutral, and the green or bare wire is your ground connection.
Before starting any electrical work, always ensure that power is turned off at the circuit breaker. This step is vital for your safety and helps prevent any electrical mishaps during installation.
Once you’ve identified each wire’s purpose, connect them according to your diagram. Following these steps will help you achieve a successful installation and enjoy your ceiling fan without any issues.
With a little patience and attention to detail, wiring your ceiling fan can be a straightforward task. Soon enough, you’ll be enjoying a cool breeze in your home with confidence in your handiwork.