Understanding the wiring of your 48v e-bike controller can seem daunting, but it doesn’t have to be. With a little guidance, you can easily navigate the connections and ensure your bike runs smoothly.
Proper wiring is crucial for the performance and safety of your e-bike. A clear wiring diagram can help you visualize how each component interacts, making troubleshooting much simpler.

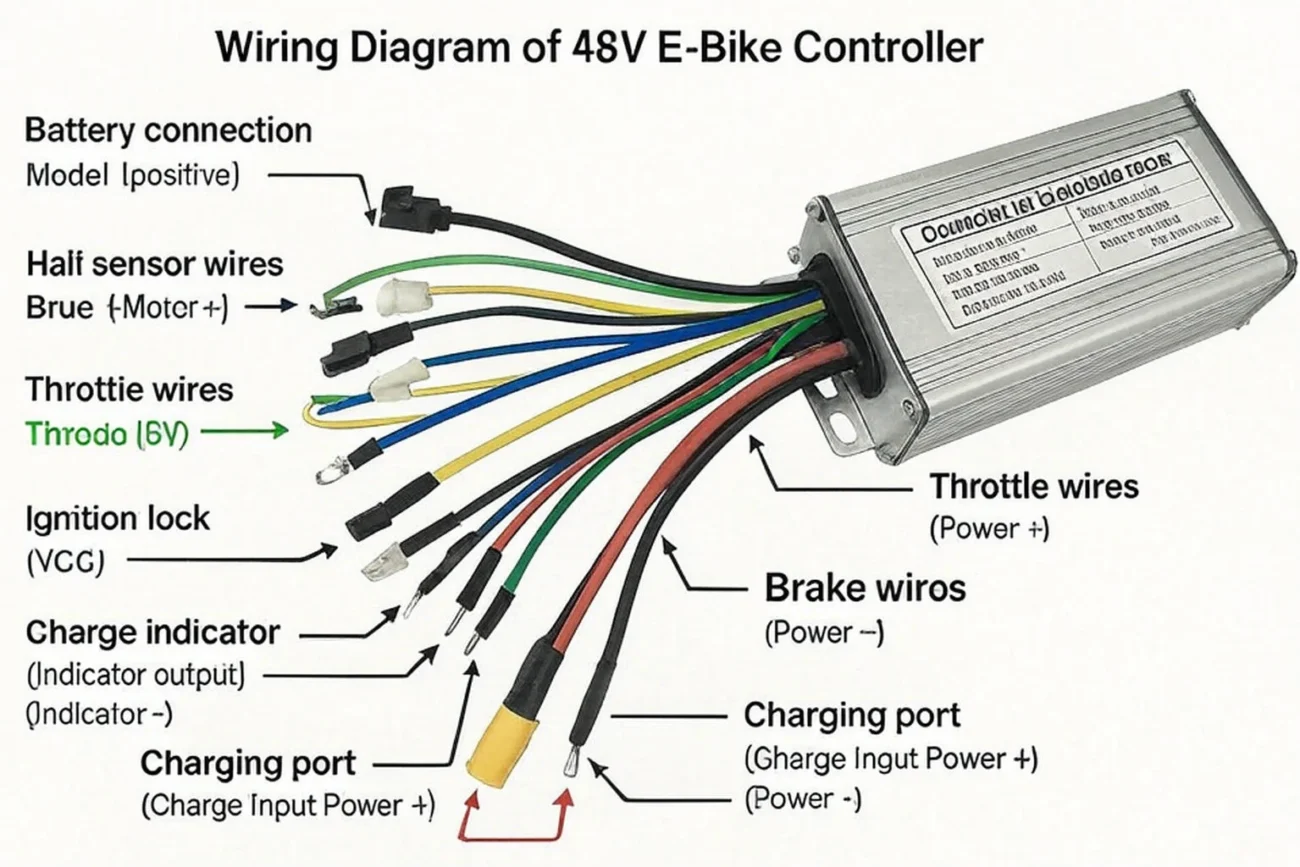
48v E Bike Controller Wiring Diagram
48v E Bike Controller Wiring Diagram
The 48v e-bike controller wiring diagram typically includes connections for the battery, motor, throttle, and brake. Each part plays a vital role in the overall functionality of your e-bike.
When following the wiring diagram, pay close attention to color codes. These codes help you identify which wires connect to specific components, reducing the risk of errors during installation.
Additionally, ensure that all connections are secure and insulated. Loose or exposed wires can lead to short circuits or other electrical issues that may compromise your ride.
After completing the wiring, test each component individually before taking your e-bike for a spin. This step ensures everything is functioning correctly and helps you catch any potential problems early on.
With a solid understanding of the 48v e-bike controller wiring diagram, you can confidently tackle any wiring project. Enjoy your rides knowing your e-bike is set up for success!