Understanding electrical wiring can seem daunting, especially for beginners. However, with the right guidance, you can easily grasp the basics of wiring systems in your home. One essential aspect is the three-way switch, which allows you to control a light from two different locations.
Learning how to wire a basic three-way switch can save you time and money. Instead of hiring an electrician, you can tackle this project yourself with a little patience and the right information. Let’s dive into the basic 3 way switch wiring diagram.

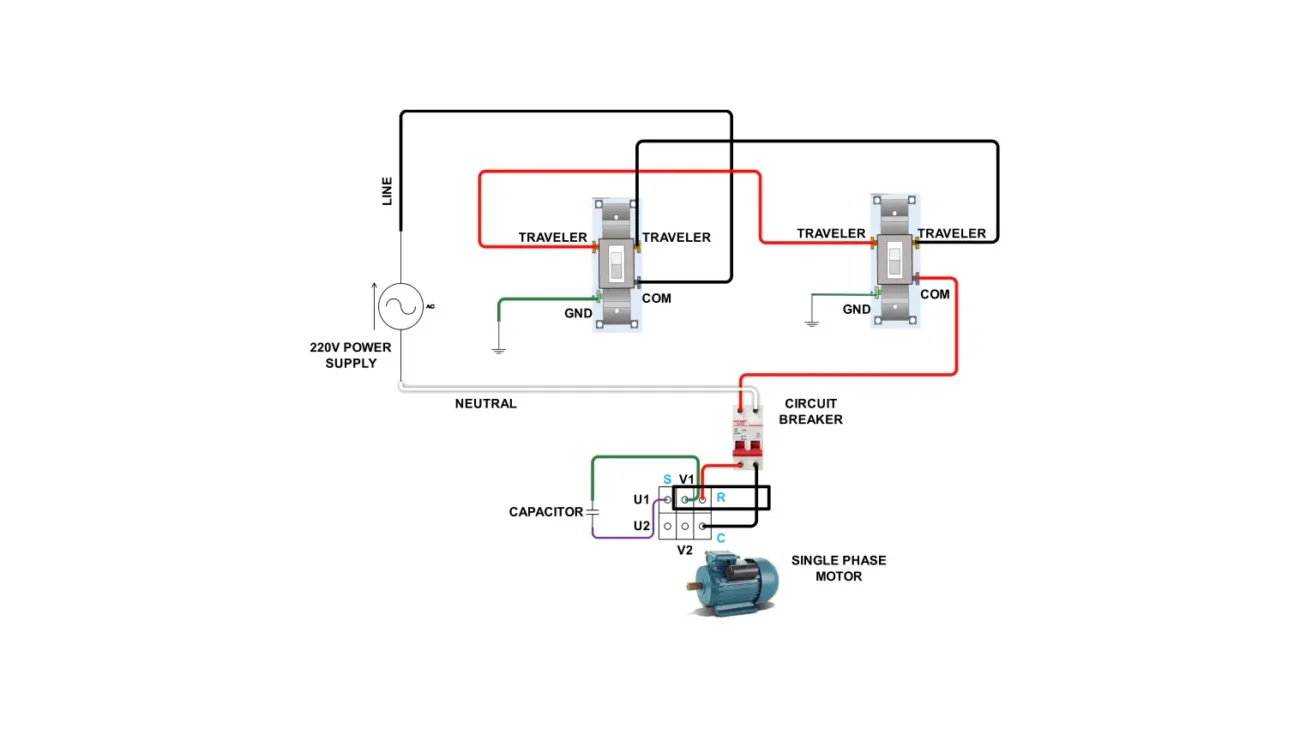
Basic 3 Way Switch Wiring Diagram
Basic 3 Way Switch Wiring Diagram
The basic three-way switch setup involves two switches controlling one light fixture. This configuration is perfect for hallways or large rooms where multiple entry points exist. Understanding this wiring diagram is crucial for successful installation.
In a typical setup, you will find three wires: the common wire, traveler wires, and ground wire. The common wire connects to the light fixture, while the traveler wires connect the two switches. Properly identifying these wires is key to a successful installation.
When wiring, ensure that power is turned off at the circuit breaker to avoid any accidents. Following the diagram closely will help you connect everything correctly. Double-check your connections before restoring power to ensure safety.
Once everything is wired correctly, test your switches to confirm they work as intended. If done right, you’ll enjoy the convenience of controlling your lights from multiple locations without any hassle.
Mastering basic three-way switch wiring can empower you to take on more electrical projects confidently. With practice and attention to detail, you’ll become more comfortable with home wiring tasks in no time.