Understanding how to wire a light switch can seem daunting, but it’s a straightforward task with the right guidance. Many homeowners find themselves needing to replace or install switches, making this knowledge essential.
With a basic understanding of electrical systems, you can tackle this project confidently. A clear diagram can simplify the process, ensuring you connect everything correctly and safely.

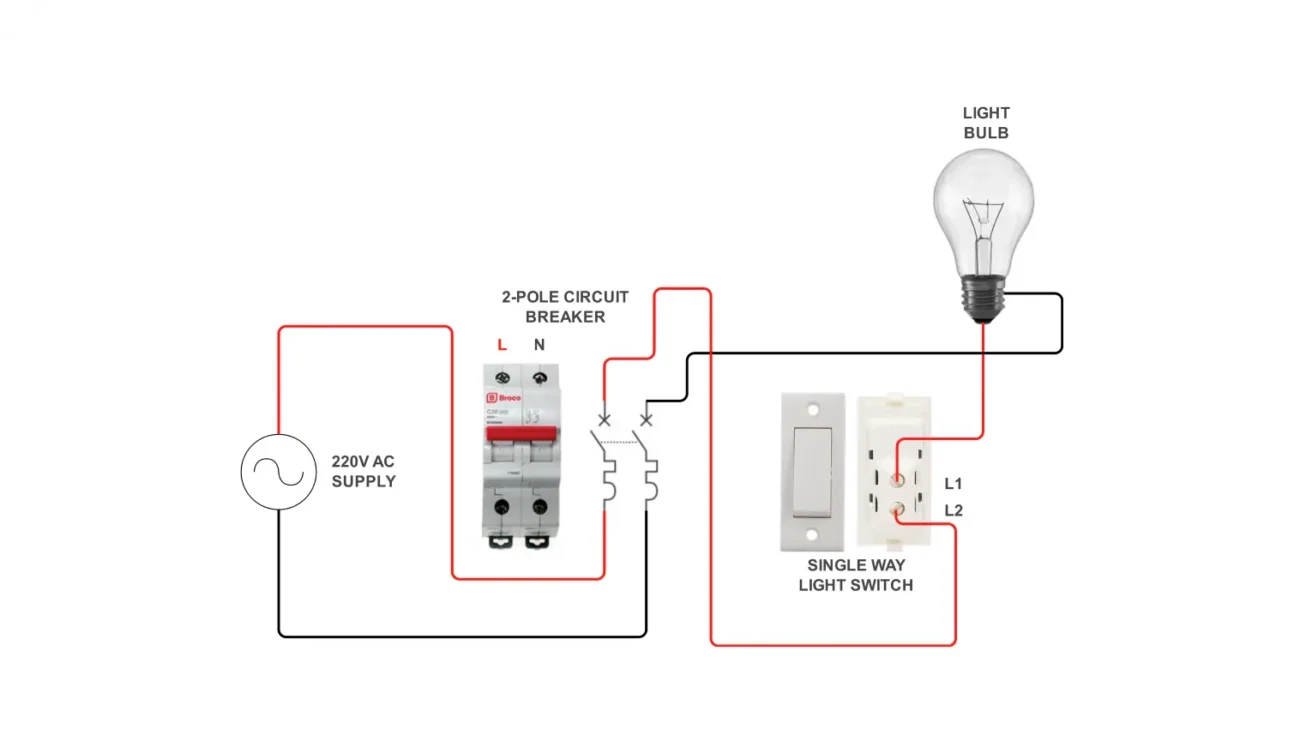
Basic Light Switch Wiring Diagram
Basic Light Switch Wiring Diagram
A basic light switch wiring diagram typically includes two wires: a hot wire and a switch leg. The hot wire brings electricity from the power source, while the switch leg sends it to the light fixture.
When wiring, always ensure the power is turned off at the circuit breaker. This precaution helps prevent accidents and ensures your safety while working on electrical components.
Connect the hot wire to one terminal of the switch and the switch leg to the other terminal. This simple setup allows you to control the light from that switch effectively.
After making your connections, secure the switch back into its box and attach the cover plate. Finally, turn the power back on and test your new switch to ensure it works properly.
Learning basic light switch wiring can save you time and money on home repairs. With practice, you’ll feel more comfortable handling electrical projects around your home.