Understanding battery kill switches can greatly enhance your vehicle’s safety and efficiency. These devices prevent battery drain and protect against electrical fires, making them essential for many car owners.
Proper wiring is crucial for the effective functioning of a battery kill switch. A clear wiring diagram can simplify the installation process, ensuring everything is connected correctly and safely.

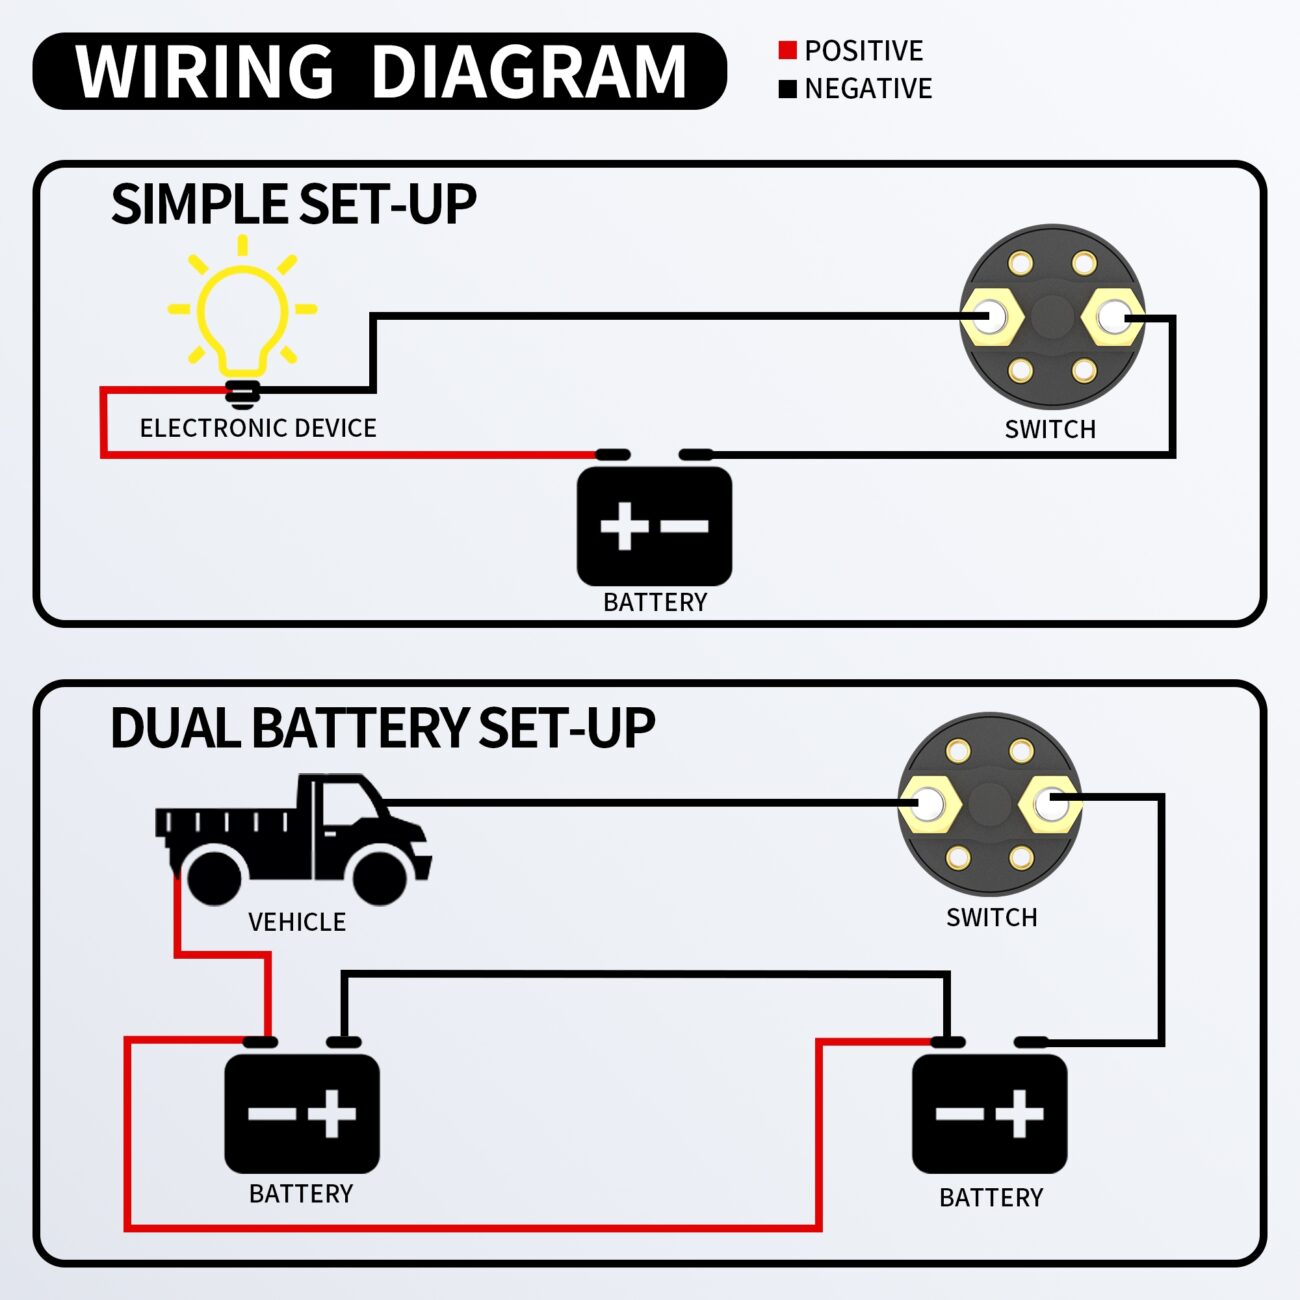
Battery Kill Switch Wiring Diagram
Battery Kill Switch Wiring Diagram
A battery kill switch wiring diagram typically includes a simple layout showing how to connect the switch to the battery and other components. This visual guide helps you avoid common mistakes during installation.
When installing a battery kill switch, always ensure the vehicle is off and disconnected from any power source. This precaution prevents accidental shocks or short circuits while you work on the wiring.
After connecting the wires according to the diagram, test the switch to ensure it functions properly. A well-installed kill switch should easily disconnect power without any issues, providing peace of mind.
Regularly check your battery kill switch for wear and tear. Keeping it in good condition ensures your vehicle remains safe and functional, allowing you to enjoy worry-free driving.
Installing a battery kill switch can be a straightforward process with the right wiring diagram. Following these steps will help you enhance your vehicle’s safety and extend its battery life effectively.