Understanding electrical outlet wiring can seem daunting, but it’s essential for any DIY enthusiast. With the right knowledge, you can tackle simple electrical projects safely and confidently. Let’s break down the basics of wiring an outlet.
Having a clear diagram is crucial when working with electrical outlets. A Beginner Basic Electrical Outlet Wiring Diagram serves as a visual guide, helping you identify each component and connection. This clarity makes the process much easier.

Beginner Basic Electrical Outlet Wiring Diagram
Beginner Basic Electrical Outlet Wiring Diagram
The first step in wiring an outlet is to ensure safety. Always turn off the power at the circuit breaker before starting any electrical work. This precaution protects you from electric shocks and ensures a safe environment.
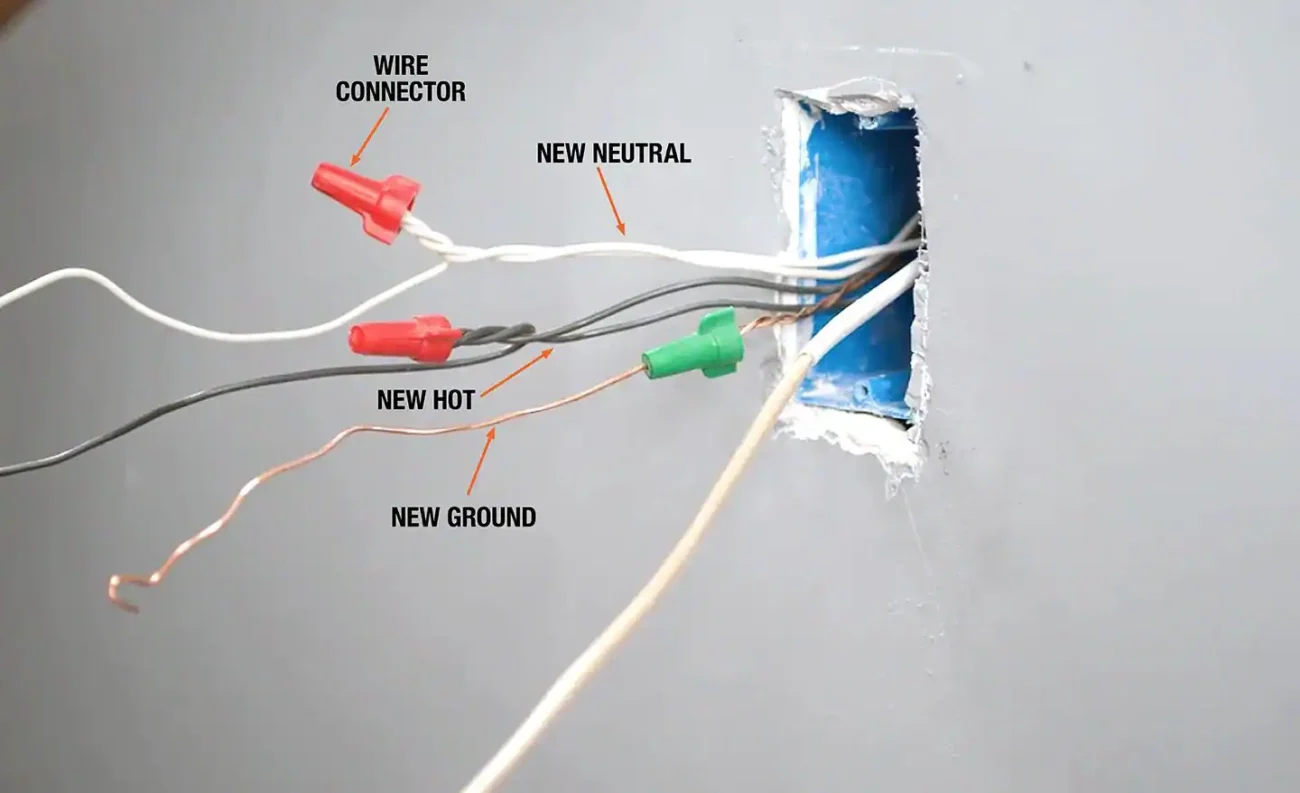
Next, familiarize yourself with the components of the outlet. Typically, you’ll find two screws for the hot and neutral wires, and a ground screw. Understanding these parts is vital for proper installation and function.
When connecting the wires, make sure to follow the diagram closely. The hot wire usually connects to the brass screw, while the neutral wire goes to the silver screw. The ground wire should be attached to the green screw for safety.
After making all connections, carefully push the wires back into the electrical box and secure the outlet with screws. Finally, attach the cover plate and restore power at the circuit breaker to test your work.
With practice and attention to detail, wiring an outlet can become a straightforward task. Always prioritize safety and refer back to your Beginner Basic Electrical Outlet Wiring Diagram as needed for guidance.