Understanding ceiling fan switch wiring can seem daunting, but it’s easier than you might think. With the right guidance, you can tackle this project and enhance your home’s comfort and style.
Many homeowners overlook the importance of a properly wired ceiling fan. A clear wiring diagram can simplify the installation process, ensuring your fan operates safely and efficiently. Let’s dive into the details!

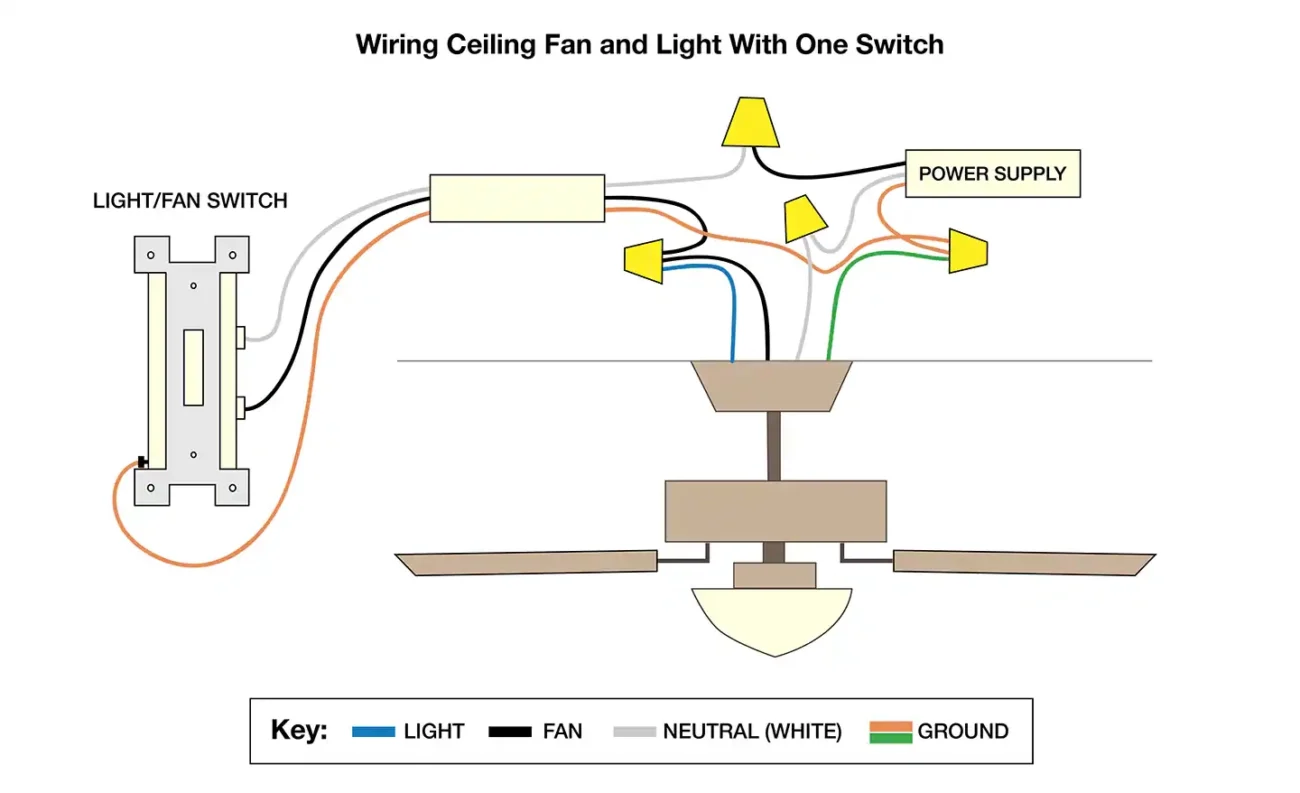
Ceiling Fan Switch Wiring Diagram
Ceiling Fan Switch Wiring Diagram
A ceiling fan switch wiring diagram typically includes connections for the fan, light kit, and power source. Knowing how to read this diagram is crucial for a successful installation.
When wiring your ceiling fan, always start by turning off the power at the circuit breaker. This ensures your safety while working with electrical components. Double-checking that the power is off is a smart move.
Next, identify the wires: usually, there are three types—black (hot), white (neutral), and green or bare (ground). Connecting these correctly is essential for proper functionality and safety.
After connecting the wires according to the diagram, secure all connections with wire nuts. Finally, attach the fan to the ceiling bracket and restore power to test your work. Enjoy your newly installed ceiling fan!
With a little patience and attention to detail, you can successfully wire your ceiling fan. Following a clear diagram makes this task manageable and rewarding, enhancing your living space’s comfort.