Understanding ceiling fan wiring can seem daunting, but it’s quite manageable with the right guidance. A clear ceiling fan wiring connection diagram can simplify the process, making installation a breeze for any DIY enthusiast.
Many homeowners opt for ceiling fans to enhance comfort and reduce energy costs. Knowing how to properly connect the wiring ensures your fan operates efficiently and safely, providing a cool breeze during hot days.

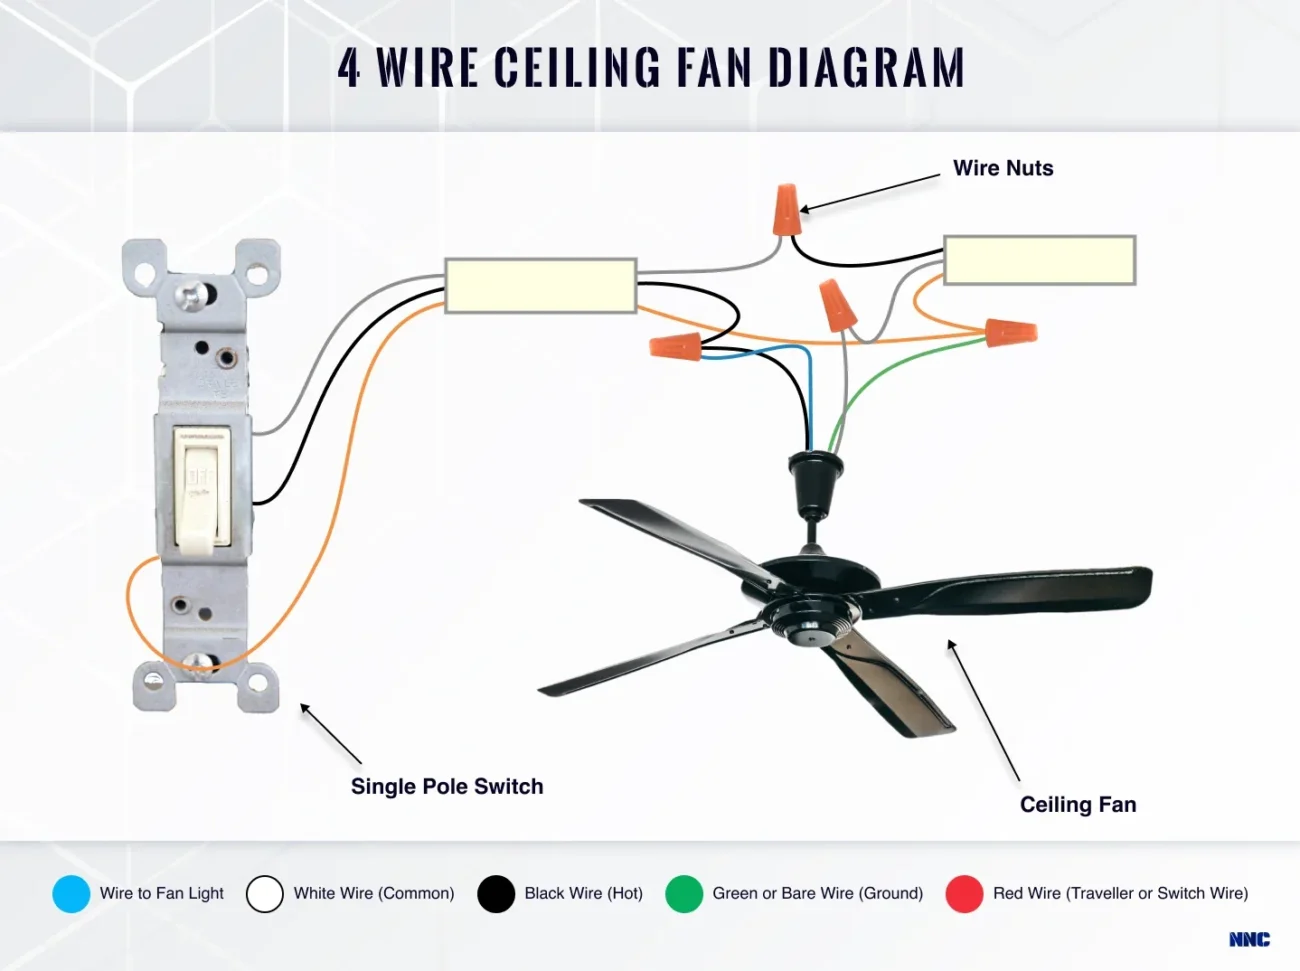
Ceiling Fan Wiring Connection Diagram
Ceiling Fan Wiring Connection Diagram
A ceiling fan wiring connection diagram typically includes color codes for wires. Generally, black wires are for power, white wires are neutral, and green or bare wires are for grounding. Understanding these colors is crucial for a successful installation.
Before starting, ensure you turn off the power at the circuit breaker. This step is vital for your safety. Once the power is off, refer to your ceiling fan’s manual alongside the wiring diagram for specific instructions tailored to your model.
After connecting the wires according to the diagram, secure all connections with wire nuts. It’s essential to tuck the wires neatly into the ceiling box before attaching the fan. This prevents any potential hazards and ensures a clean look.
Finally, once everything is connected and secured, restore power and test your fan. If it operates smoothly, you’ve successfully completed the installation! Enjoy your new ceiling fan and the comfort it brings to your space.