Understanding ceiling fan wiring can seem daunting, but it’s easier than you might think. With the right guidance and a clear diagram, you can tackle this home improvement project confidently. Let’s break it down step by step.
Ceiling fans are a great addition to any room, providing comfort and style. Knowing how to wire them correctly ensures they operate safely and efficiently. Familiarizing yourself with ceiling fan wiring diagrams is essential for success.

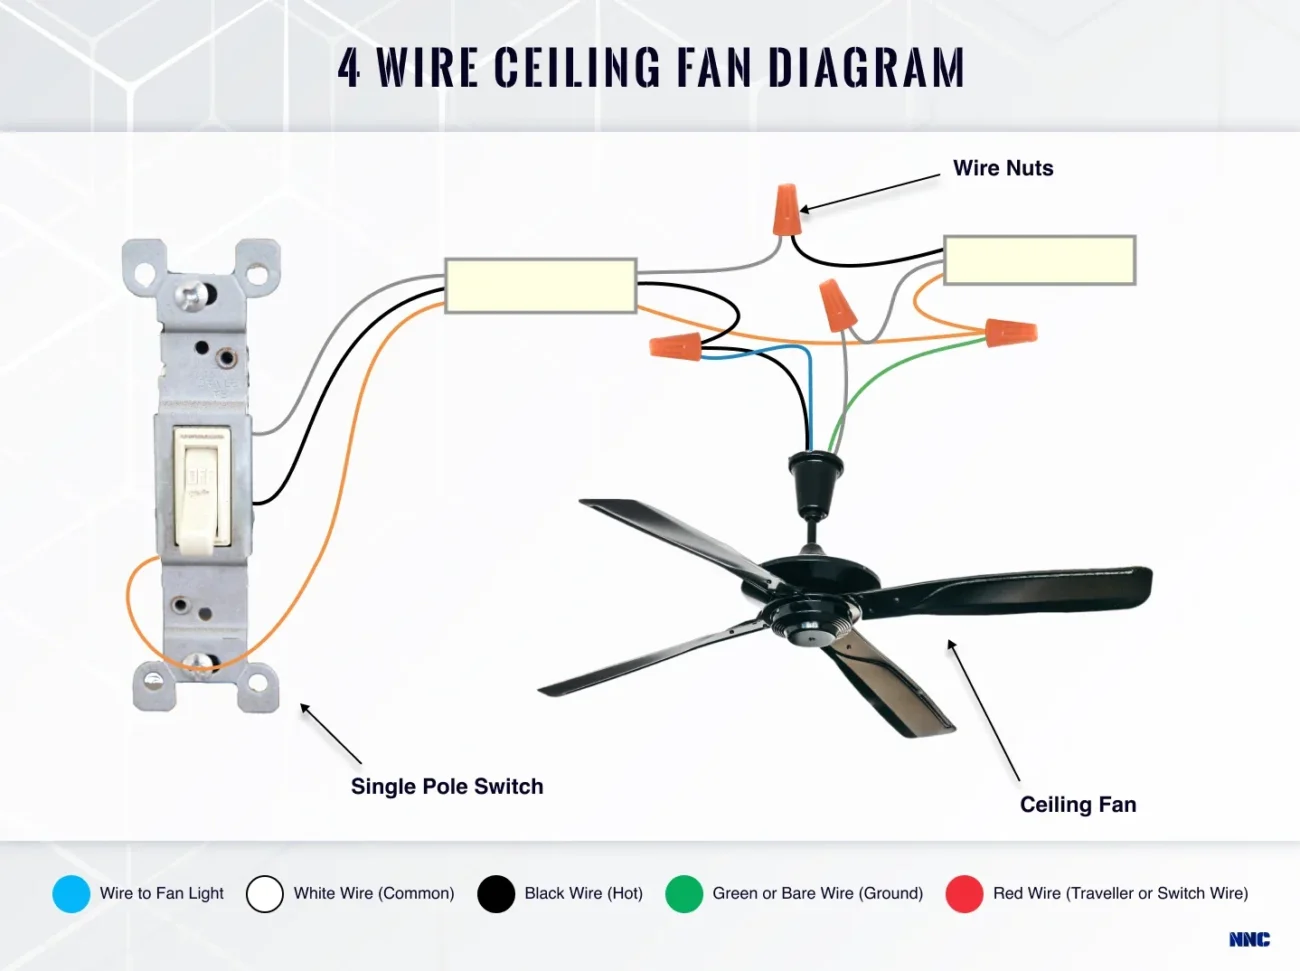
Ceiling Fan Wiring Diagrams
Ceiling Fan Wiring Diagrams
Ceiling fan wiring diagrams typically include color codes for wires, which help identify their functions. Common colors include black for power, white for neutral, and green or bare for ground. Understanding these colors is crucial for proper installation.
Before starting your project, ensure you have the necessary tools: wire strippers, electrical tape, and a screwdriver. Always turn off the power at the circuit breaker to avoid any accidents while working on the wiring.
Once you have your diagram and tools ready, follow the steps carefully. Connect the black wire from the fan to the black wire in the ceiling, then connect the white wires together. Finally, secure the ground wires to ensure safety.
After completing the connections, double-check everything before turning the power back on. Testing your fan will confirm that it’s wired correctly and functioning as intended. Enjoy your newly installed ceiling fan!
With a little patience and attention to detail, wiring a ceiling fan can be a rewarding DIY project. Following these guidelines will help ensure your fan operates smoothly and enhances your living space.