Understanding ceiling light fan wiring can seem daunting, but it’s easier than you think. With the right guidance, you can tackle this project confidently and enhance your living space with style and functionality.
Many homeowners want to install ceiling fans with lights for added comfort. Knowing how to read a ceiling light fan wiring diagram is essential for a successful installation. This knowledge helps prevent mistakes and ensures safety.

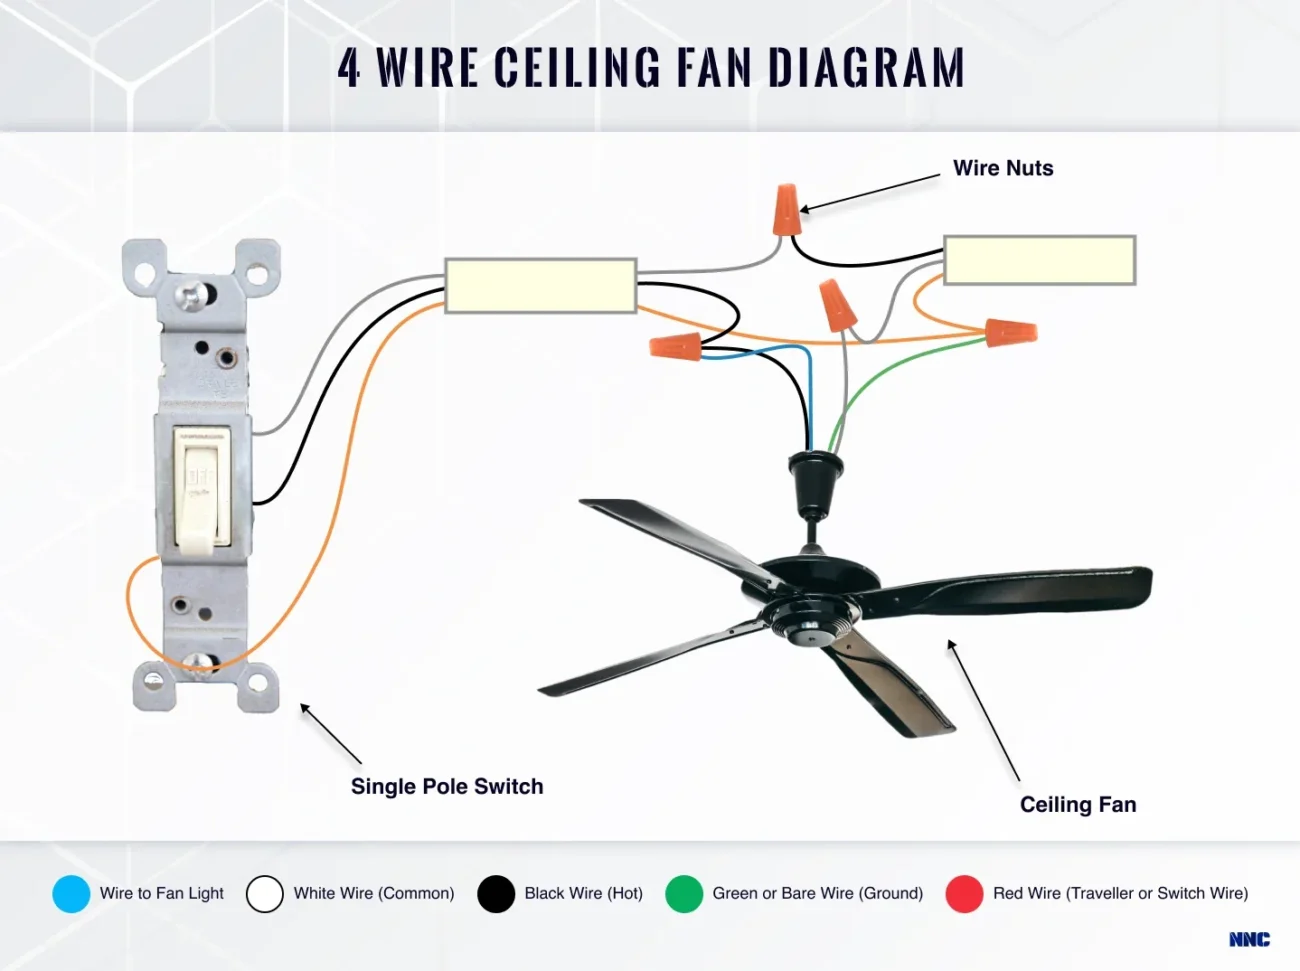
Ceiling Light Fan Wiring Diagram
Ceiling Light Fan Wiring Diagram
A ceiling light fan wiring diagram typically illustrates the connections between the fan, light fixture, and power source. Familiarizing yourself with these diagrams can simplify the installation process significantly.
When wiring your ceiling fan, always turn off the power at the circuit breaker. This step is crucial for your safety. Once the power is off, you can begin connecting the wires according to the diagram.
Most ceiling fans come with color-coded wires: black for the fan, blue for the light, and white for neutral. Ensure you connect these wires correctly to avoid any electrical issues or malfunctions.
After making all connections, secure the fan and light fixture to the ceiling. Finally, restore power at the circuit breaker and test your new ceiling light fan to ensure everything works perfectly.
With a little patience and attention to detail, you can successfully install your ceiling light fan. Enjoy your newly enhanced space and the comfort it brings to your home!