Understanding how to wire a garbage disposal can save you time and money. With the right guidance, you can tackle this task confidently and ensure your kitchen runs smoothly. A clear wiring diagram is essential for a successful installation.
Many homeowners find themselves puzzled when it comes to electrical work. However, with a little patience and the right information, wiring your garbage disposal can be a straightforward project. Let’s explore the key components involved.

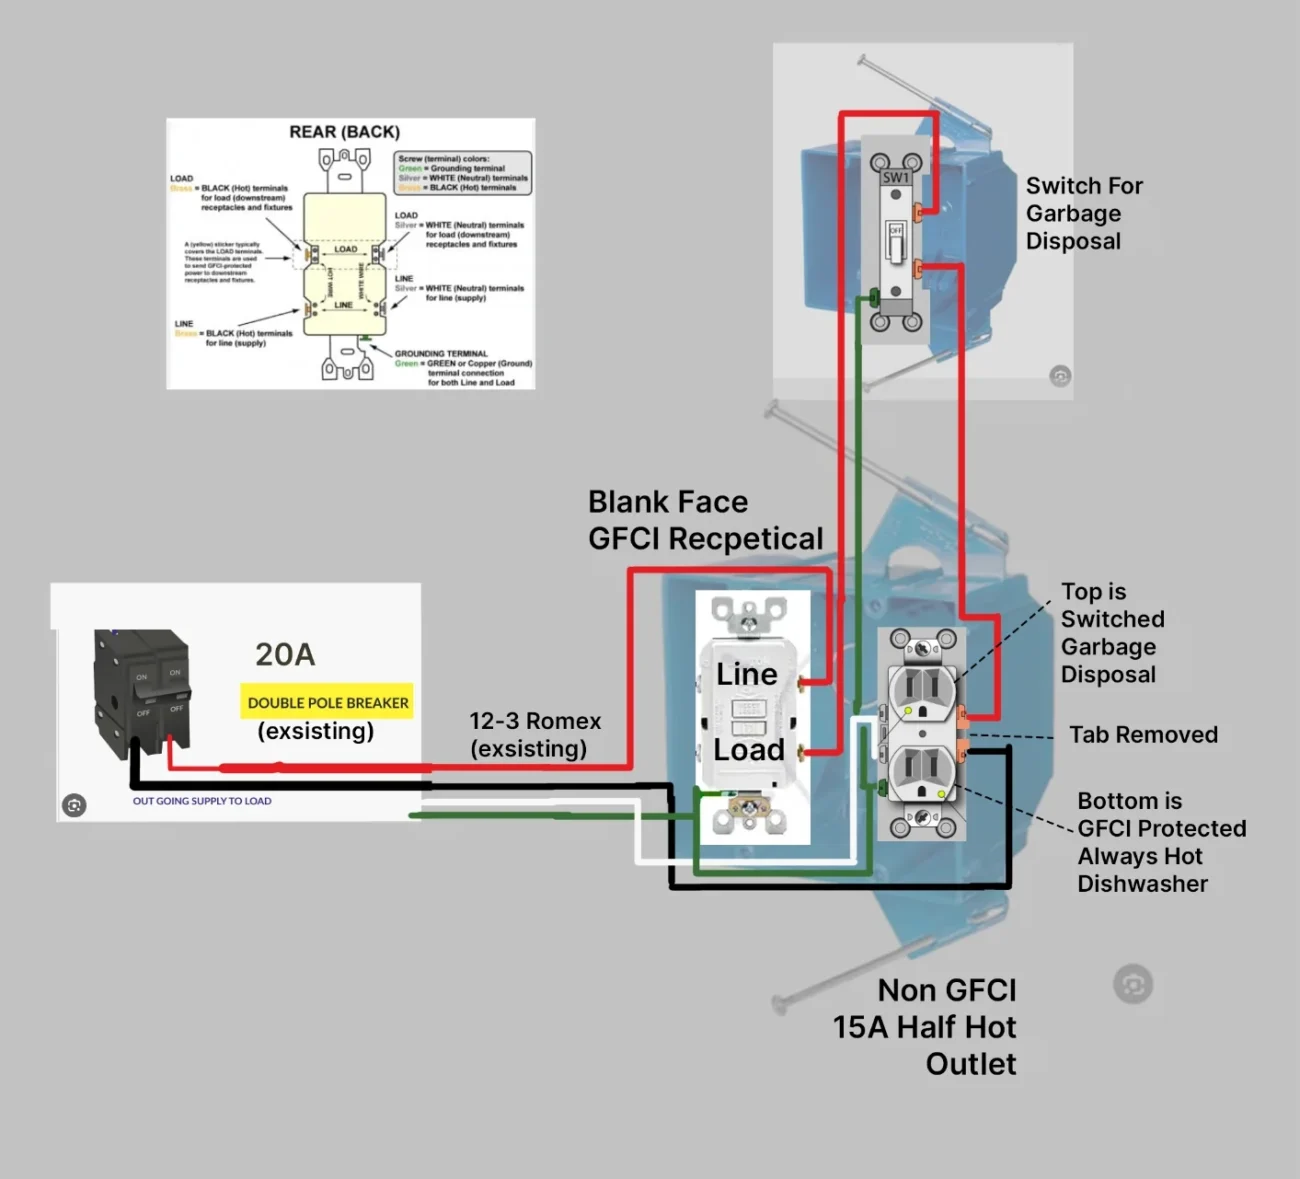
Garbage Disposal Wiring Diagram
Garbage Disposal Wiring Diagram
A garbage disposal wiring diagram typically includes details about the power source, switch, and disposal unit connections. Familiarizing yourself with these components will make the installation process much easier and more efficient.
Before starting, ensure you have the necessary tools: wire strippers, a screwdriver, and electrical tape. Safety is paramount, so always turn off the power at the circuit breaker before beginning any electrical work. This precaution will help prevent accidents.
Once you have your tools ready, refer to the wiring diagram. Connect the wires from the disposal unit to the power source according to the diagram’s instructions. Make sure all connections are secure and properly insulated to avoid any electrical hazards.
After completing the wiring, restore power and test your garbage disposal. If everything works correctly, you’ve successfully completed the installation! If not, double-check your connections against the wiring diagram.
Wiring a garbage disposal may seem daunting at first, but with a clear diagram and some basic tools, it becomes manageable. Enjoy your newly installed appliance and the convenience it brings to your kitchen!