Understanding how to wire your Genie garage door opener can seem daunting, but it doesn’t have to be. With the right guidance, you can easily tackle this task and ensure your garage door operates smoothly.
Having a reliable garage door opener is essential for convenience and security. Knowing the wiring diagram will help you troubleshoot issues and perform installations without unnecessary complications.

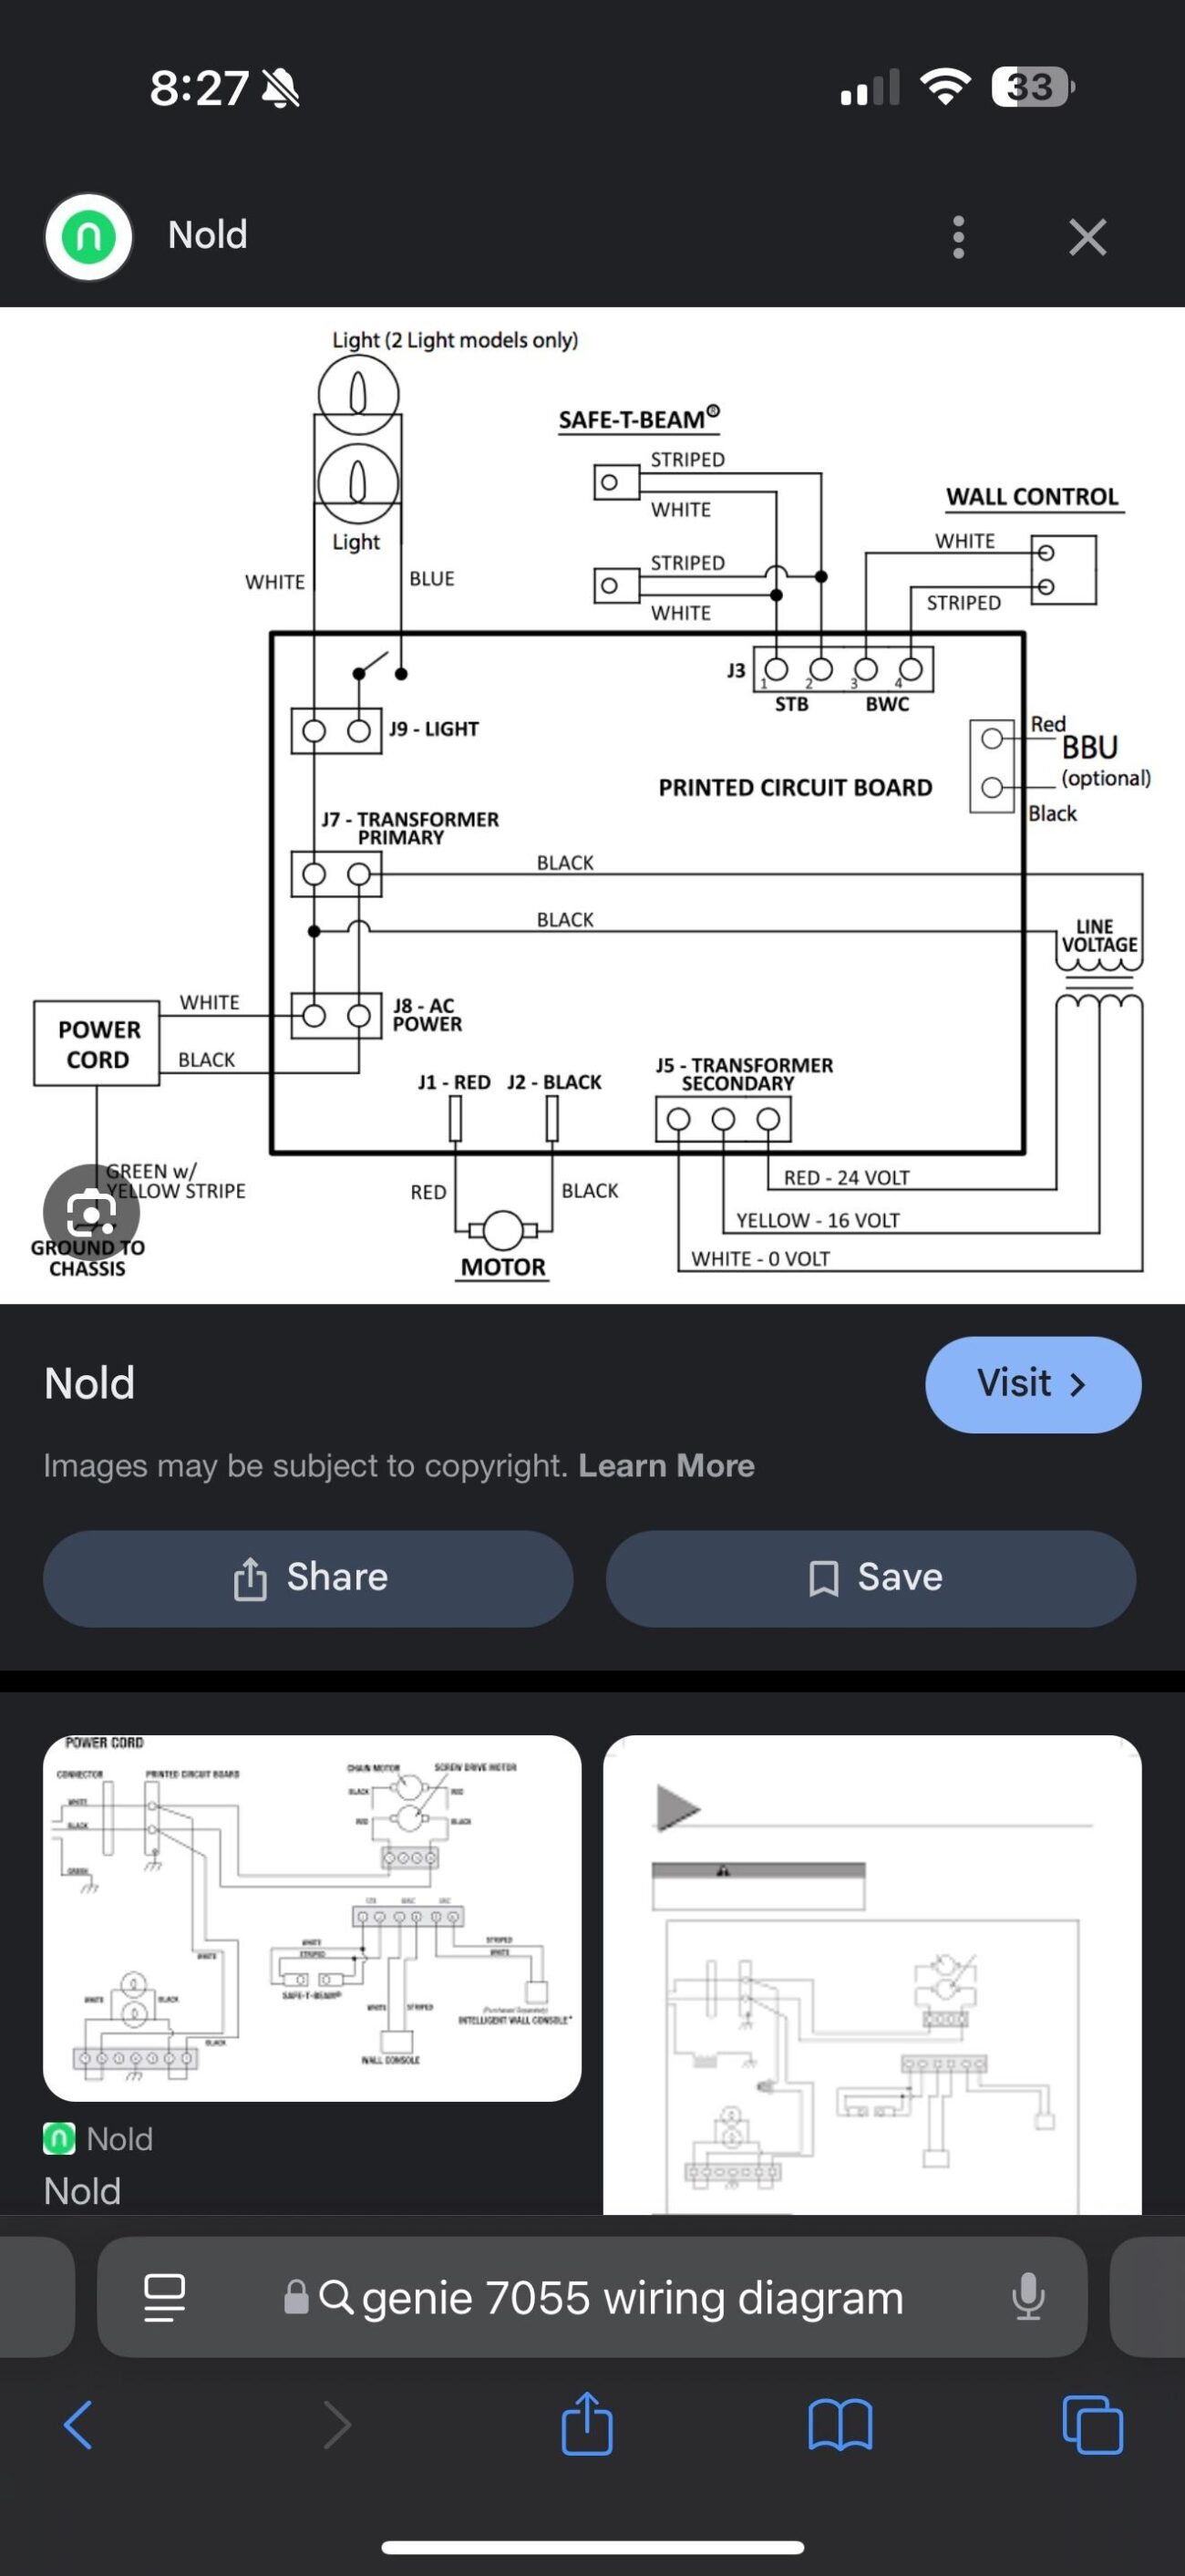
Genie Garage Door Opener Wiring Diagram
Genie Garage Door Opener Wiring Diagram
The Genie garage door opener wiring diagram provides a clear visual representation of how to connect various components. This includes the motor, safety sensors, and wall control panel, ensuring everything works harmoniously.
Before starting, gather all necessary tools and materials. A screwdriver, wire strippers, and electrical tape are essential for a successful installation. Make sure to follow safety precautions to avoid any accidents during the process.
Once you have your wiring diagram in hand, identify each wire’s purpose. Typically, you’ll find color-coded wires that correspond to specific functions, making it easier to connect them correctly.
If you encounter any issues during installation, refer back to the wiring diagram. It can help you troubleshoot problems like non-responsive sensors or malfunctioning remotes, ensuring your garage door operates as intended.
Completing the wiring for your Genie garage door opener can be a rewarding experience. With patience and attention to detail, you’ll enjoy the convenience of a fully functional garage door in no time.