Understanding ceiling fan wiring can seem daunting, but it doesn’t have to be. With the right guidance, you can easily tackle the installation of your Hampton Bay ceiling fan. This fan is popular for its style and functionality.
Having a clear wiring diagram makes the process smoother. Knowing where each wire connects ensures your fan operates efficiently and safely. Let’s dive into the Hampton Bay Ceiling Fan Wiring Diagram to simplify your installation experience.

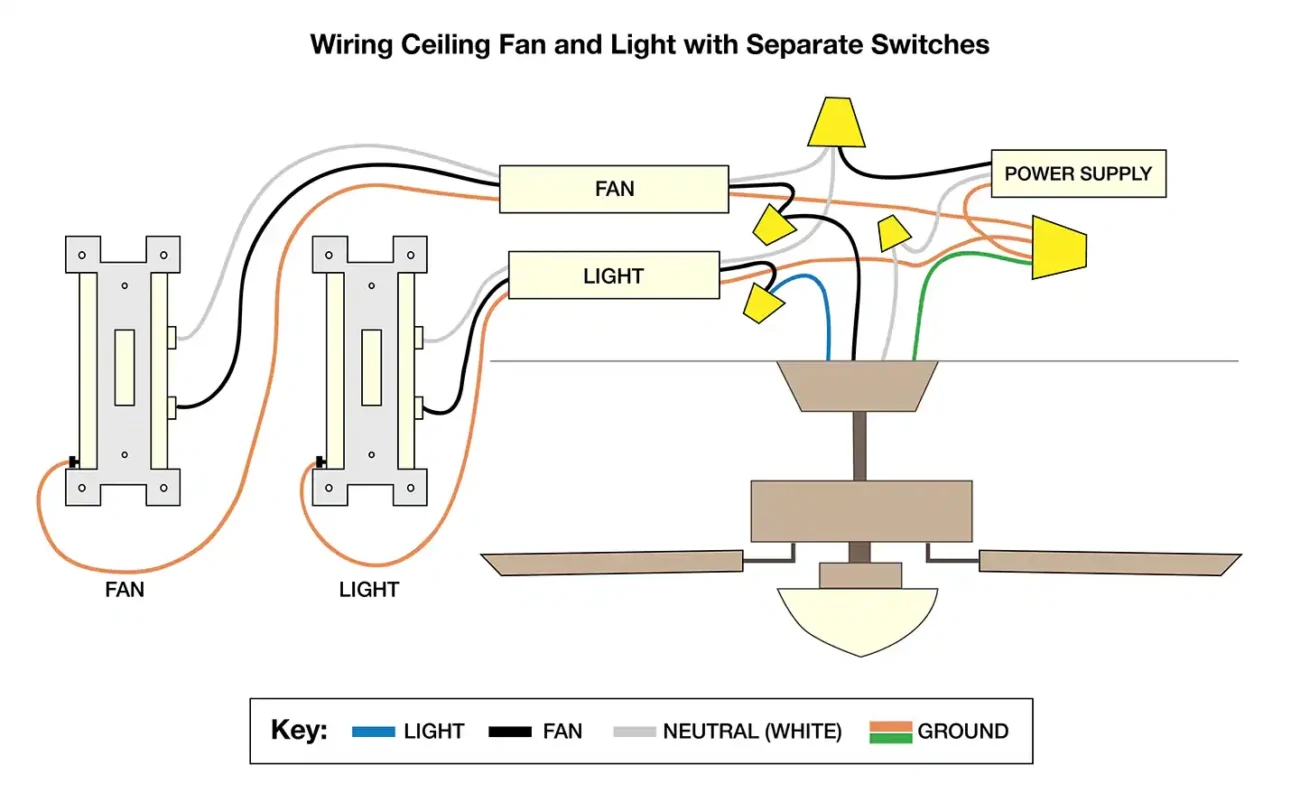
Hampton Bay Ceiling Fan Wiring Diagram
Hampton Bay Ceiling Fan Wiring Diagram
The Hampton Bay ceiling fan typically includes three wires: black, white, and green or bare copper. The black wire connects to the power source, while the white wire is for neutral connections. The green or bare wire is for grounding.
When installing, first turn off the power at the circuit breaker. Connect the black wire from the fan to the black wire from the ceiling. Next, connect the white wires together and secure them with a wire nut.
Finally, attach the green or bare copper wire to the grounding screw in your electrical box. This step is crucial for safety. Once all connections are secure, you can mount your fan and restore power to test it.
By following this simple Hampton Bay Ceiling Fan Wiring Diagram, you can enjoy a cool breeze in no time. Remember to always prioritize safety and consult a professional if you’re unsure about any steps.