Understanding how to wire a ceiling fan can seem daunting, but it doesn’t have to be. With the right guidance and a clear diagram, you can tackle the task with confidence and ease. A Harbor Breeze ceiling fan is a popular choice for many homeowners.
Having a reliable wiring diagram is essential for a successful installation. It helps you identify the various wires and their functions, ensuring that your fan operates safely and efficiently. Let’s explore the Harbor Breeze Ceiling Fan Wiring Diagram to simplify the process.

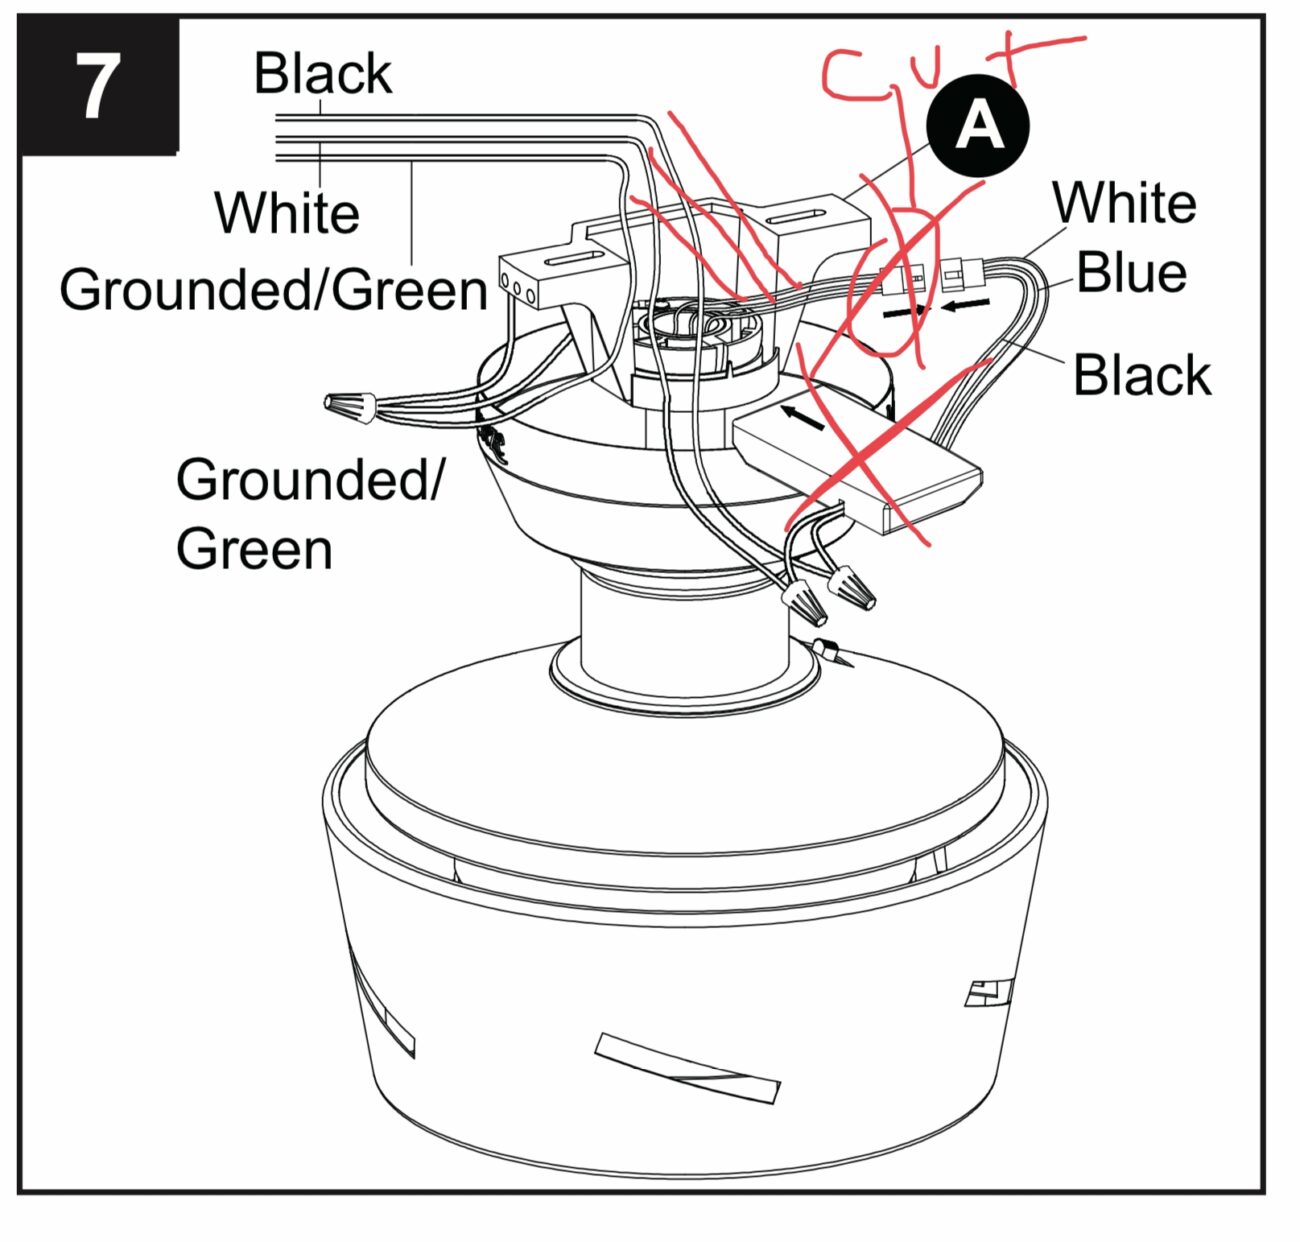
Harbor Breeze Ceiling Fan Wiring Diagram
Harbor Breeze Ceiling Fan Wiring Diagram
The Harbor Breeze ceiling fan typically includes three main wires: black, white, and green. The black wire connects to the fan motor, while the white wire is for neutral connections. The green wire is used for grounding.
When installing your fan, ensure that you turn off the power at the circuit breaker. This step is crucial for your safety. Once the power is off, refer to the wiring diagram to connect each wire correctly.
After connecting the wires, secure all connections with wire nuts and electrical tape. This ensures that there are no loose connections that could lead to electrical issues later on. Double-check your work before turning the power back on.
Once everything is connected and secured, restore power and test your fan. If it operates smoothly without any issues, you’ve successfully completed the installation! Enjoy the comfort of your new Harbor Breeze ceiling fan.
With a little patience and attention to detail, wiring your Harbor Breeze ceiling fan can be a straightforward project. Follow the diagram closely, and you’ll have a cool breeze in no time!