Understanding how to wire a Lutron Diva Dimmer can enhance your lighting experience at home. With the right wiring diagram, you can easily install this dimmer switch and enjoy adjustable lighting in any room.
Many homeowners appreciate the flexibility that dimmers provide. The Lutron Diva Dimmer is a popular choice due to its sleek design and user-friendly features, making it a great addition to your lighting setup.

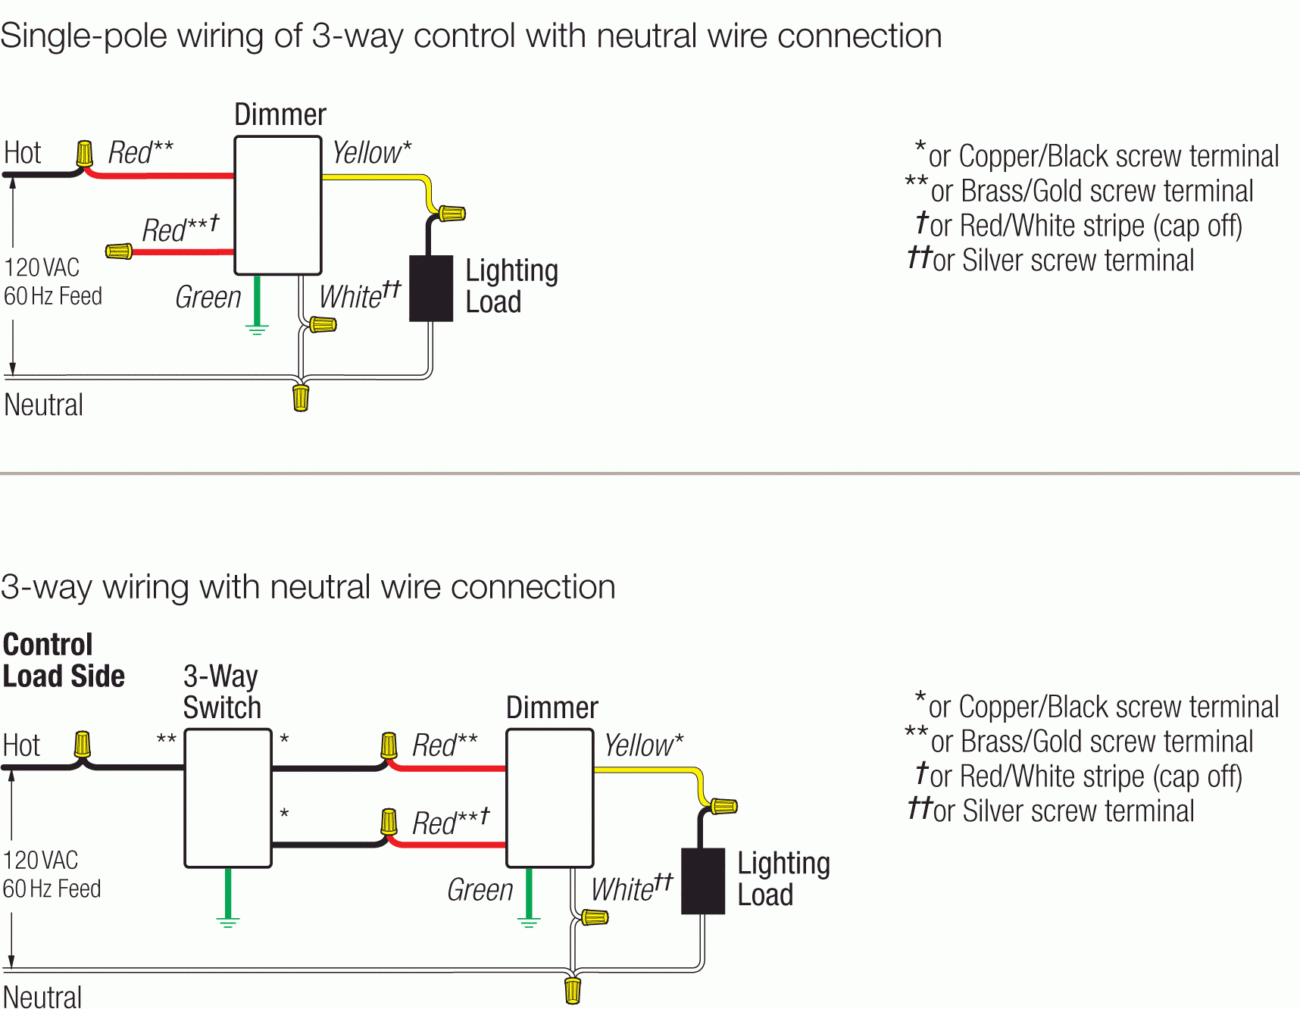
Lutron Diva Dimmer Wiring Diagram
Lutron Diva Dimmer Wiring Diagram
To begin, gather all necessary tools and materials for the installation. You’ll need a screwdriver, wire connectors, and the Lutron Diva Dimmer itself. Following the wiring diagram ensures a smooth installation process.
Next, turn off the power at the circuit breaker to avoid any electrical hazards. Carefully remove the existing switch and note how the wires are connected. This will help you connect the new dimmer correctly.
Once you’ve identified the wires, refer to the Lutron Diva Dimmer wiring diagram. Typically, you’ll connect the black wire from the dimmer to the black wire in your wall. The white wires should be connected together as well.
After making all connections, secure the dimmer into the electrical box and attach the faceplate. Finally, restore power at the circuit breaker and test your new dimmer switch to ensure it functions properly.
Installing a Lutron Diva Dimmer can significantly improve your home’s ambiance. With just a bit of effort and attention to detail, you can enjoy customized lighting that suits your needs perfectly.