Understanding how to set up your Nest Thermostat can make a significant difference in your home’s energy efficiency. A clear wiring diagram is essential for a smooth installation process, ensuring everything connects correctly.
Many homeowners appreciate the convenience of smart thermostats. The Nest model stands out for its user-friendly interface and energy-saving features, making it a popular choice for modern homes.

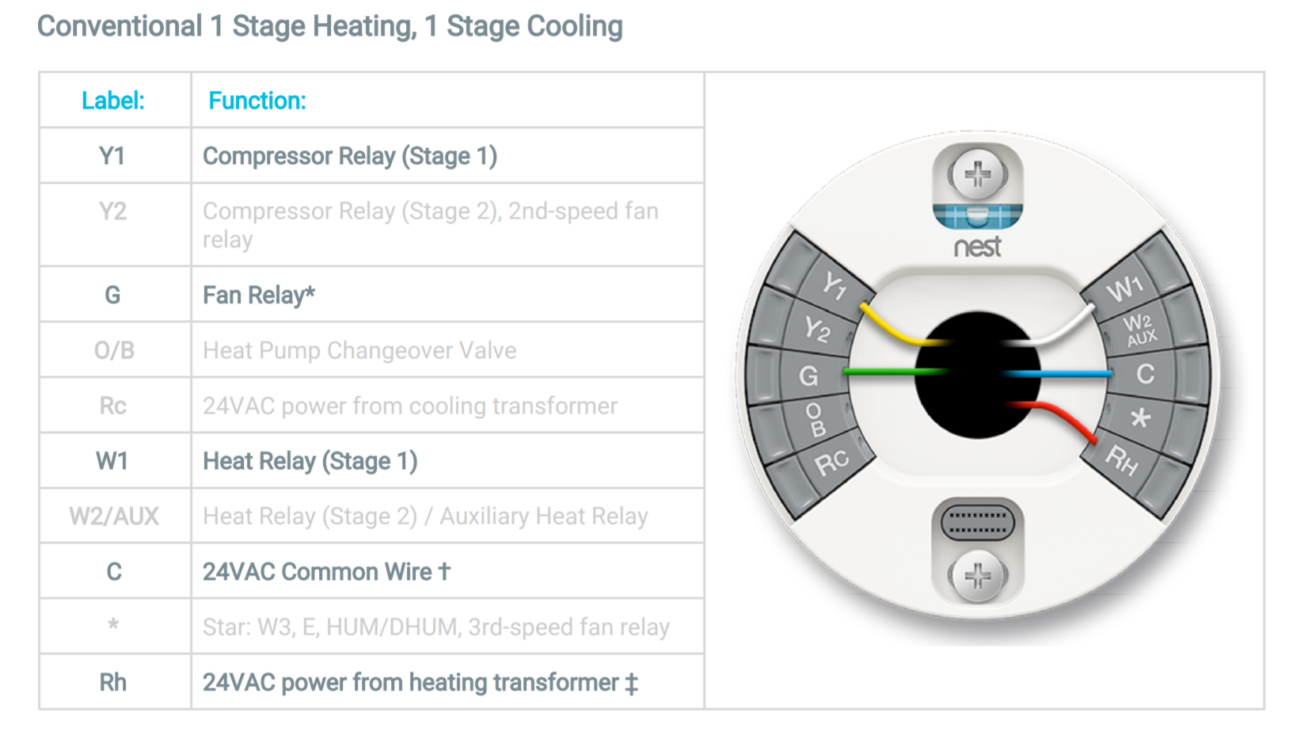
Nest Thermostat Wiring Diagram
Nest Thermostat Wiring Diagram
To begin, familiarize yourself with the Nest Thermostat wiring diagram. This diagram illustrates how to connect various wires from your HVAC system to the thermostat, ensuring proper functionality.
Typically, you’ll encounter wires labeled R, Y, G, W, and C. Each wire serves a specific purpose: R for power, Y for cooling, G for the fan, W for heating, and C for the common wire. Understanding these labels is crucial.
Before starting the installation, turn off your HVAC system’s power to avoid any electrical mishaps. Once you’ve ensured safety, follow the wiring diagram closely to connect each wire to its corresponding terminal on the thermostat.
After completing the wiring, restore power to your HVAC system and test the thermostat. If everything is connected correctly, your Nest Thermostat should power on and be ready for setup.
Installing a Nest Thermostat can enhance your home’s comfort and efficiency. With the right wiring diagram and careful attention to detail, you’ll enjoy a seamless installation experience.