Understanding how to set up your Nest thermostat can make a significant difference in your home’s energy efficiency. With the right wiring diagrams, you can ensure a smooth installation process without any hassle.
Many homeowners find themselves confused by the various wires and connections involved. Fortunately, Nest thermostat wiring diagrams simplify this process, making it easier to connect your device correctly and enjoy its benefits.

Nest Thermostat Wiring Diagrams
Nest Thermostat Wiring Diagrams
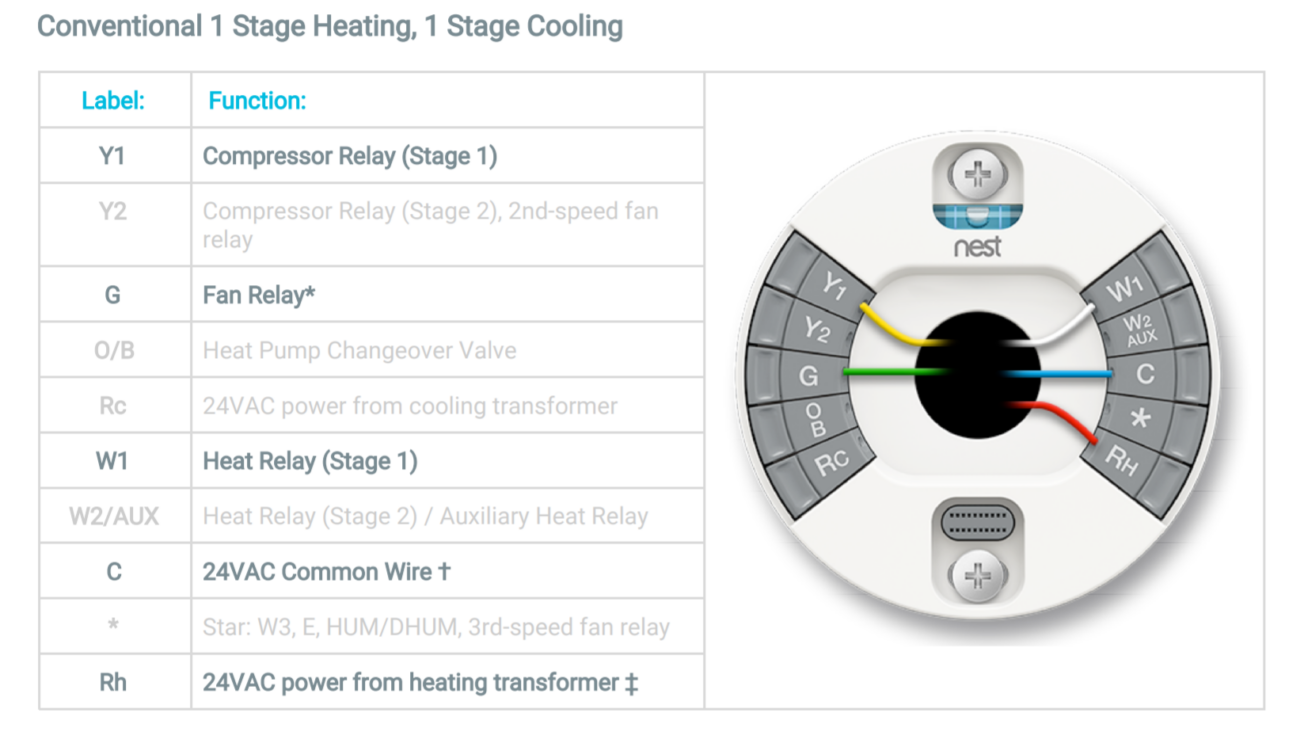
Nest thermostat wiring diagrams provide a clear visual representation of how to connect your thermostat to your HVAC system. These diagrams typically include color-coded wires that correspond to specific functions, ensuring you know exactly where each wire goes.
Common wires you’ll encounter include the R wire for power, the Y wire for cooling, and the W wire for heating. Understanding these connections is crucial for a successful installation and optimal performance of your thermostat.
Before starting, it’s essential to turn off your HVAC system’s power. This precaution helps prevent any electrical issues during installation. Once you’re ready, follow the wiring diagram closely for a seamless setup.
After installation, take a moment to test your thermostat. Ensure that it responds correctly to temperature changes and settings. A well-installed Nest thermostat can lead to significant energy savings and enhanced comfort in your home.
In conclusion, using Nest thermostat wiring diagrams simplifies the installation process and ensures everything is connected correctly. With a little patience and attention to detail, you can enjoy the benefits of smart temperature control in no time.