Understanding the wiring of your nest thermostat can seem daunting, but it doesn’t have to be. With a little guidance, you can easily navigate the Nest Wiring Diagram 6 Wire and ensure your system is set up correctly.
Many homeowners find themselves confused by the various wires and connections. Knowing what each wire does is essential for a smooth installation process. Let’s break it down step by step.

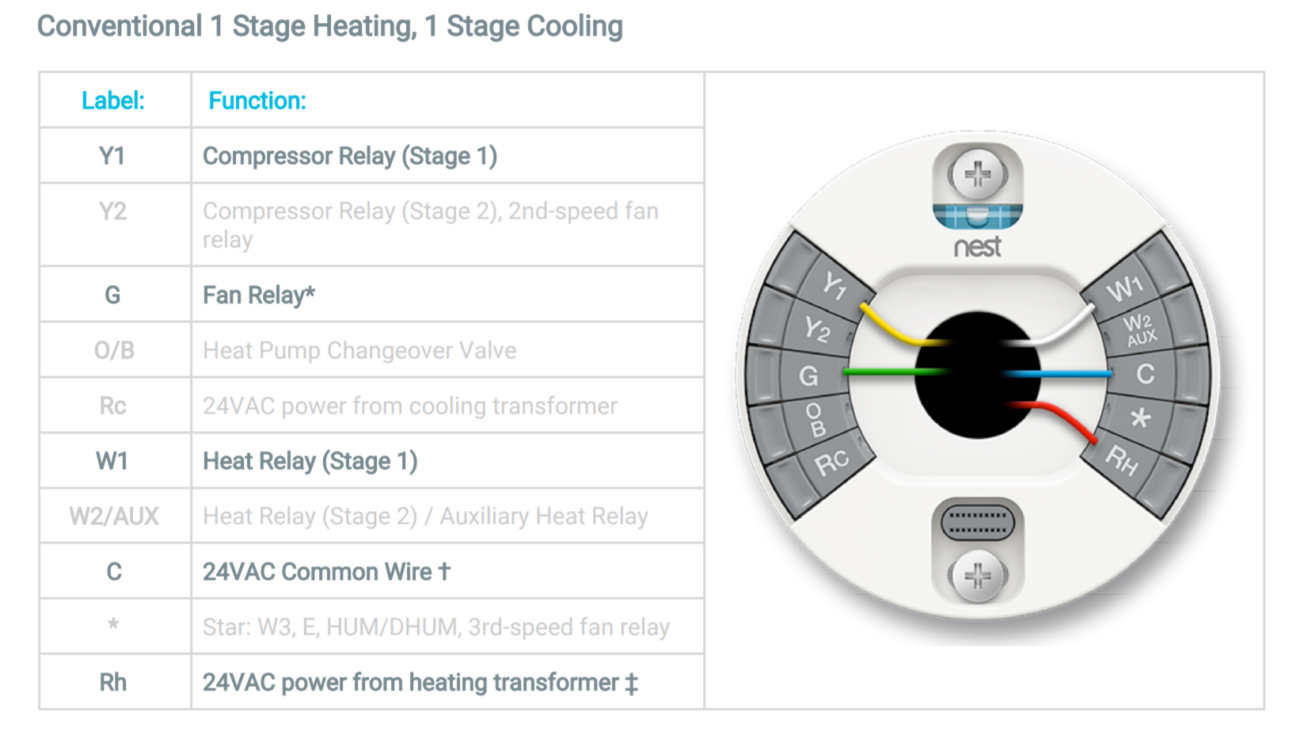
Nest Wiring Diagram 6 Wire
Nest Wiring Diagram 6 Wire
The Nest Wiring Diagram 6 Wire typically includes wires labeled as R, Y, G, W, C, and O/B. Each of these wires serves a specific purpose in controlling your heating and cooling systems effectively.
The R wire is the power supply for your thermostat, while the Y wire controls the cooling system. The G wire is responsible for the fan operation, ensuring proper airflow throughout your home.
Next, the W wire connects to your heating system, allowing you to manage temperature settings efficiently. The C wire provides a continuous power source, which is crucial for smart thermostats like Nest.
Lastly, the O/B wire is used for heat pumps and can switch between heating and cooling modes. Understanding these connections will help you troubleshoot any issues that may arise during installation.
With this knowledge of the Nest Wiring Diagram 6 Wire, you’re well on your way to a successful installation. Take your time and refer back to this guide whenever needed for a smooth experience.