Planning outdoor lighting can transform your space, enhancing both aesthetics and safety. Understanding the wiring involved is crucial for a successful installation, ensuring everything functions smoothly and efficiently.
With the right outdoor light wiring diagram, you can simplify the process. This guide will help you visualize the connections needed for your outdoor lighting project, making it easier to follow along.

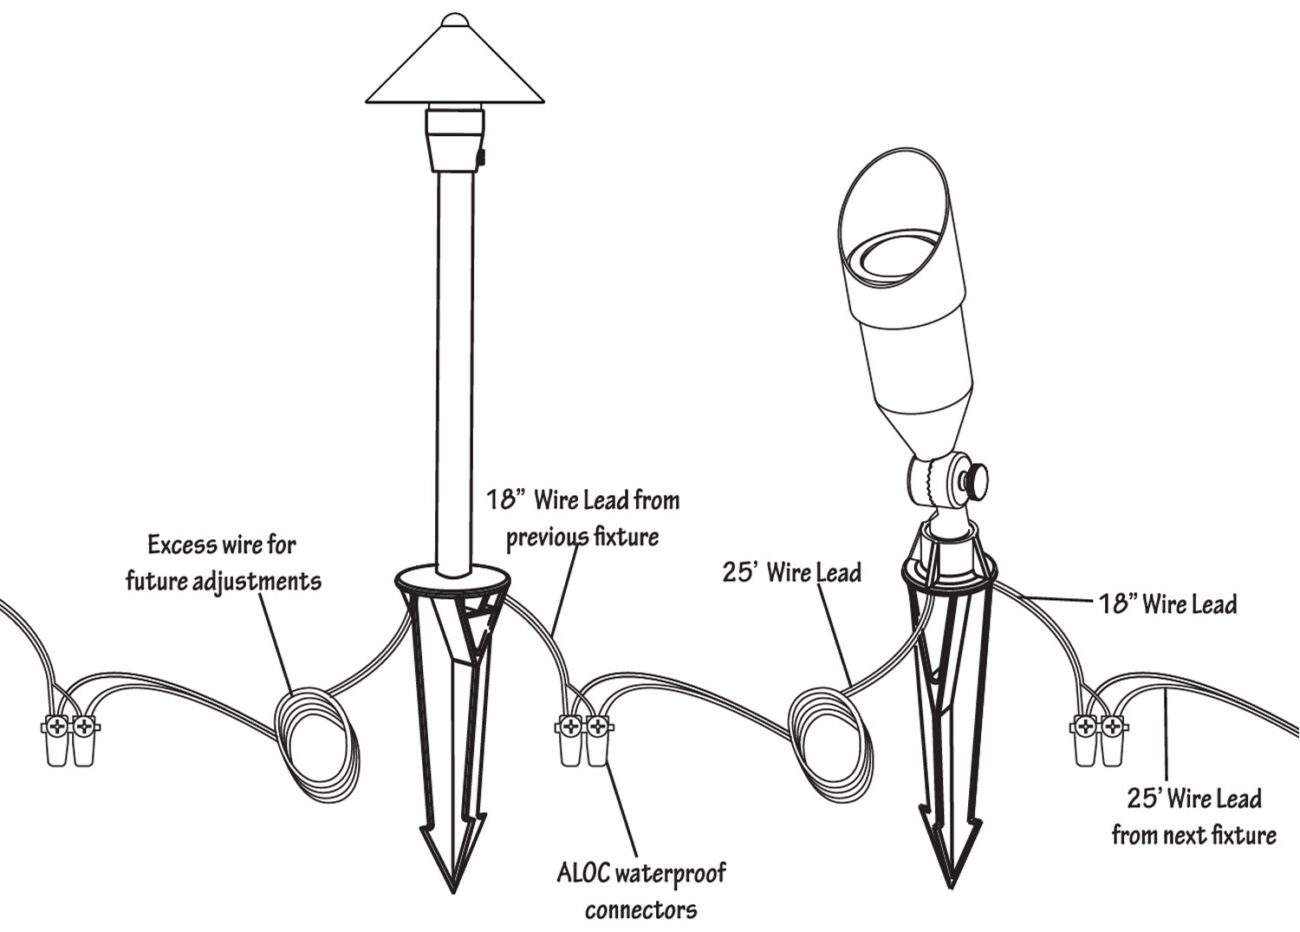
Outdoor Light Wiring Diagram
Outdoor Light Wiring Diagram
An outdoor light wiring diagram typically includes symbols representing fixtures, switches, and power sources. Familiarizing yourself with these symbols can streamline your installation process and prevent common mistakes.
When creating your diagram, consider the layout of your outdoor space. Identify where you want to place lights and how they will connect to your power source. This planning phase is essential for achieving optimal lighting effects.
Safety should always be a priority when dealing with electrical installations. Ensure that all connections are secure and that you use weatherproof materials to protect against the elements. Following safety guidelines will help prevent accidents.
Once your wiring is complete, test each light fixture to ensure everything works correctly. This step is vital for troubleshooting any issues that may arise during installation, allowing you to enjoy your outdoor space without worry.
Creating an outdoor lighting setup can be rewarding and enhance your home’s curb appeal. With a clear wiring diagram and careful planning, you’ll achieve a beautifully lit outdoor area that you can enjoy year-round.