Understanding car audio systems can be a bit tricky, especially when it comes to wiring. The right connections can make all the difference in sound quality and functionality. A clear wiring diagram is essential for a smooth installation process.
The Pioneer DMH 160BT is a popular choice among car audio enthusiasts. Its features and performance are impressive, but proper wiring is crucial to unlock its full potential. Knowing how to connect it correctly ensures you enjoy your music without any hassle.

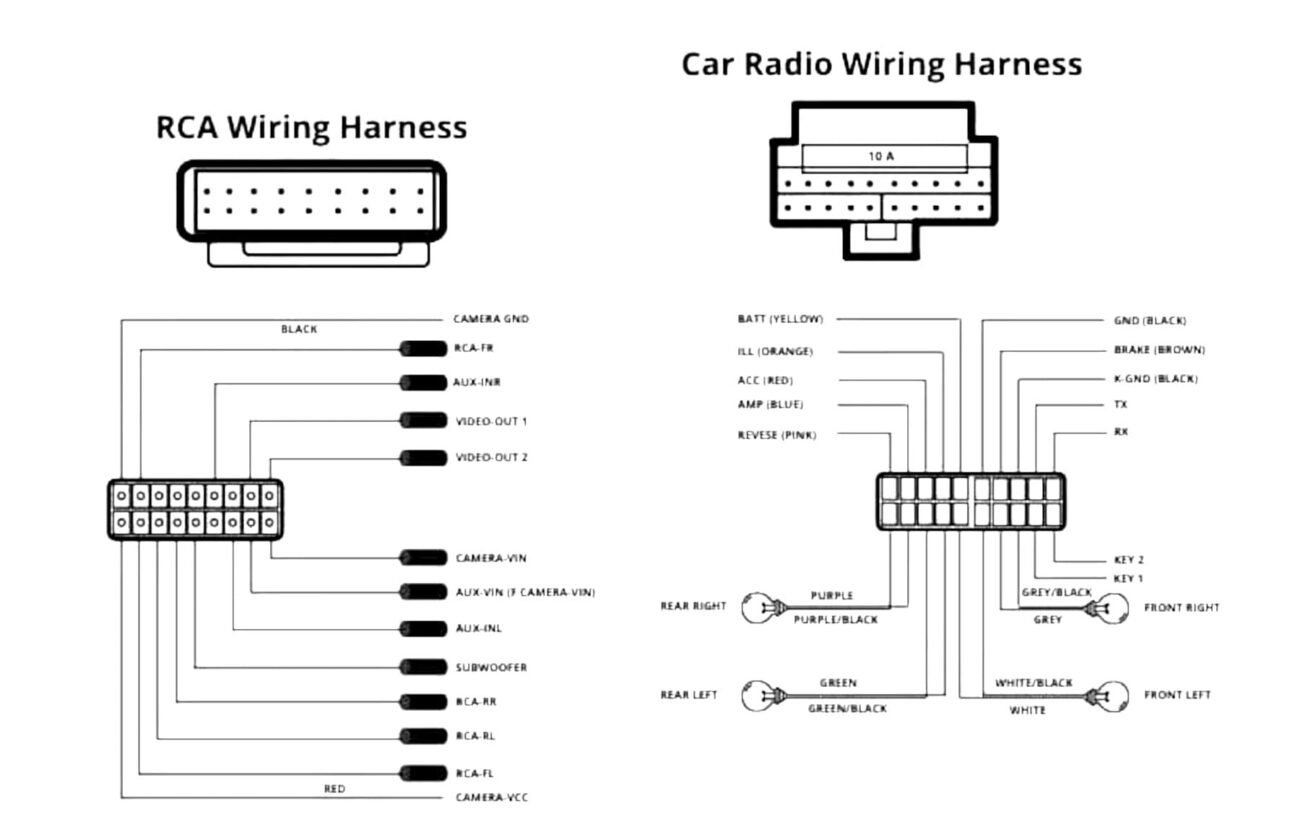
Pioneer Dmh 160bt Wiring Diagram
Pioneer Dmh 160bt Wiring Diagram
The Pioneer DMH 160BT wiring diagram provides a visual guide for connecting your unit to your vehicle’s electrical system. It includes color codes and pin assignments that simplify the installation process. Following this diagram helps avoid common mistakes.
When installing the DMH 160BT, start by identifying the power, ground, and speaker wires. Each wire has a specific function, and connecting them correctly is vital for optimal performance. Refer to the wiring diagram for accurate connections.
Additionally, ensure that you have the right tools on hand before starting the installation. Wire strippers, crimpers, and connectors will make the job easier. A clean workspace also helps prevent any accidental damage during the process.
Once everything is connected according to the wiring diagram, test your system before finalizing the installation. This step ensures that all components are working correctly and that you can enjoy your favorite tunes without interruptions.
Taking the time to understand the Pioneer DMH 160BT wiring diagram can significantly enhance your audio experience. With proper installation, you’ll be ready to hit the road with great sound quality and functionality.