Understanding how to wire a light switch can seem daunting, but it doesn’t have to be. With the right guidance and a simple wiring diagram, anyone can tackle this task with confidence. Let’s break it down step by step.
Having a clear visual reference is essential when working on electrical projects. A simple wiring diagram for a light switch can help you visualize the connections needed. This makes the process much easier and safer for DIY enthusiasts.

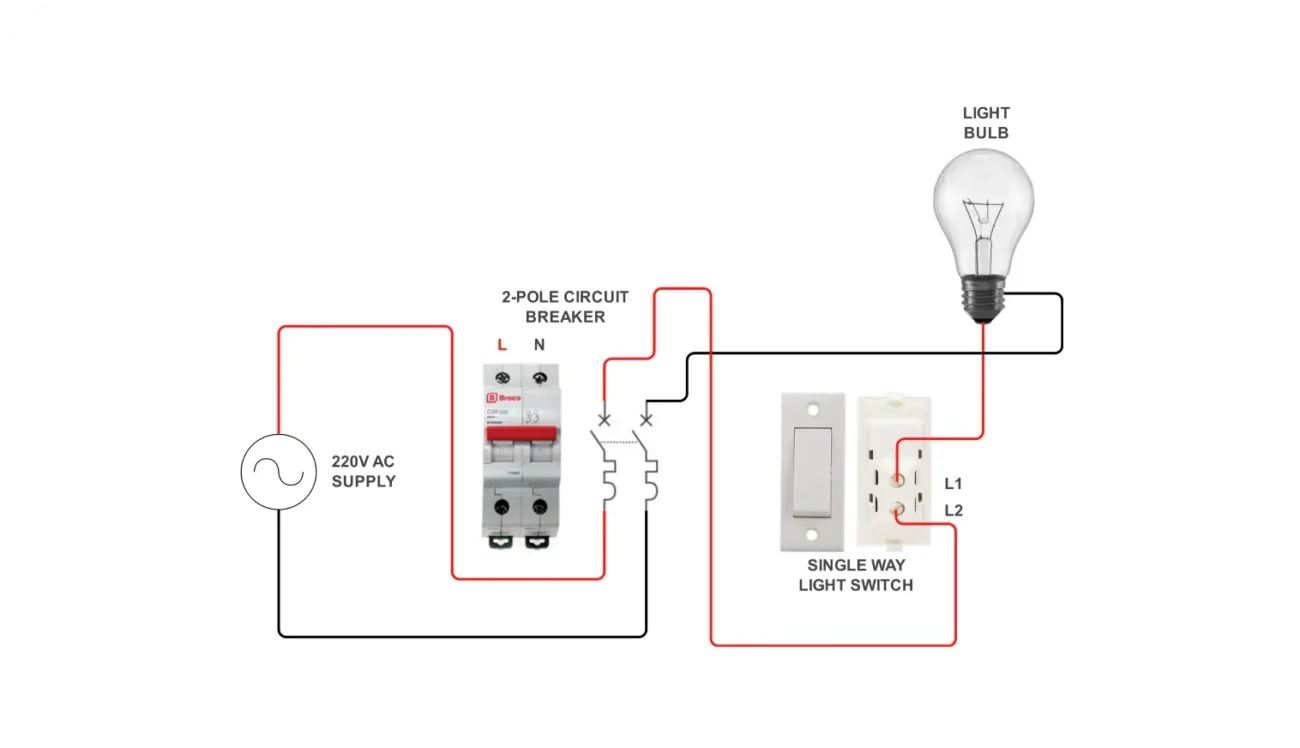
Simple Wiring Diagram For Light Switch
Simple Wiring Diagram For Light Switch
A basic light switch typically has two terminals. One terminal connects to the power source, while the other connects to the light fixture. Understanding these connections is crucial for a successful installation.
When using a simple wiring diagram for a light switch, ensure you identify the hot wire, usually black or red, and the neutral wire, typically white. Properly connecting these wires will ensure your switch functions correctly.
Before starting any electrical work, always turn off the power at the circuit breaker. This precaution helps prevent accidents and ensures your safety while working on the wiring. Double-checking that the power is off is a smart practice.
Once you’ve made your connections according to the diagram, secure everything in place and restore power. Test your light switch to ensure it operates as expected. If everything works smoothly, you’ve successfully completed your project!
With a simple wiring diagram for a light switch and some basic knowledge, you can confidently handle this task. Remember to prioritize safety and enjoy your newfound skills in home improvement.