Understanding electrical wiring can seem daunting, but with the right guidance, it becomes manageable. One common setup many homeowners encounter is the three-way switch, which allows control of a single light from two different locations.
Learning how to wire a three-way switch can enhance your home’s functionality and convenience. This setup is especially useful in larger rooms or hallways where multiple entry points exist. Let’s explore the essentials of a three-way switch wiring diagram.

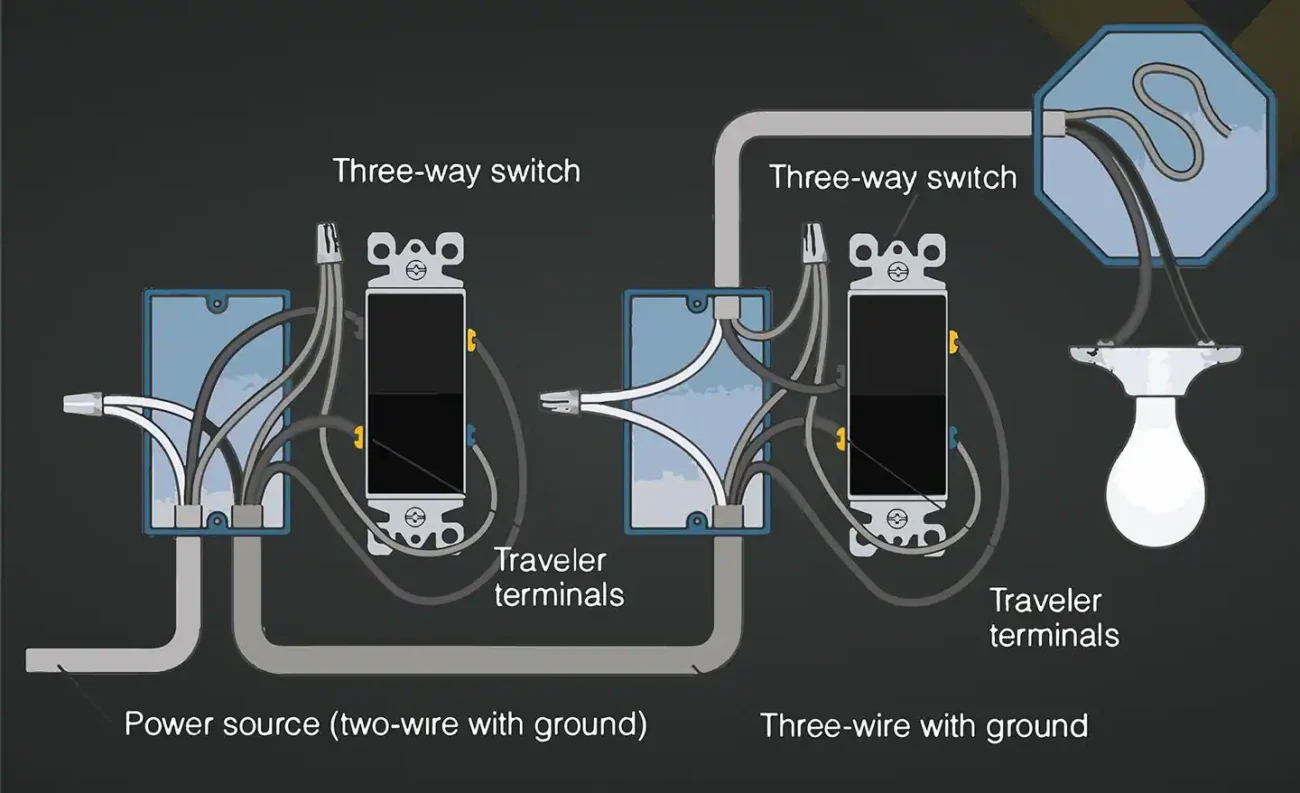
Three-Way Switch Wiring Diagram
Three-Way Switch Wiring Diagram
A three-way switch wiring diagram typically includes two switches and one light fixture. The switches are connected by traveler wires, allowing them to communicate and control the light effectively. Understanding this diagram is crucial for successful installation.
When wiring, ensure you identify the common terminal on each switch. This terminal connects to the power source and the light fixture. Properly connecting these terminals is vital for the system to function correctly.
Additionally, using color-coded wires simplifies the process. Typically, black wires are used for power, while red or white wires serve as travelers. Following these color codes helps prevent confusion during installation.
Lastly, always prioritize safety when working with electricity. If you’re unsure about any step in the process, consider consulting a professional electrician. They can provide valuable insights and ensure everything is up to code.
Mastering three-way switch wiring can significantly improve your home’s lighting control. With practice and attention to detail, you’ll find it easier to navigate this essential electrical task.