Understanding your vehicle’s electrical system can be a bit daunting, especially when it comes to wiring diagrams. The Toyota 3 Pin Alternator Wiring Diagram is essential for anyone looking to troubleshoot or replace their alternator effectively.
Having a clear wiring diagram can save you time and frustration. It helps you identify the correct connections and ensures that your alternator functions properly, providing the necessary power to your vehicle.

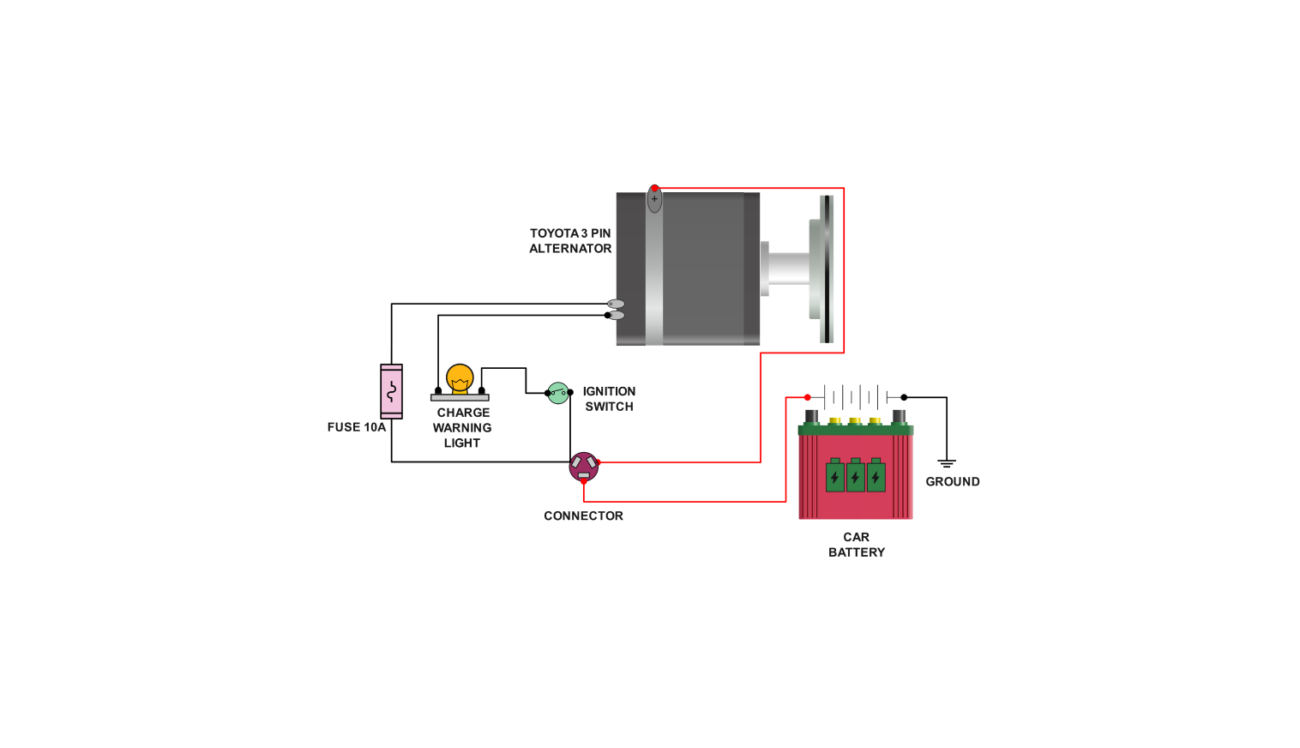
Toyota 3 Pin Alternator Wiring Diagram
Toyota 3 Pin Alternator Wiring Diagram
The Toyota 3 Pin Alternator Wiring Diagram typically includes three main terminals: B+, S, and L. Each terminal serves a specific purpose in the alternator’s operation, making it crucial to understand their functions.
Terminal B+ connects directly to the battery, supplying power from the alternator. Terminal S is the sensing terminal that monitors battery voltage, while terminal L is responsible for the warning light on your dashboard.
When working with this wiring diagram, ensure you have the right tools and follow safety precautions. A multimeter can help you test connections and ensure everything is functioning as it should.
In conclusion, mastering the Toyota 3 Pin Alternator Wiring Diagram can empower you to handle electrical issues confidently. With a little patience and practice, you’ll be well on your way to maintaining your vehicle’s electrical system.