Understanding electrical systems can be daunting, especially when it comes to wiring configurations. One common setup many homeowners encounter is the two-way light switch, which allows control of a single light from two different locations.
Learning how to wire a two-way switch can enhance your home’s functionality and safety. With the right diagram and a bit of patience, you can tackle this project with confidence.

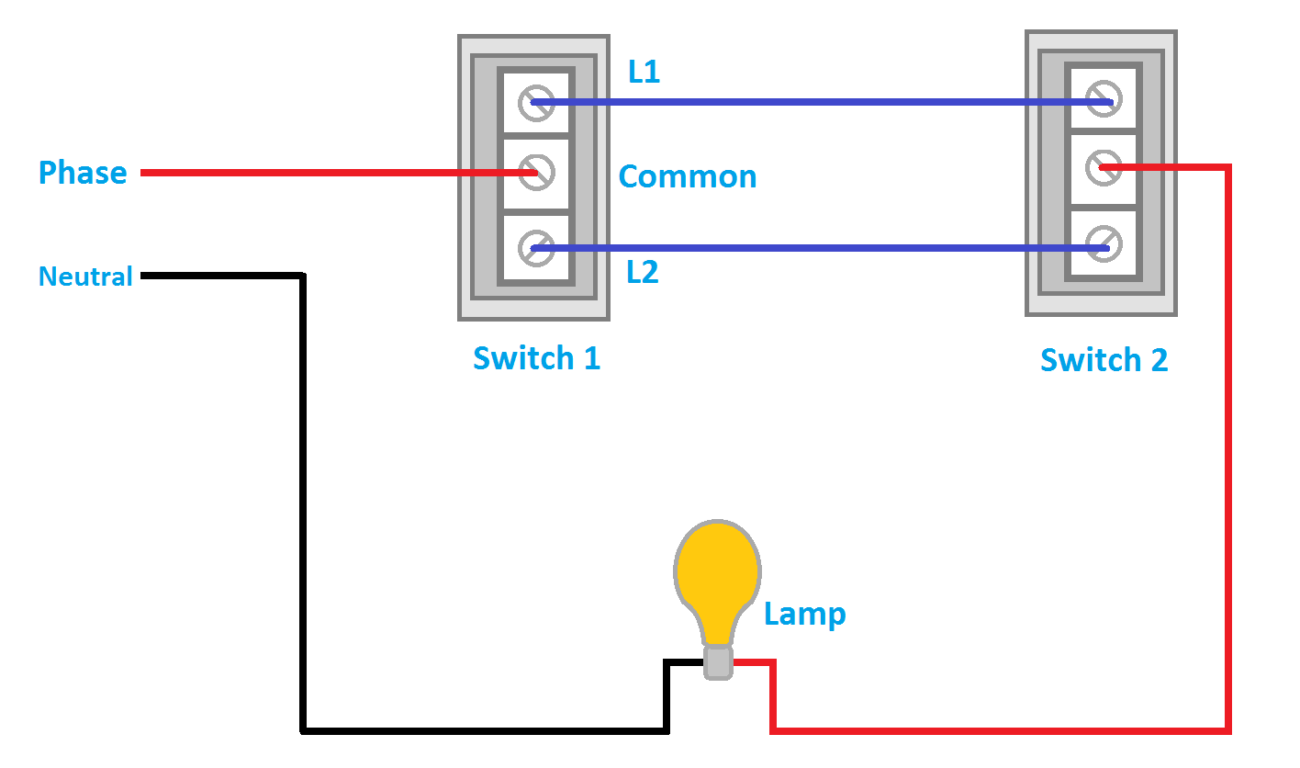
Two Way Light Switch Wiring Diagram
Two Way Light Switch Wiring Diagram
The two-way light switch wiring diagram is essential for visualizing how the switches connect to the light fixture. This diagram typically includes two switches and a light, showing the connections clearly.
When wiring, ensure you turn off the power at the circuit breaker. This step is crucial for your safety. Following the diagram closely will help you connect the wires correctly without confusion.
Each switch has three terminals: common, L1, and L2. The common terminal connects to the power source or light fixture, while L1 and L2 connect to the other switch. Understanding these connections is key to successful installation.
After completing the wiring, double-check all connections before restoring power. Test the switches to ensure they operate correctly. If everything works as intended, you’ve successfully wired your two-way light switch!
Mastering the two-way light switch wiring can significantly improve your home’s lighting control. With practice and attention to detail, you’ll find this task manageable and rewarding.