Understanding the wiring of your security system can seem daunting, but it doesn’t have to be. With the right resources, you can easily navigate the complexities of the Vista 20p system and ensure everything is set up correctly.
Having a clear wiring diagram is essential for both installation and troubleshooting. This guide will help you grasp the basics of the Vista 20p wiring diagram, making your security setup much more manageable.

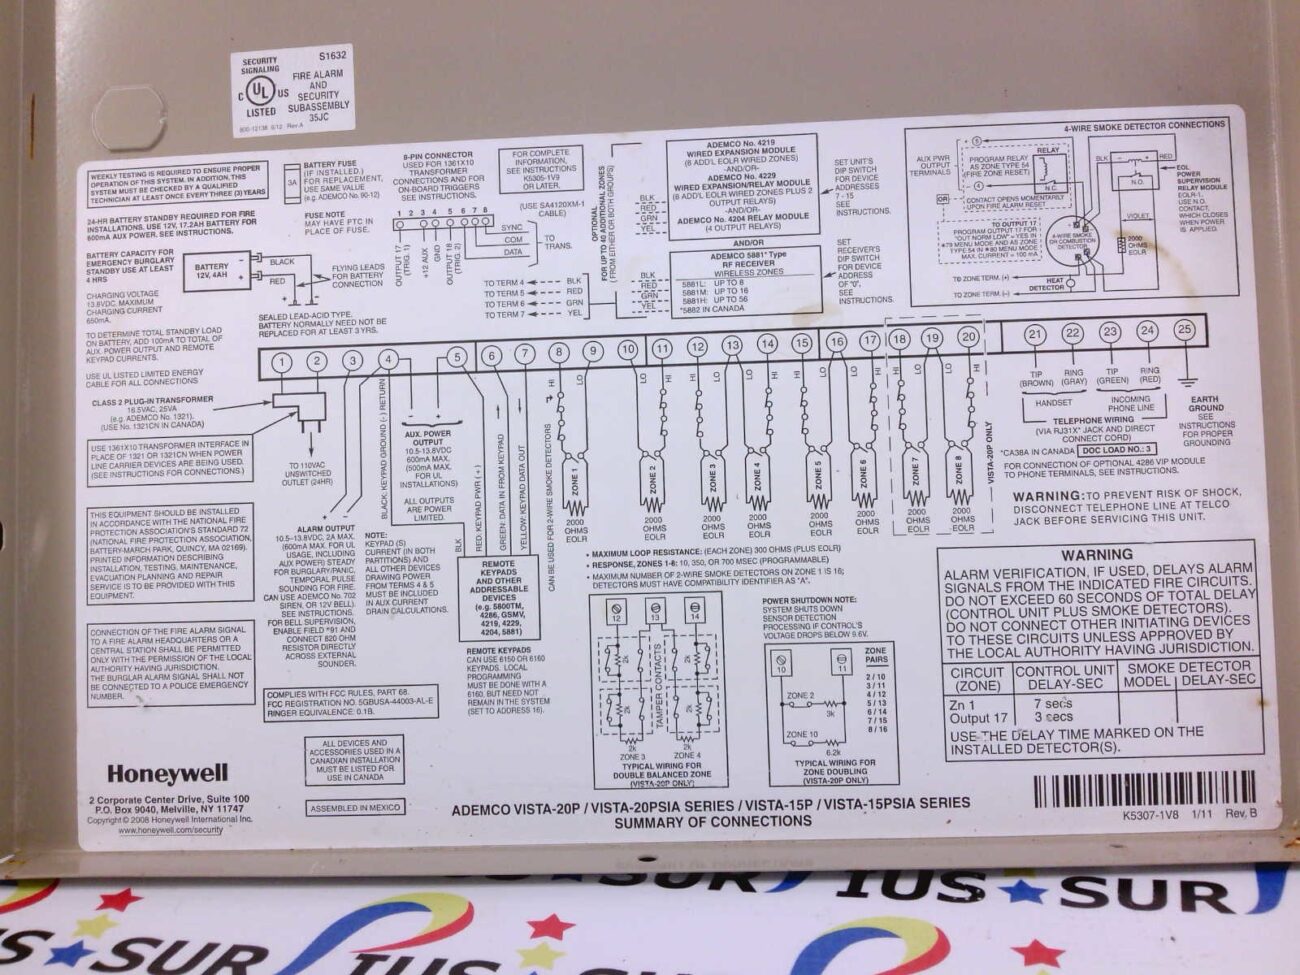
Vista 20p Wiring Diagram
Vista 20p Wiring Diagram
The Vista 20p wiring diagram provides a visual representation of how to connect various components. It includes details on connecting sensors, keypads, and other devices to the main control panel.
Each component in the Vista 20p system has specific wiring requirements. For instance, door and window sensors typically connect to designated zones on the panel, ensuring accurate monitoring of your property.
Additionally, understanding the power supply connections is crucial. The Vista 20p requires a reliable power source to function effectively, so knowing where to connect the transformer is vital for uninterrupted service.
Lastly, always refer to the manufacturer’s guidelines when working with your wiring diagram. This ensures that you follow best practices and maintain the integrity of your security system.
By familiarizing yourself with the Vista 20p wiring diagram, you can confidently install or troubleshoot your security system. A well-connected system enhances your home’s safety and gives you peace of mind.