Understanding how to wire a 3-way switch can seem daunting, but with the right guidance, it becomes manageable. This knowledge not only enhances your DIY skills but also improves your home’s functionality and lighting control.
Many homeowners seek to install 3-way switches for better convenience. These switches allow you to control a single light fixture from two different locations, making them perfect for hallways or large rooms.

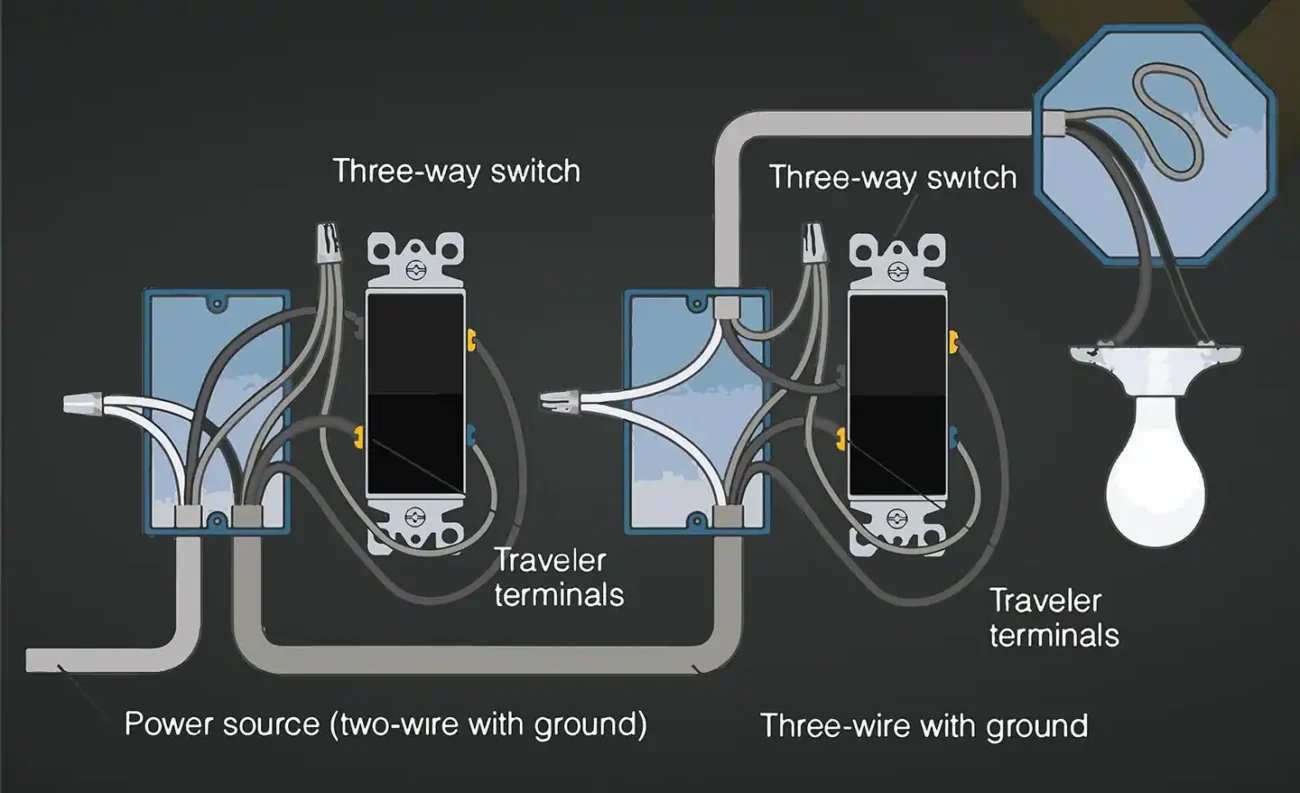
Wiring A 3-Way Switch Diagram
Wiring A 3-Way Switch Diagram
To start, gather your tools: a voltage tester, wire strippers, and a screwdriver. Familiarize yourself with the wiring diagram for a 3-way switch. This diagram will guide you through the connections needed for successful installation.
Next, turn off the power at the circuit breaker to ensure safety. Identify the common terminal on each switch; this is where the power source connects. The traveler terminals will connect the two switches together.
When wiring, use color-coded wires: typically black for hot wires and white for neutral. Connect the black wire from the power source to the common terminal of one switch and run a black wire to the other switch’s common terminal.
Finally, connect the traveler wires between both switches. Once everything is connected, double-check your work before restoring power. Testing the switches will confirm that they operate correctly.
With these steps, wiring a 3-way switch can be an easy project. Enjoy the newfound convenience of controlling your lights from multiple locations in your home!