Installing a ceiling fan can be a great way to enhance comfort in your home. Understanding the wiring process is essential for a successful installation, ensuring safety and functionality. A clear wiring diagram can simplify this task significantly.
Many homeowners feel intimidated by electrical work, but with the right guidance, it can be manageable. Familiarizing yourself with the Wiring A Ceiling Fan Diagram is a crucial first step. This diagram provides a visual representation of how to connect the wires correctly.

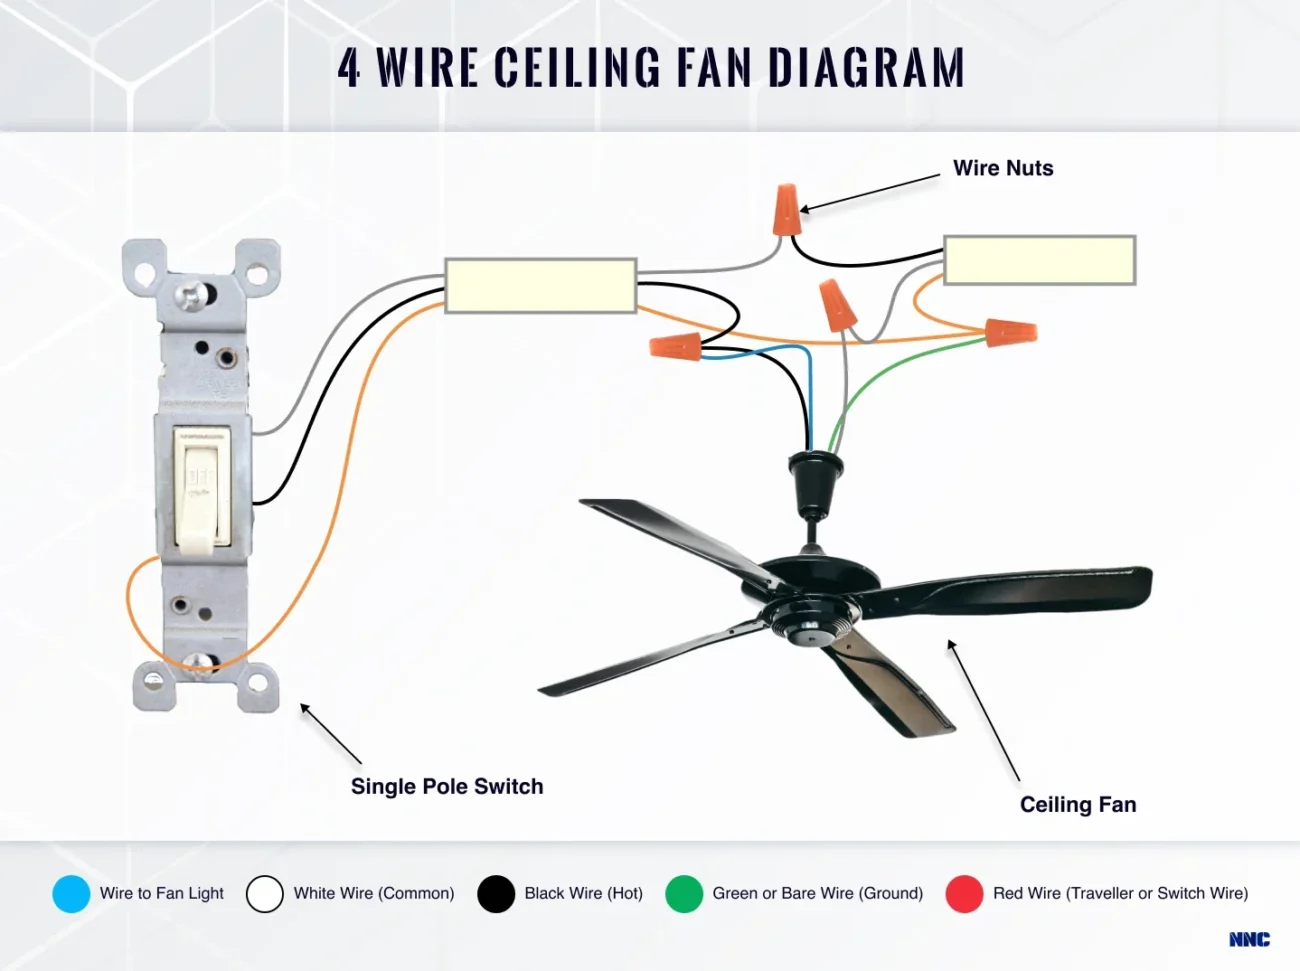
Wiring A Ceiling Fan Diagram
Wiring A Ceiling Fan Diagram
The Wiring A Ceiling Fan Diagram typically includes color-coded wires: black for power, white for neutral, and green or bare for ground. Knowing these colors helps you connect the fan safely and effectively.
Before starting, ensure you turn off the power at the circuit breaker. This precaution protects you from electrical shocks while working on the fan installation. Always double-check that the power is off using a voltage tester.
Once you have confirmed the power is off, follow the diagram closely. Connect the black wire from the ceiling to the black wire of the fan, and do the same with the white wires. Finally, secure the ground wire to prevent any electrical hazards.
After completing the connections, mount the fan securely and restore power to test it. If everything works correctly, you can enjoy your newly installed ceiling fan without any worries!
With a little patience and attention to detail, wiring a ceiling fan can be an easy DIY project. Following a clear diagram ensures safety and efficiency throughout your installation process.