Understanding electrical systems can be daunting, especially when it comes to wiring. However, grasping the basics of wiring a relay can simplify many projects and enhance your skills. This knowledge is essential for DIY enthusiasts and professionals alike.
Relays are crucial components in various electrical applications, acting as switches that control larger currents. Learning how to wire a relay diagram can help you manage these circuits efficiently and safely. Let’s dive into the essentials.

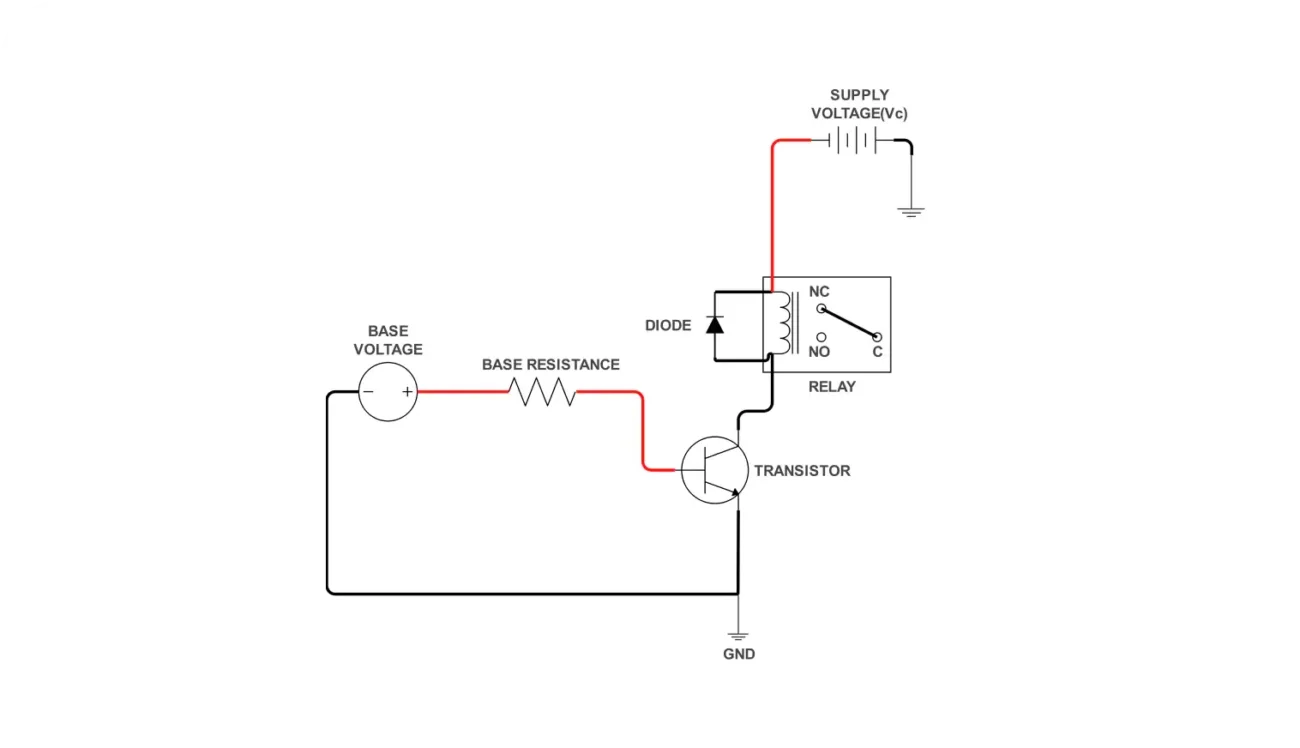
Wiring A Relay Diagram
Wiring A Relay Diagram
When wiring a relay, start by identifying the relay terminals. Typically, there are four or five terminals: two for the coil and two or three for the switch contacts. Understanding these connections is vital for proper installation.
The coil terminals activate the relay when voltage is applied. Ensure you connect these to your control circuit correctly. Once the coil is energized, it closes or opens the switch contacts, allowing current to flow through your load.
Next, focus on the switch contacts. Depending on your application, you may use normally open (NO) or normally closed (NC) contacts. NO contacts allow current to flow only when the relay is activated, while NC contacts do the opposite.
Always double-check your wiring against the relay diagram before powering up. This precaution helps prevent short circuits or damage to components. A clear understanding of wiring a relay diagram will boost your confidence in handling electrical projects.
Mastering wiring a relay diagram opens up new possibilities for your electrical projects. With practice and attention to detail, you’ll find this skill invaluable in various applications, making your work more efficient and enjoyable.