Understanding how to install a ceiling fan can enhance your home’s comfort and style. A clear wiring diagram is essential for ensuring safety and functionality during the installation process. Let’s explore the basics of wiring a ceiling fan.
Having a reliable wiring diagram ceiling fan can simplify your installation experience. It provides a visual guide that helps you connect wires correctly, avoiding potential hazards and ensuring your fan operates efficiently.

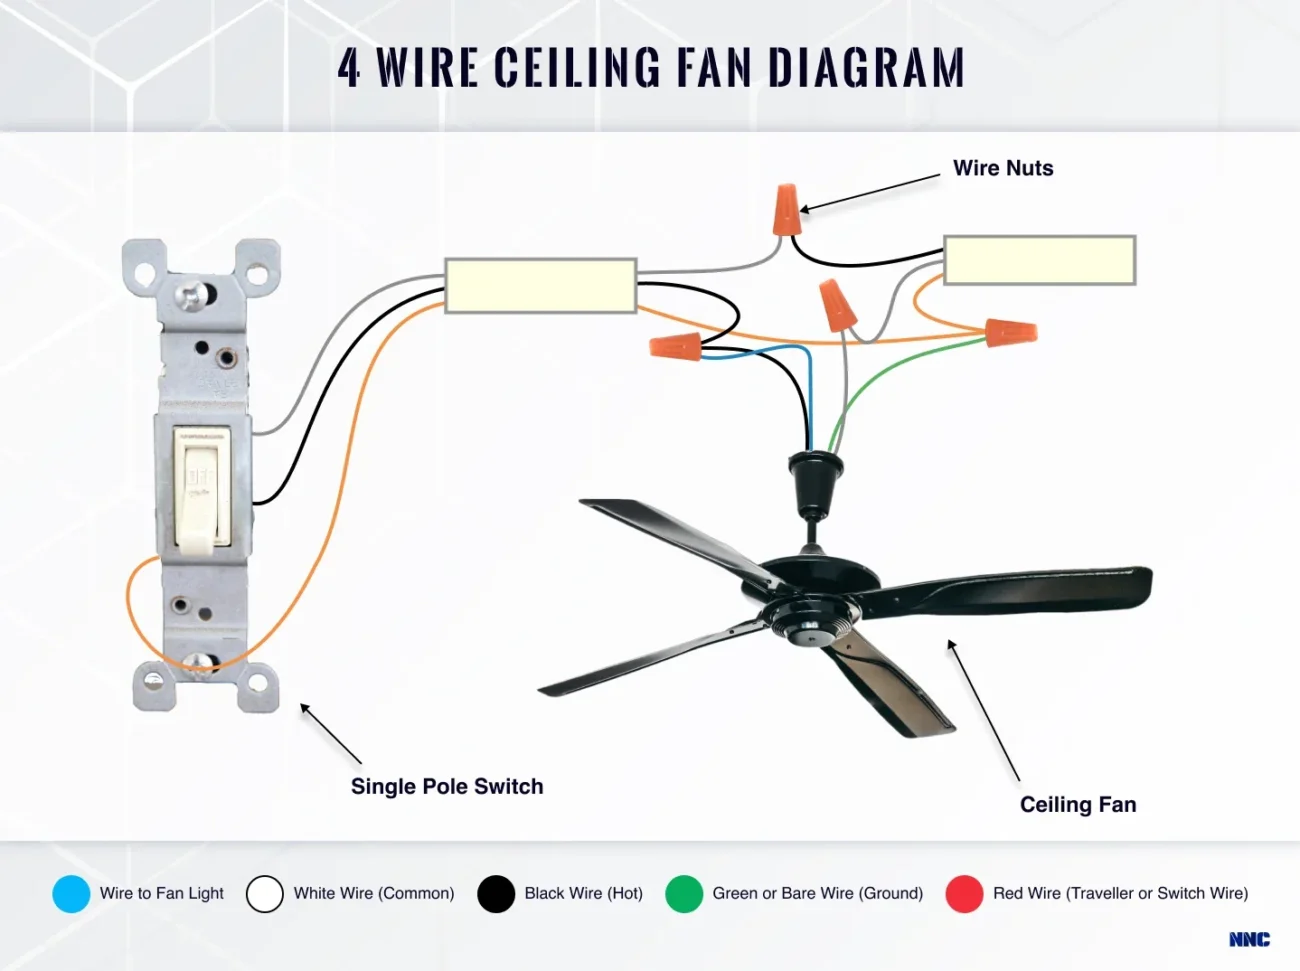
Wiring Diagram Ceiling Fan
Wiring Diagram Ceiling Fan
Before starting, gather all necessary tools and materials. You’ll need wire connectors, electrical tape, and a voltage tester. Familiarizing yourself with the wiring diagram ceiling fan will make the process smoother and more manageable.
Typically, a ceiling fan has three main wires: the black (hot), white (neutral), and green or bare (ground). The wiring diagram will show you how to connect these wires to your home’s electrical system safely.
Always turn off the power at the circuit breaker before beginning any electrical work. This precaution helps prevent accidents while you follow the wiring diagram ceiling fan to connect the wires correctly.
Once everything is connected according to the diagram, secure all connections with wire connectors and electrical tape. Finally, restore power and test your ceiling fan to ensure it operates as expected.
Following these steps will help you successfully install your ceiling fan with confidence. A proper wiring diagram is crucial for a safe and efficient installation, making your home more comfortable and stylish.