Understanding the wiring diagram for your 24v trolling motor can significantly enhance your boating experience. A clear diagram helps you connect components correctly, ensuring optimal performance on the water.
Whether you’re a seasoned boater or a beginner, knowing how to read and implement a wiring diagram is essential. It not only saves time but also prevents potential issues that could arise from incorrect wiring.

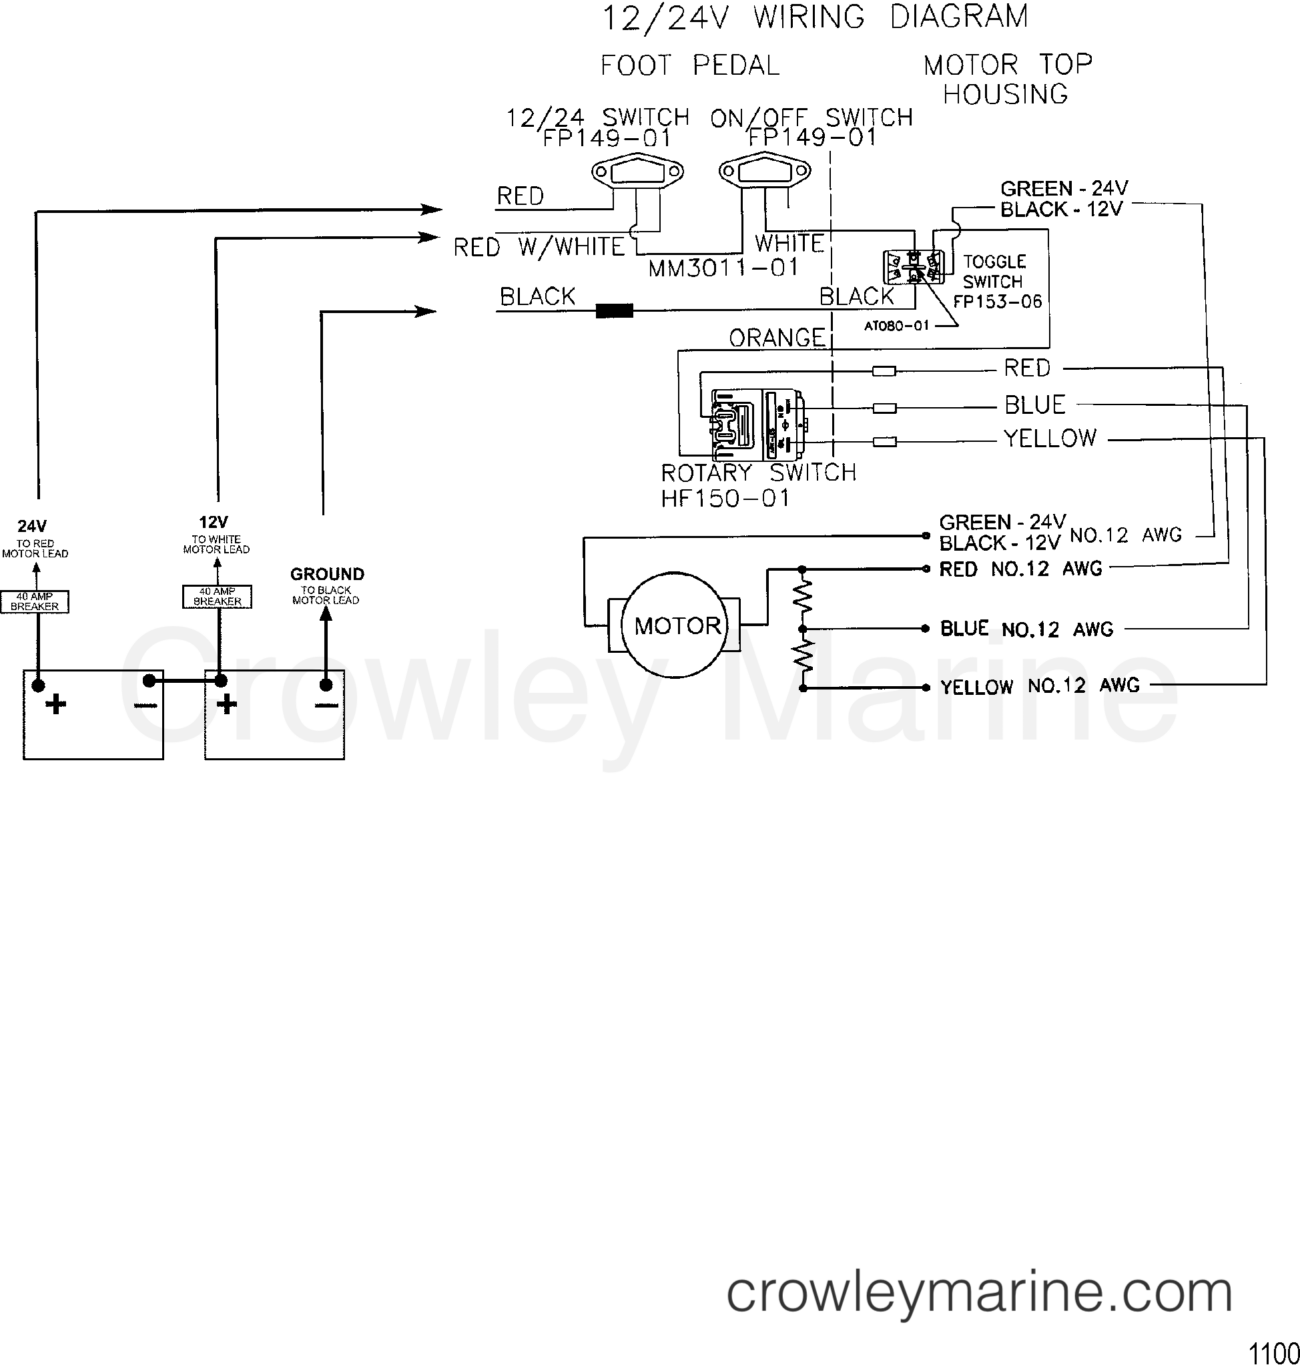
Wiring Diagram For 24v Trolling Motor
Wiring Diagram For 24v Trolling Motor
A wiring diagram for a 24v trolling motor typically includes the battery, motor, and control connections. Each component plays a crucial role in ensuring your motor operates efficiently and reliably.
When setting up your trolling motor, start by connecting the batteries in series to achieve the required 24 volts. This configuration is vital for powering the motor effectively and maximizing its performance.
Next, refer to the wiring diagram to connect the motor leads correctly. Ensuring that positive and negative connections are accurate will prevent damage and enhance the longevity of your equipment.
Lastly, always double-check your connections before powering up the motor. A quick inspection can save you from troubleshooting issues later on, allowing you to enjoy your time on the water without worries.
Mastering the wiring diagram for your 24v trolling motor is a valuable skill for any boater. With proper understanding and execution, you can ensure a smooth and enjoyable boating experience every time.