Understanding how to wire an alternator can be a bit daunting, especially if you’re new to automotive repairs. However, with the right guidance, you can easily grasp the essentials of a wiring diagram for a 3 wire alternator.
Many car enthusiasts find that having a clear wiring diagram simplifies the installation process. This guide will help you navigate through the basic connections needed for your 3 wire alternator setup.

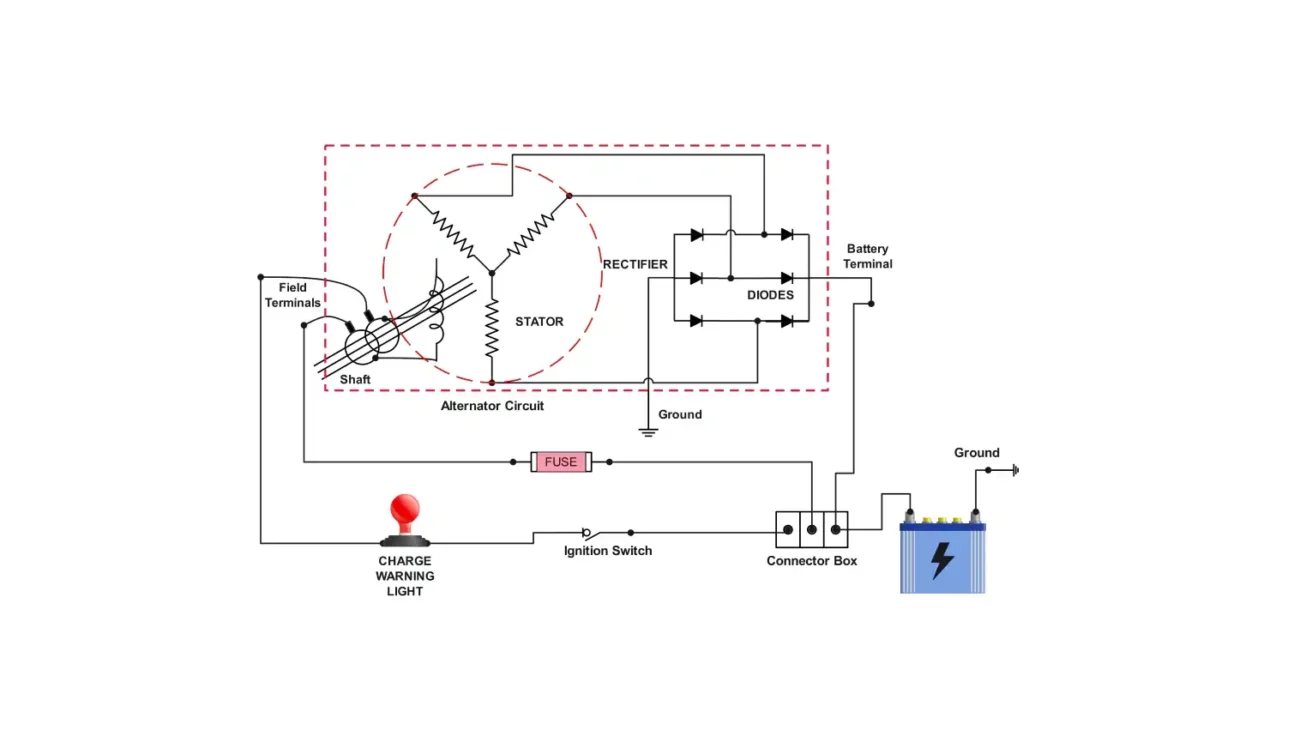
Wiring Diagram For 3 Wire Alternator
Wiring Diagram For 3 Wire Alternator
The 3 wire alternator typically includes three main connections: the battery, the ignition switch, and the voltage regulator. Each of these plays a crucial role in ensuring your vehicle’s electrical system functions smoothly.
First, connect the battery terminal to the alternator’s output. This connection allows the alternator to charge the battery while the engine is running. Make sure to use appropriate gauge wires for safety and efficiency.
Next, connect the ignition switch to the alternator’s field terminal. This connection activates the alternator when you start your vehicle, ensuring it begins charging immediately. A reliable connection here is essential for optimal performance.
Lastly, link the voltage regulator to manage the output voltage from the alternator. This component prevents overcharging and protects your battery and electrical system from damage. Proper installation of this connection is vital for longevity.
By following these steps and referring to a wiring diagram for a 3 wire alternator, you can confidently tackle your vehicle’s electrical needs. With practice, this task will become second nature and enhance your automotive skills.