Understanding how to wire a ceiling fan light can seem daunting, but it’s easier than you might think. With the right wiring diagram and a bit of patience, you can enhance your space with stylish lighting.
Many homeowners choose to install ceiling fans for their energy efficiency and aesthetic appeal. Knowing the correct wiring setup is crucial for safe and effective installation. Let’s explore the wiring diagram for ceiling fan light.

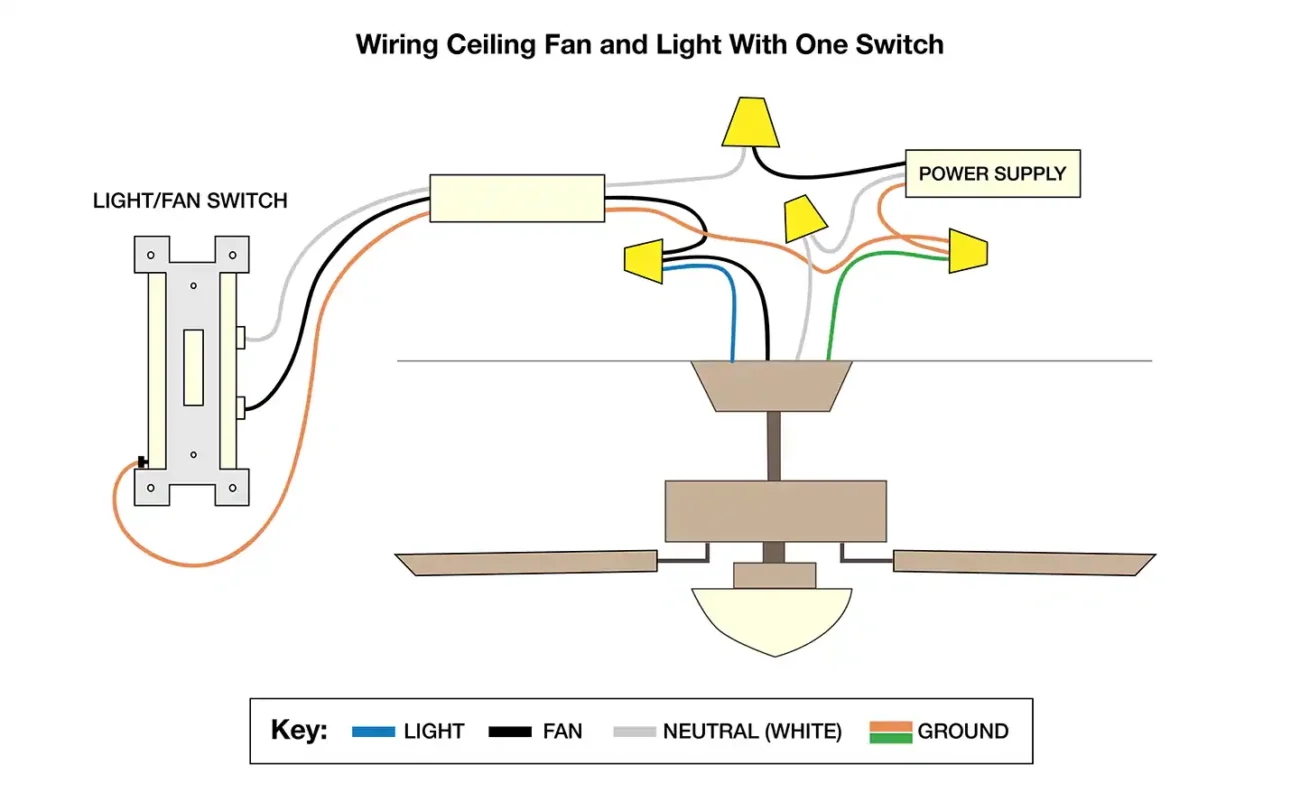
Wiring Diagram For Ceiling Fan Light
Wiring Diagram For Ceiling Fan Light
A wiring diagram for a ceiling fan light typically includes several key components: the fan, light fixture, switch, and power source. Each element must be connected properly to ensure functionality and safety.
First, identify the power source and ensure it’s turned off before starting any work. Next, connect the fan wires to the corresponding wires from the power source according to the diagram. This usually involves matching colors: black to black, white to white.
After connecting the fan, it’s time to wire the light fixture. The light usually connects to the same power source as the fan. Ensure that all connections are secure and insulated to prevent any electrical hazards.
Finally, double-check all connections against your wiring diagram for accuracy. Once everything is in place, restore power and test your ceiling fan light. Enjoy your newly installed fixture!
With a clear wiring diagram for your ceiling fan light, installation becomes a straightforward task. Take your time, follow each step carefully, and soon you’ll have a beautifully lit room with a functional ceiling fan.