Understanding the electrical system of your golf cart can enhance its performance and longevity. A clear wiring diagram is essential for troubleshooting and maintenance, ensuring you keep your cart running smoothly.
Many golf cart owners find themselves confused by the battery setup. Knowing how to read a wiring diagram for golf cart batteries can simplify repairs and upgrades, making the process much more manageable.

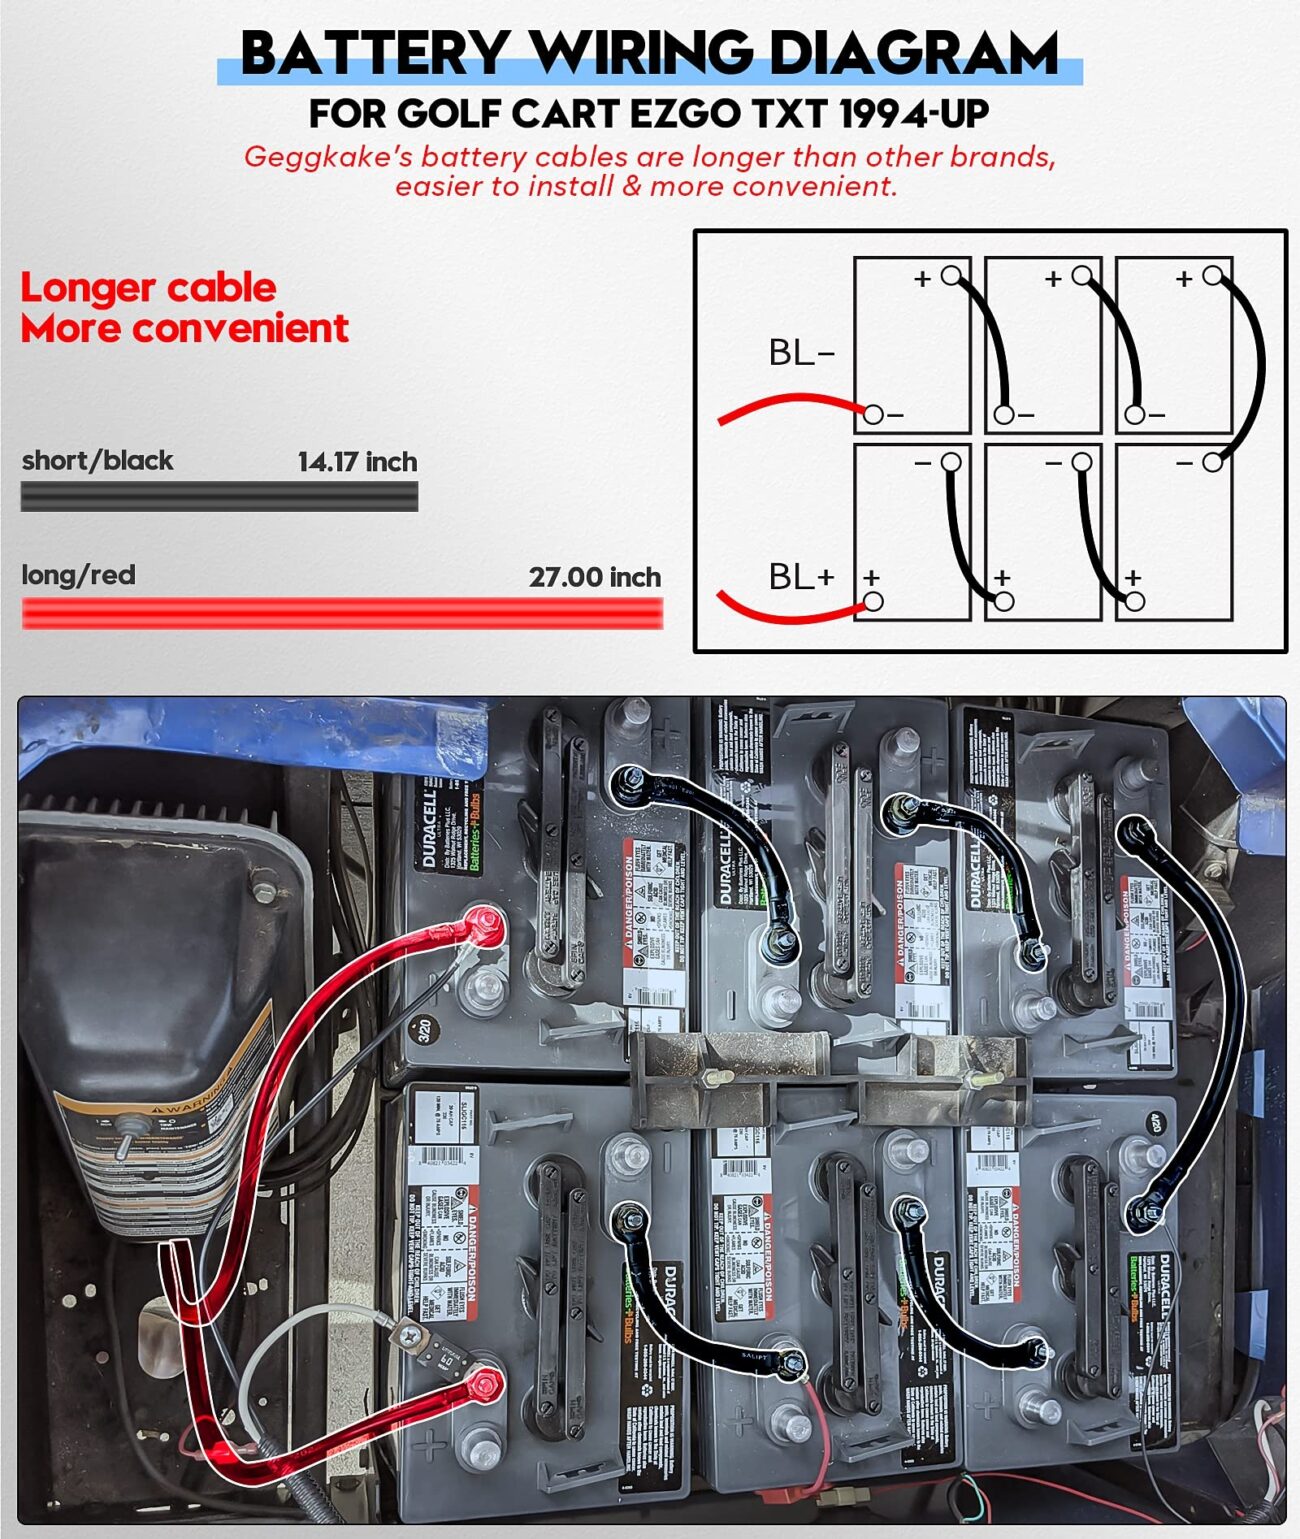
Wiring Diagram For Golf Cart Batteries
Wiring Diagram For Golf Cart Batteries
A wiring diagram for golf cart batteries illustrates how each component connects. This visual guide helps you identify positive and negative terminals, ensuring correct connections to avoid electrical issues.
When working with batteries, safety is paramount. Always disconnect the power before making any changes. Following the wiring diagram closely will help prevent short circuits and potential damage to your golf cart.
Regularly checking your battery connections can prevent performance issues. A well-maintained wiring system ensures that your golf cart operates efficiently, providing a smooth ride on the course or around the neighborhood.
In conclusion, having a reliable wiring diagram for golf cart batteries is invaluable for any owner. It not only aids in maintenance but also enhances your understanding of your cart’s electrical system, leading to better performance.