Understanding how to wire a light switch can seem daunting, but with the right guidance, it becomes a straightforward task. Many homeowners find themselves needing to replace or install switches, making knowledge of wiring essential.
A wiring diagram serves as a visual guide, simplifying the process. By following these diagrams, you can ensure safety and functionality in your electrical projects. Let’s explore the basics of a wiring diagram for light switches.

Wiring Diagram For Light Switch
Wiring Diagram For Light Switch
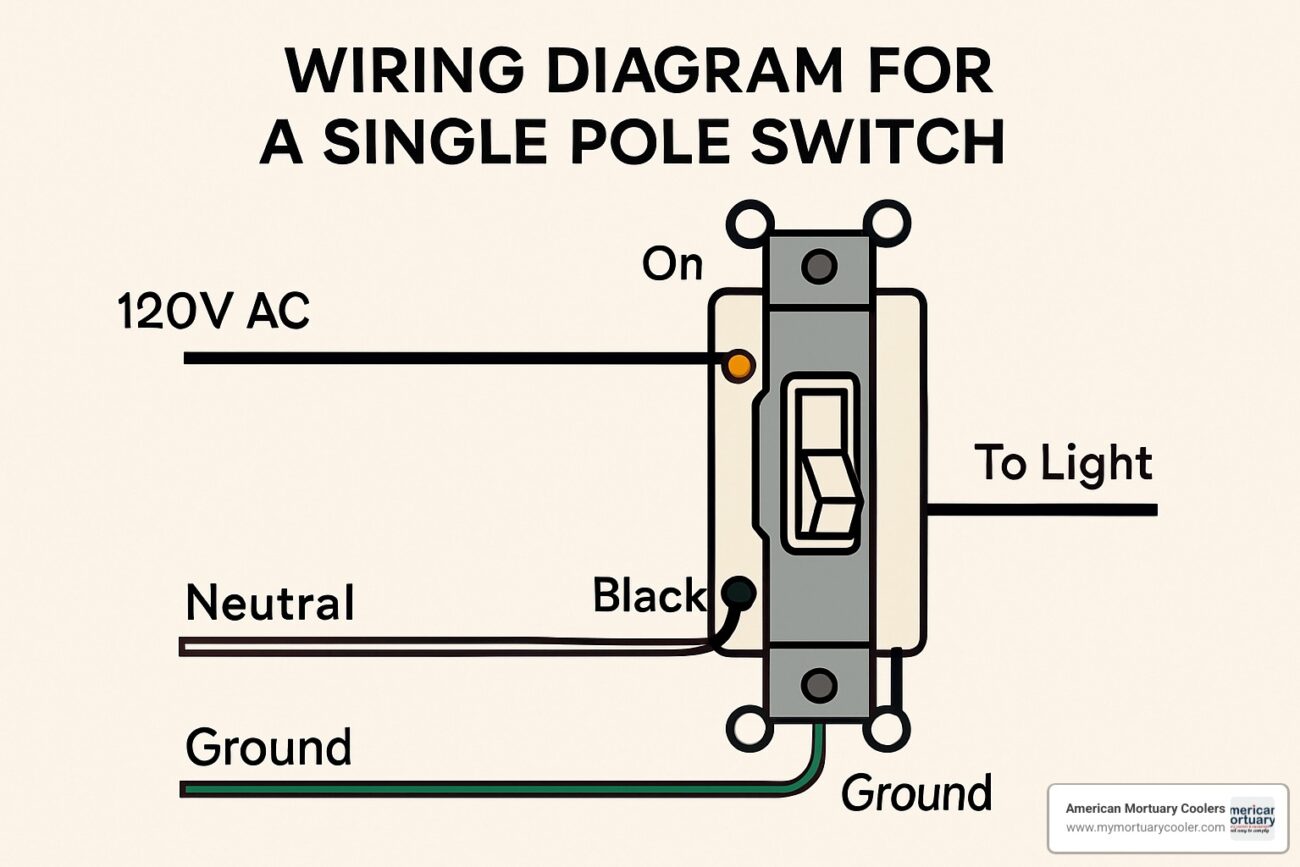
A wiring diagram for a light switch typically includes symbols representing the switch, light fixture, and power source. These symbols help you visualize how everything connects, making installation easier and more efficient.
When working with a single-pole switch, the diagram shows two terminals. One terminal connects to the power source, while the other connects to the light fixture. This simple setup is common in many homes.
If you’re dealing with a three-way switch setup, the diagram becomes slightly more complex. It involves two switches controlling one light fixture from different locations. Understanding this layout is crucial for proper installation.
Always remember to turn off the power before starting any electrical work. Safety should be your top priority when dealing with wiring. Following the wiring diagram closely will help prevent mistakes and ensure everything functions correctly.
With a clear understanding of wiring diagrams for light switches, you can confidently tackle your electrical projects. Whether replacing an old switch or installing a new one, these diagrams are invaluable tools for success.