Understanding how to set up outdoor lighting can be a game changer for your home. One essential component in this setup is the photocell, which automatically turns lights on and off based on daylight. This feature not only enhances convenience but also saves energy.
Creating a wiring diagram for your photocell can simplify the installation process. By visualizing the connections, you can ensure everything is set up correctly, reducing the chances of errors and making your outdoor lighting efficient.

Wiring Diagram For Photocell
Wiring Diagram For Photocell
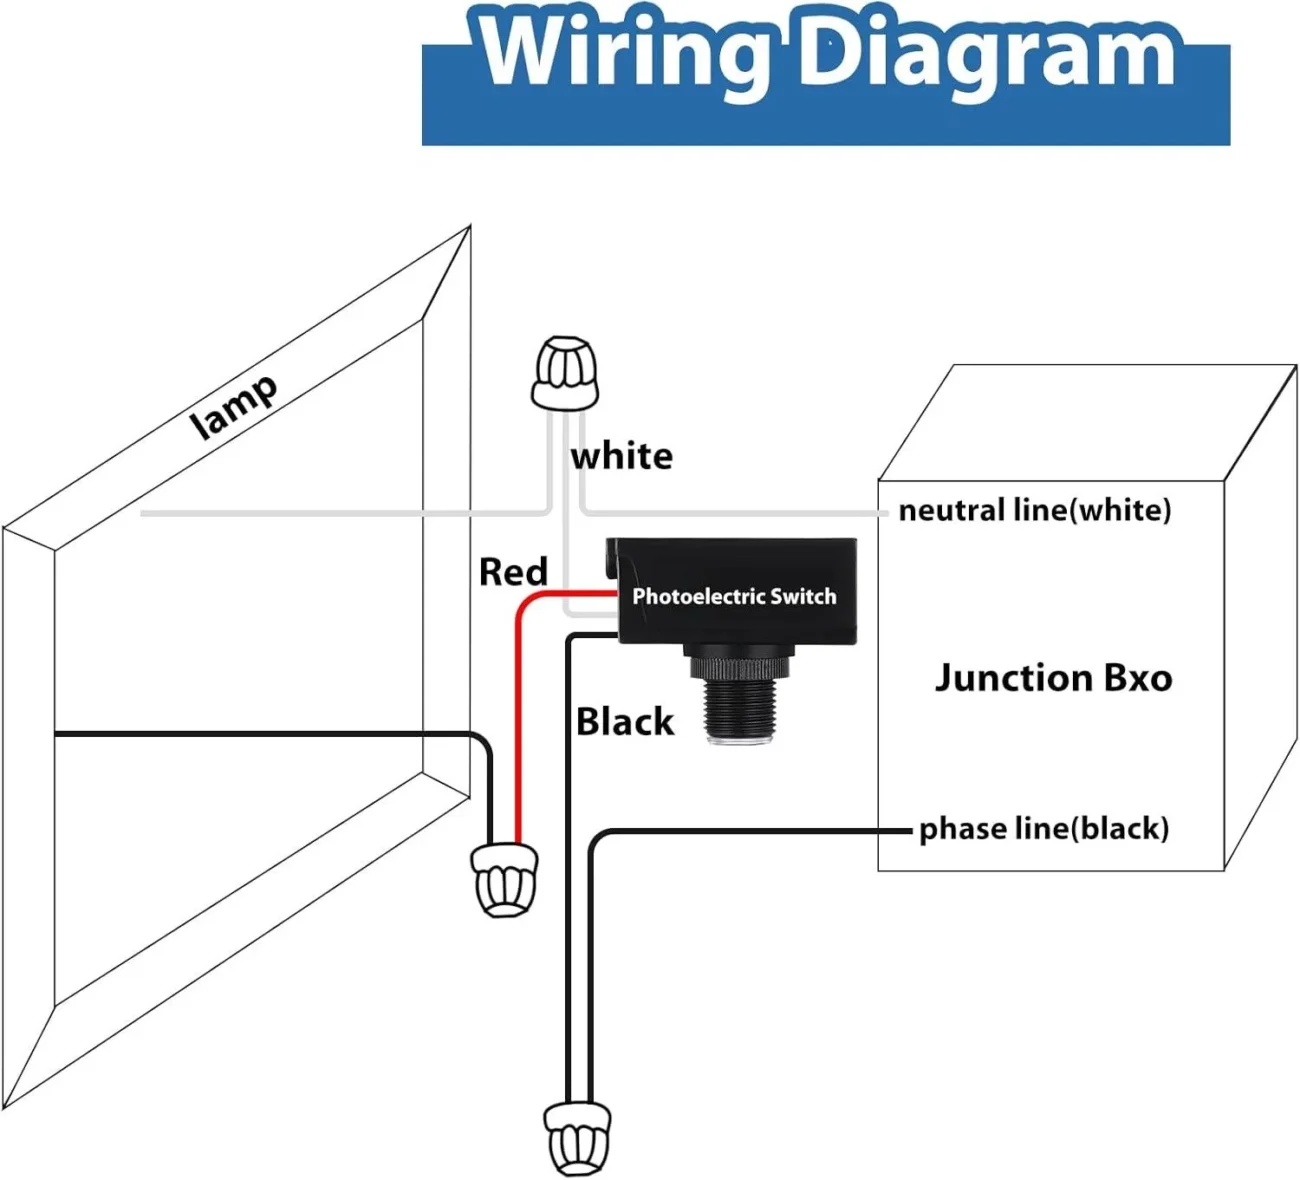
A wiring diagram for photocell lighting typically includes the photocell itself, the light fixture, and the power source. Understanding these components will help you connect them properly for optimal performance.
When wiring your photocell, start by identifying the terminals on the device. Usually, there are three: one for the power source, one for the light fixture, and one for the load. Following the diagram closely will guide you through this process.
It’s crucial to ensure that all connections are secure and insulated to prevent any electrical hazards. Double-checking your work can save you from potential issues down the line, ensuring your lights function as intended.
Once everything is wired correctly, test your setup by covering the photocell to simulate darkness. If your lights turn on, congratulations! You’ve successfully installed your photocell lighting system.
With a clear wiring diagram for your photocell, setting up outdoor lighting becomes straightforward and efficient. Enjoy the benefits of automated lighting while enhancing your home’s curb appeal and safety.