Understanding how to set up your Nest thermostat can be a game-changer for your home’s energy efficiency. With the right wiring diagram, you can ensure a smooth installation process and enjoy the benefits of smart temperature control.
Many homeowners find themselves confused by the various wires and connections involved. A clear wiring diagram for the Nest thermostat simplifies this process, making it accessible even for those with minimal technical skills.

Wiring Diagram For The Nest Thermostat
Wiring Diagram For The Nest Thermostat
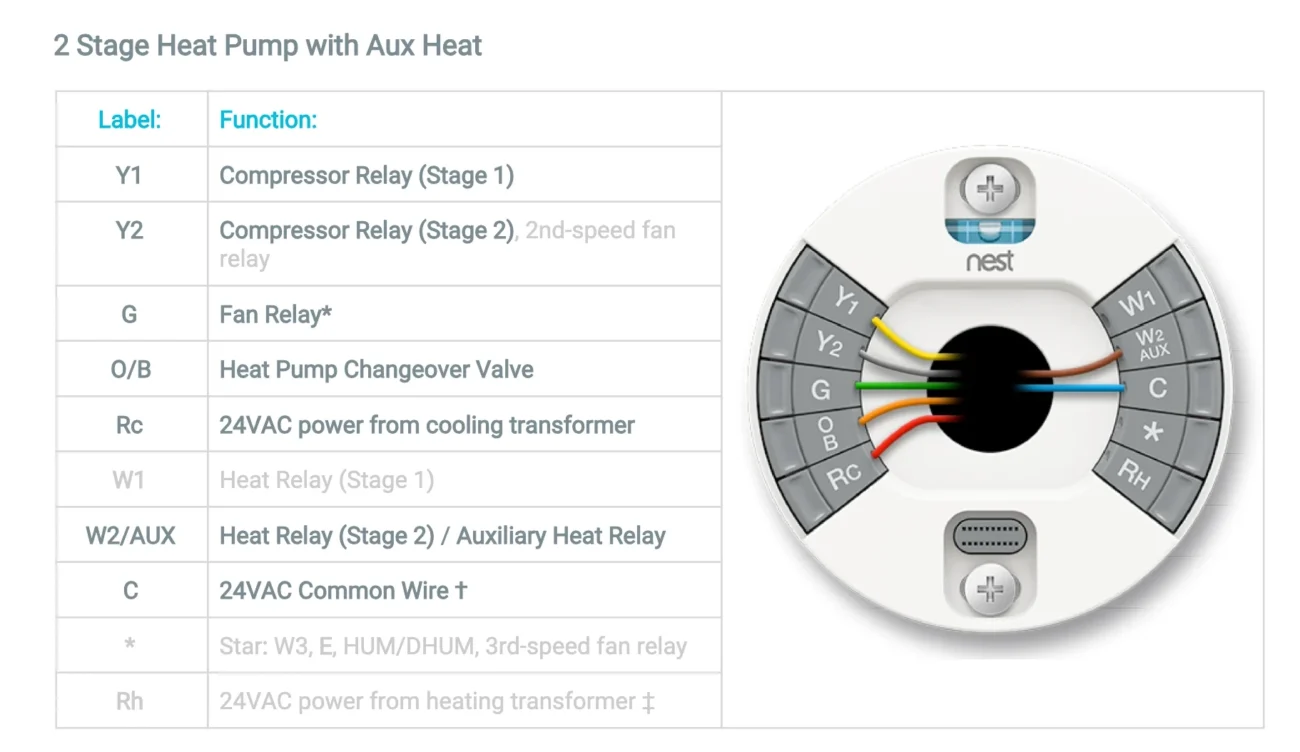
The wiring diagram for the Nest thermostat outlines the specific connections needed for different heating and cooling systems. Knowing which wires connect to which terminals is crucial for proper functionality.
Typically, you will encounter wires labeled R, Y, W, G, and C. Each wire serves a unique purpose, such as powering the thermostat or controlling the heating and cooling systems. Understanding these labels helps prevent installation mistakes.
Before starting your installation, ensure you have the right tools and materials. A screwdriver, wire stripper, and electrical tape are essential for a successful setup. Taking your time during this process will yield better results.
Once everything is connected according to the wiring diagram, double-check your work. A quick review can save you from potential issues down the line. Enjoy your new Nest thermostat and the comfort it brings!
Installing a Nest thermostat can seem daunting at first, but with a clear wiring diagram and some patience, it becomes manageable. Embrace smart technology to enhance your home’s comfort and efficiency.