Understanding how to set up your lighting can transform your home environment. One essential tool for this is the wiring diagram for a Lutron 3 way dimmer, which simplifies the installation process significantly.
With the right wiring diagram, you can easily control the brightness of your lights from multiple locations. This flexibility not only enhances convenience but also adds a touch of modernity to your living space.

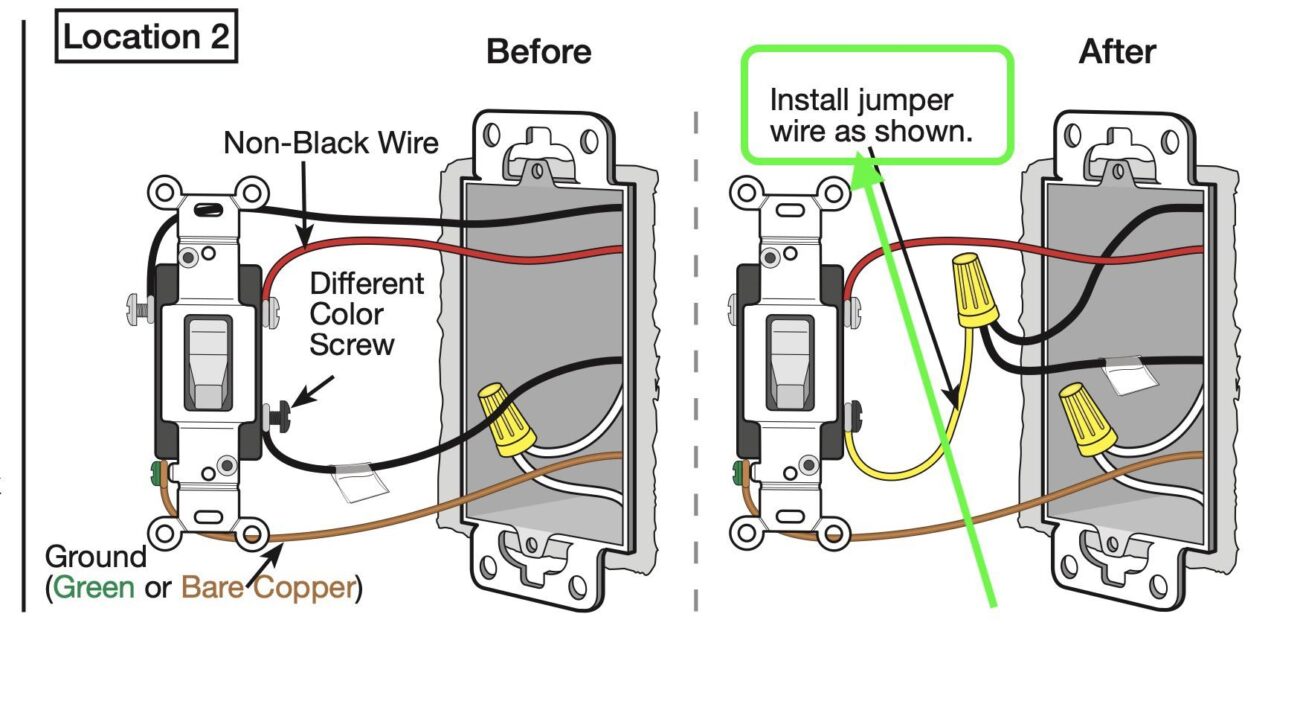
Wiring Diagram Lutron 3 Way Dimmer
Wiring Diagram Lutron 3 Way Dimmer
The Lutron 3 way dimmer allows you to adjust lighting levels effortlessly. By following the wiring diagram, you can ensure that your dimmer switch functions correctly, providing optimal performance and safety.
When installing, make sure to turn off the power supply to avoid any electrical hazards. Carefully follow the color-coded wires in the wiring diagram to connect the dimmer switch properly.
After installation, test the dimmer by adjusting the brightness from both switch locations. This feature is particularly useful in larger rooms or hallways where multiple switches are needed.
Using a Lutron 3 way dimmer not only enhances your home’s ambiance but also contributes to energy savings. Enjoy the flexibility of controlling light levels while creating a cozy atmosphere in your home.
Incorporating a Lutron 3 way dimmer into your lighting setup is a smart choice. With a clear wiring diagram and some basic tools, you can achieve a beautifully lit space that meets all your needs.