Understanding how to wire a fan can seem daunting, but with the right guidance, it becomes much simpler. A clear wiring diagram can help you visualize the connections needed for a successful installation.
Whether you’re replacing an old fan or installing a new one, having a reliable wiring diagram is essential. It ensures that you connect the wires correctly, preventing potential issues and ensuring safety.

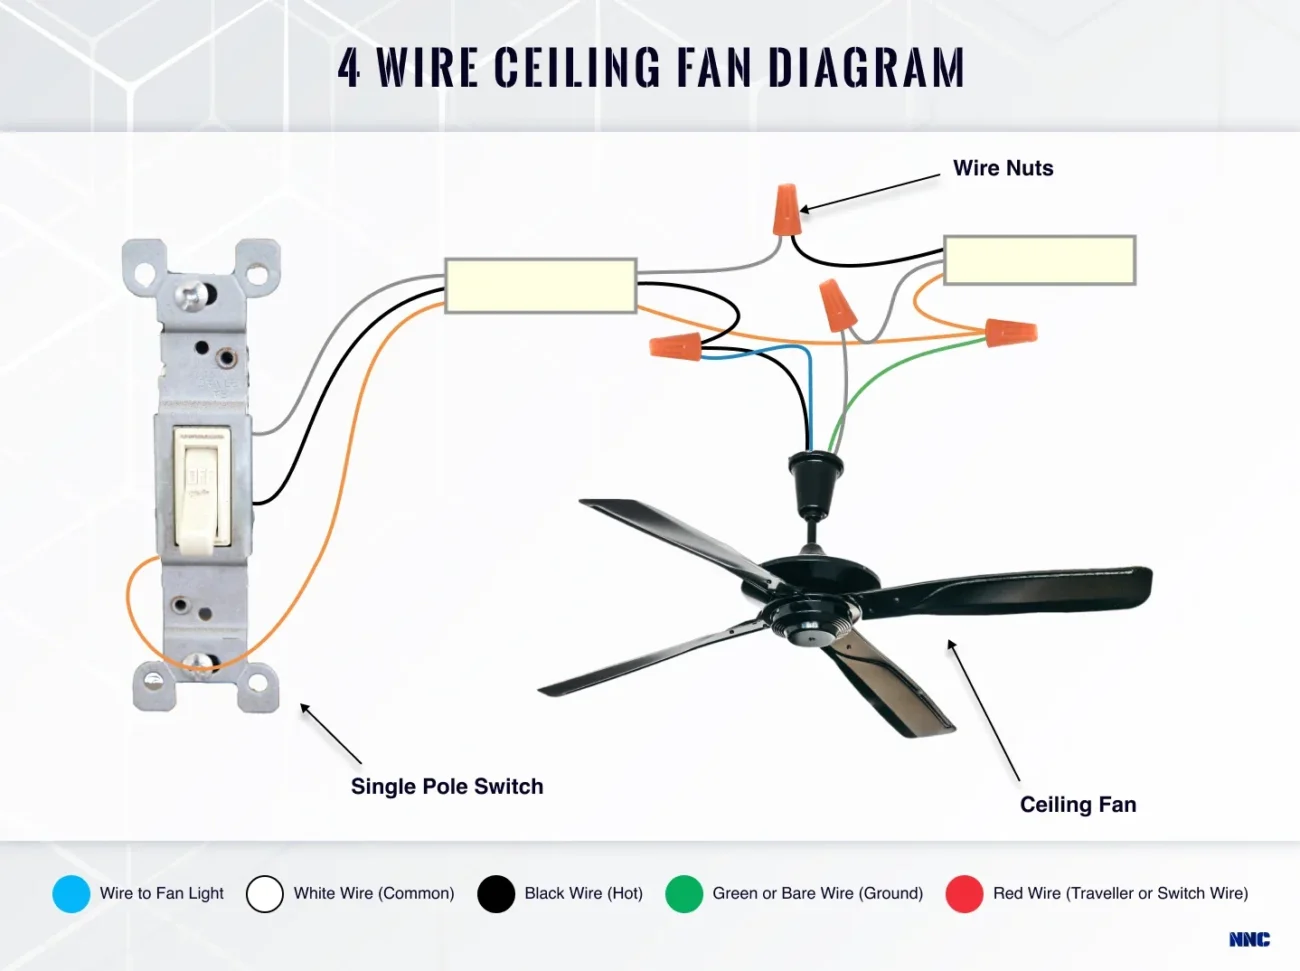
Wiring Diagram Of Fan
Wiring Diagram Of Fan
The wiring diagram of a fan typically includes color-coded wires for easy identification. Common colors include black for the live wire, white for neutral, and green or bare for ground. Knowing these colors is crucial for proper installation.
When following the wiring diagram, start by turning off the power at the circuit breaker. This step is vital to avoid any electrical hazards while working on your fan. Always double-check that the power is off before proceeding.
Next, connect the wires according to the diagram. Usually, you’ll connect the black wire from the fan to the black wire in your ceiling. Similarly, connect the white wire to white and ground to ground. Secure all connections with wire nuts.
After making all connections, carefully tuck the wires back into the electrical box and attach the fan to the ceiling. Finally, restore power at the circuit breaker and test your fan to ensure it operates correctly.
Installing a fan using a wiring diagram can be straightforward with careful attention to detail. Following these steps will help you enjoy your new fan safely and efficiently in no time.