Understanding how to wire a light switch can seem daunting, but it’s easier than you might think. With the right guidance and a clear wiring diagram, you can tackle this project confidently and safely.
Whether you’re replacing an old switch or installing a new one, having a solid grasp of the wiring process is essential. A wiring diagram single light switch will help you visualize the connections needed for a successful installation.

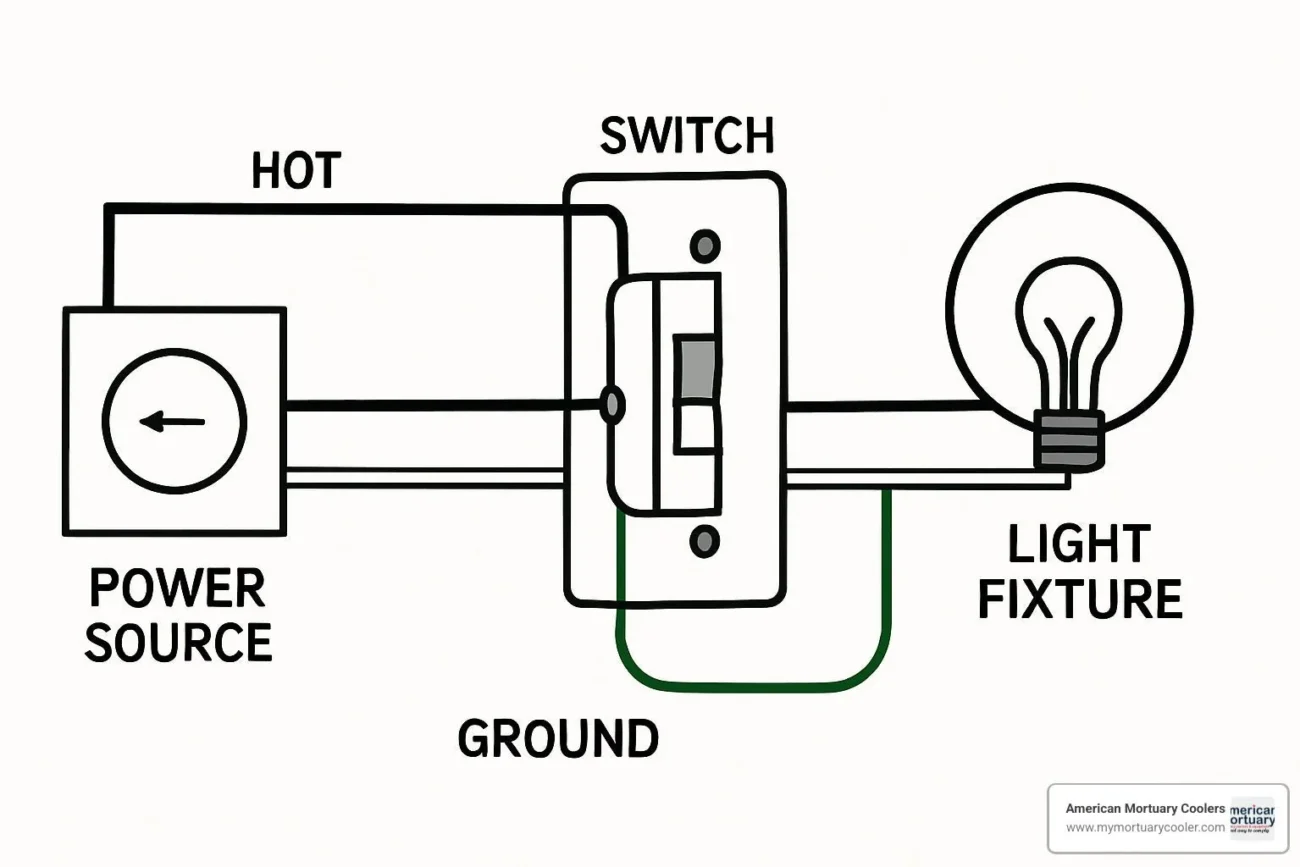
Wiring Diagram Single Light Switch
Wiring Diagram Single Light Switch
A wiring diagram single light switch typically includes three main components: the power source, the switch itself, and the light fixture. Knowing how these parts connect is crucial for a smooth installation.
First, ensure that the power is turned off at the circuit breaker. This step is vital for your safety. Next, identify the wires: usually, there will be a black (hot), white (neutral), and green or bare (ground) wire.
Connect the black wire from the power source to one terminal on the switch. Then, connect another black wire from the second terminal of the switch to the light fixture. Finally, attach the white wires together and connect the ground wires to ensure safety.
After making all connections, carefully tuck the wires back into the electrical box and secure the switch in place. Turn on the power and test your new light switch to ensure everything works correctly.
With a clear wiring diagram single light switch and some basic tools, you can complete this project with ease. Enjoy your newly installed light switch and the satisfaction of doing it yourself!