Understanding how to wire a single pole light switch can simplify your home improvement projects. This knowledge empowers you to tackle basic electrical tasks safely and confidently, enhancing your DIY skills.
Many homeowners find themselves needing to replace or install a light switch. Knowing the correct wiring diagram can make this process straightforward and efficient, ensuring your lights function properly.

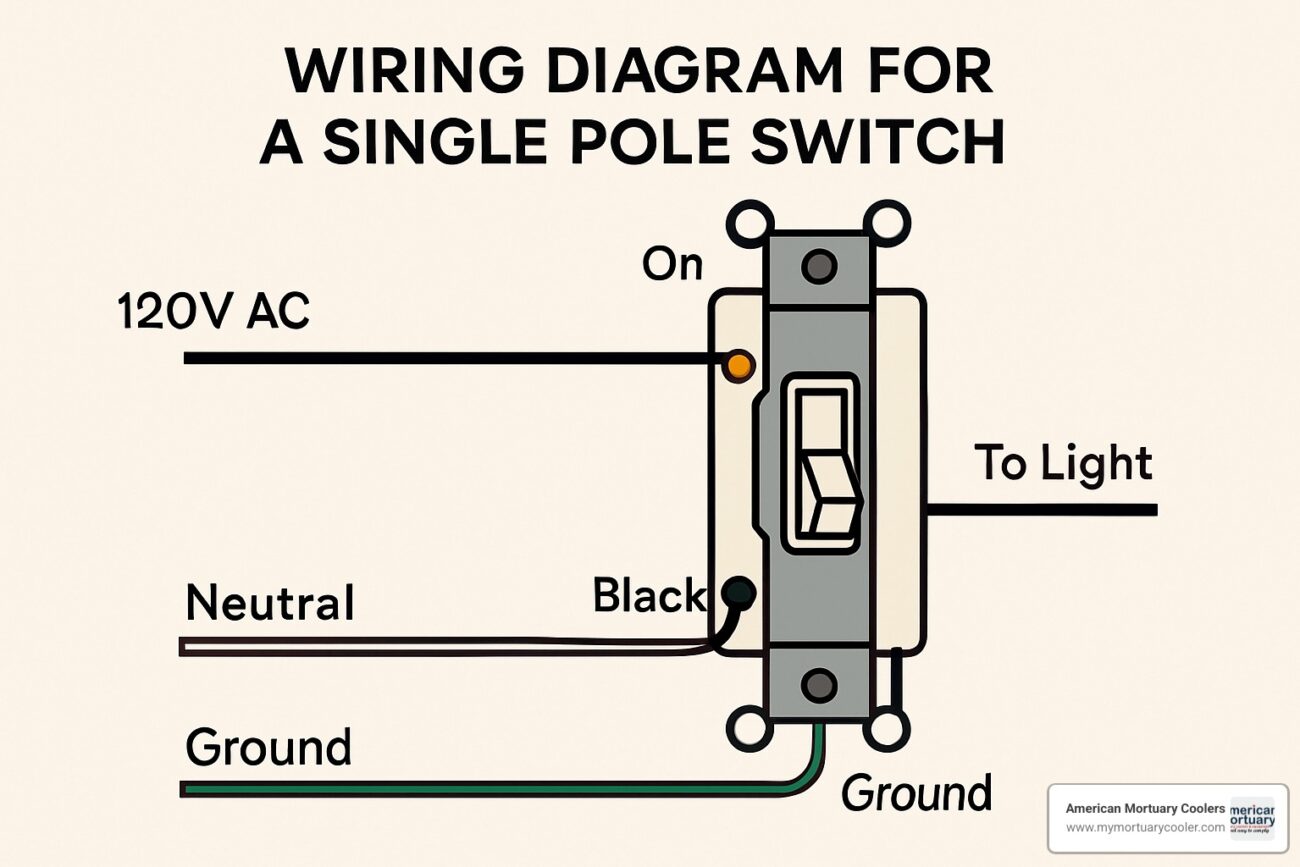
Wiring Diagram Single Pole Light Switch
Wiring Diagram Single Pole Light Switch
A single pole light switch controls one light or a group of lights from a single location. The wiring diagram typically includes two terminals for the wires, making it easy to follow.
To begin, turn off the power at the circuit breaker. Use a voltage tester to ensure no electricity is flowing. This step is crucial for your safety before handling any electrical components.
Next, connect the black wire from the power source to one terminal of the switch. Then, attach another black wire from the second terminal to the light fixture. This simple setup allows you to control the light effectively.
Finally, secure all connections with wire nuts and carefully tuck them into the electrical box. Once everything is in place, restore power and test your new switch to ensure it works correctly.
With this knowledge, you can confidently handle your lighting needs. A wiring diagram for a single pole light switch is an essential tool for any homeowner looking to enhance their space efficiently.