Understanding electrical wiring can seem daunting, but it doesn’t have to be. With the right guidance, anyone can learn how to set up a 3-way switch system effectively. This knowledge can enhance your home’s lighting control.
Many homeowners want to improve their lighting options without hiring an electrician. A 3-way switch allows you to control a single light fixture from two different locations, making it a practical solution for larger rooms or hallways.

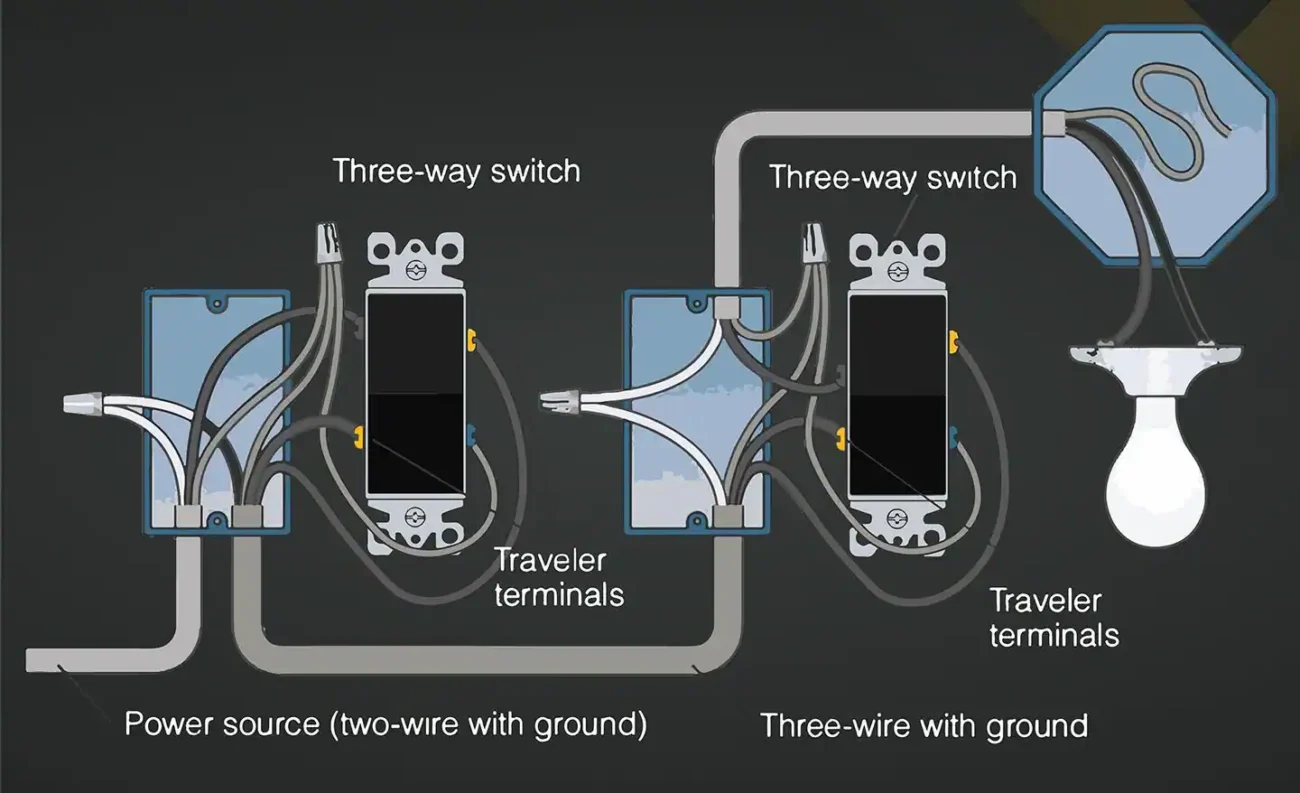
Wiring For 3 Way Switch Diagram
Wiring For 3 Way Switch Diagram
The wiring for a 3-way switch diagram is essential for successful installation. Typically, you will need two 3-way switches and a light fixture. Understanding the connections between these components is crucial for proper functionality.
To start, identify the common terminal on each switch. One switch will connect to the power source, while the other connects to the light fixture. This setup allows you to control the light from either switch location seamlessly.
Next, use traveler wires to connect the two switches. These wires allow communication between the switches, enabling them to work together. Make sure to follow color codes for safety and clarity during installation.
Finally, double-check all connections before turning on the power. A well-executed wiring job not only ensures safety but also enhances your home’s lighting convenience. Enjoy the flexibility of controlling your lights from multiple locations!
Learning about wiring for a 3-way switch can empower you as a homeowner. With a little patience and practice, you can master this skill and enjoy improved lighting in your space.